
Smart Scheduling Rules with Visual Slot Indicators
Easily manage therapist availability by adding schedule blocks at specific locations. Schedule blocks help control when therapists can take appointments, such as setting aside certain times for only initial evaluations.
Step 1: In the Manage User section, locate the therapist you need to update.
Step 2: Click Modify next to their name.
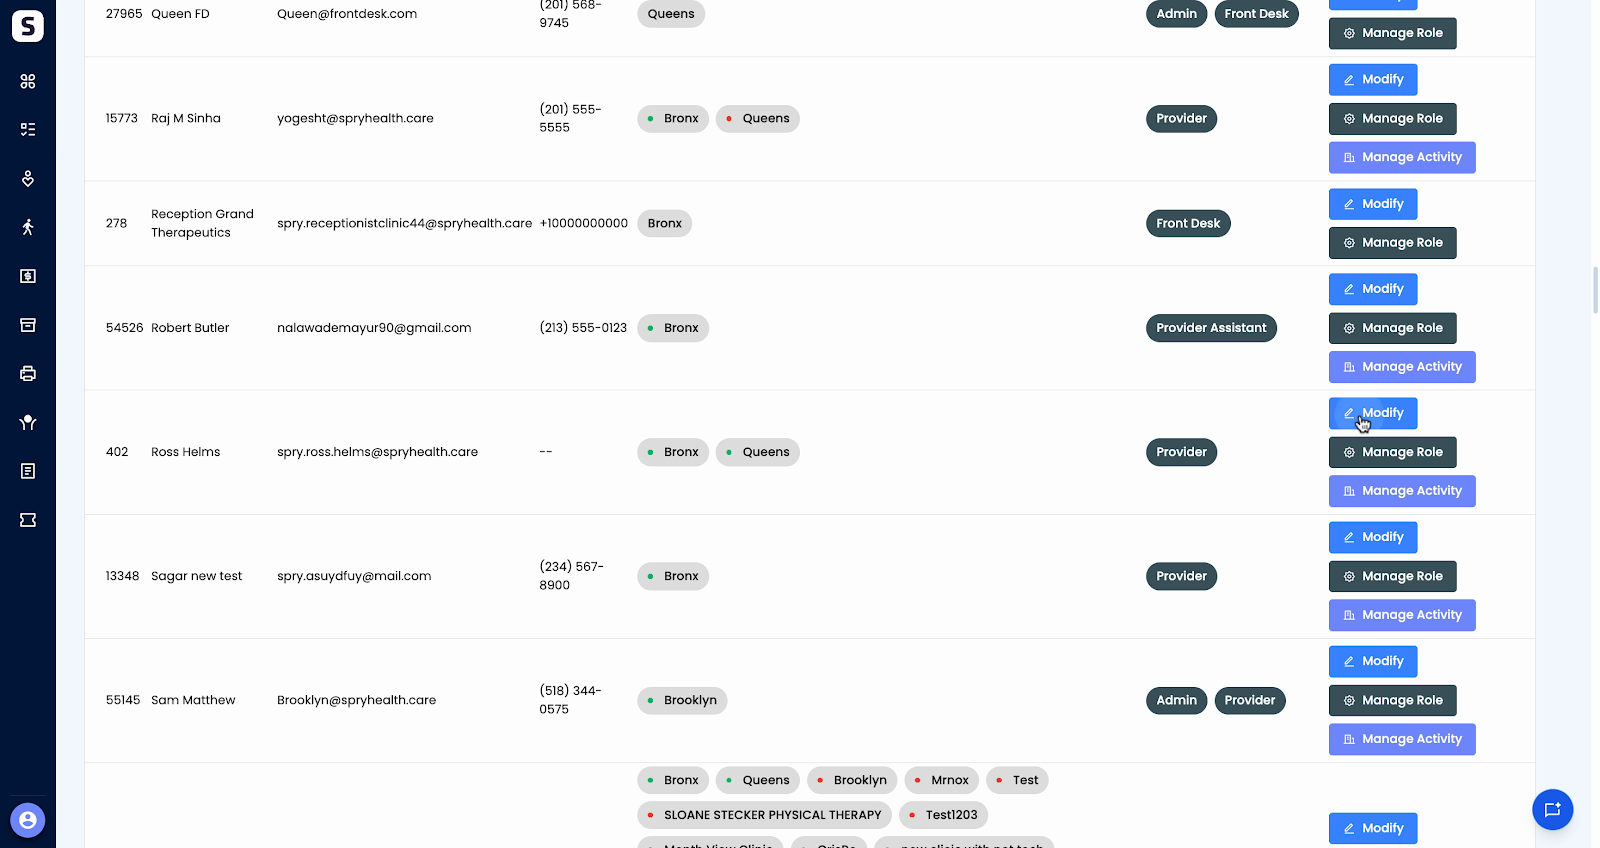
Step 3: Select the therapist’s Location to continue.
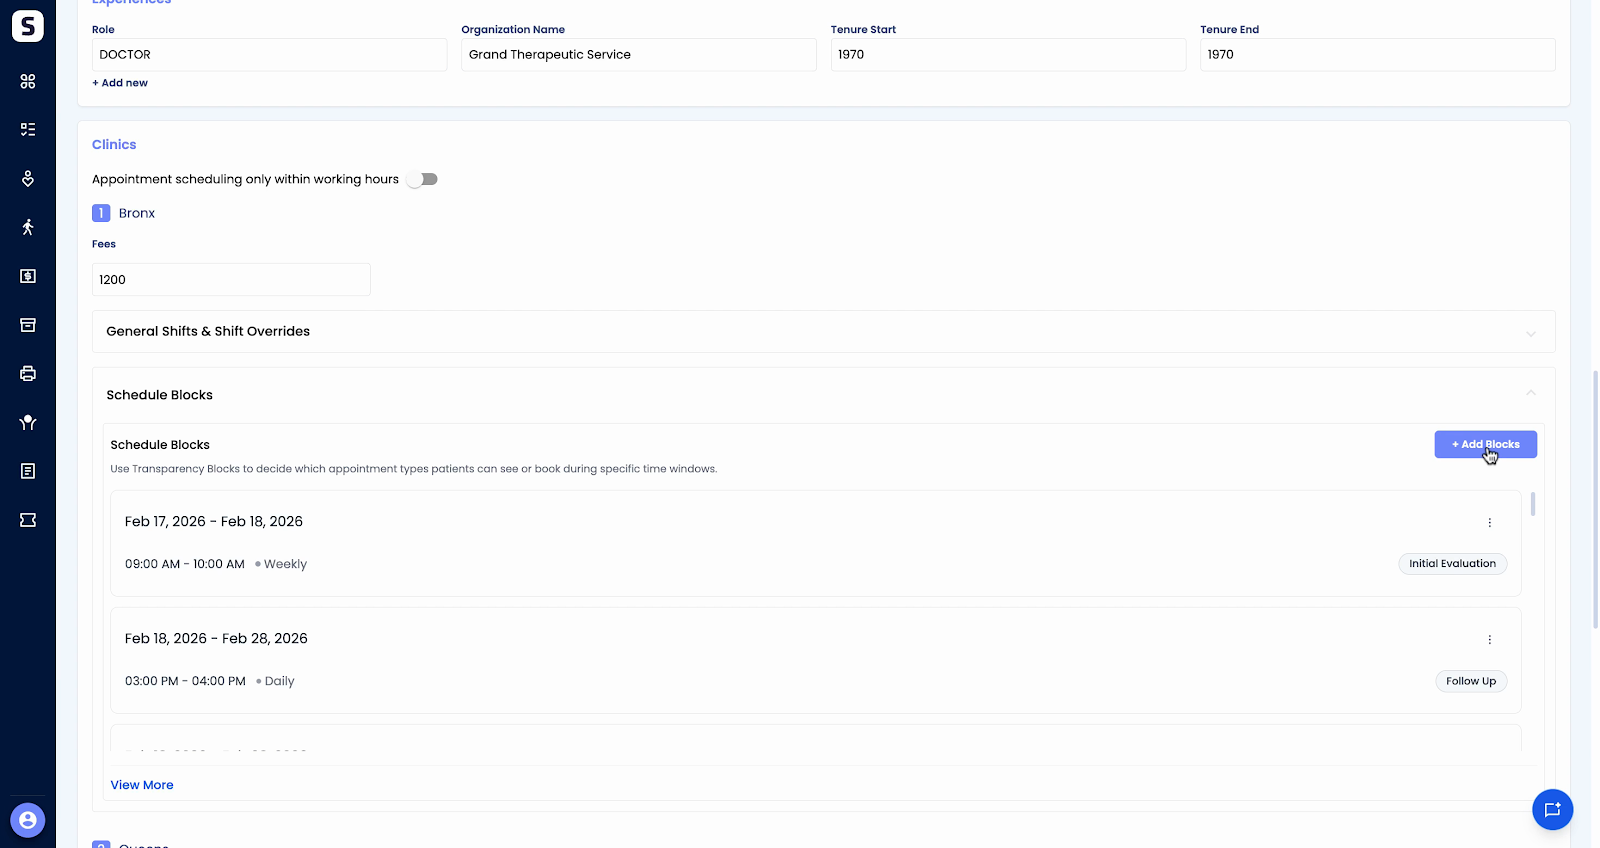
Step 4: Go to Schedule Block. Here you’ll see any existing blocks—like those restricting certain times to only initial evaluations on previous days.
Step 5: Click Add Blocks to create a new schedule block.
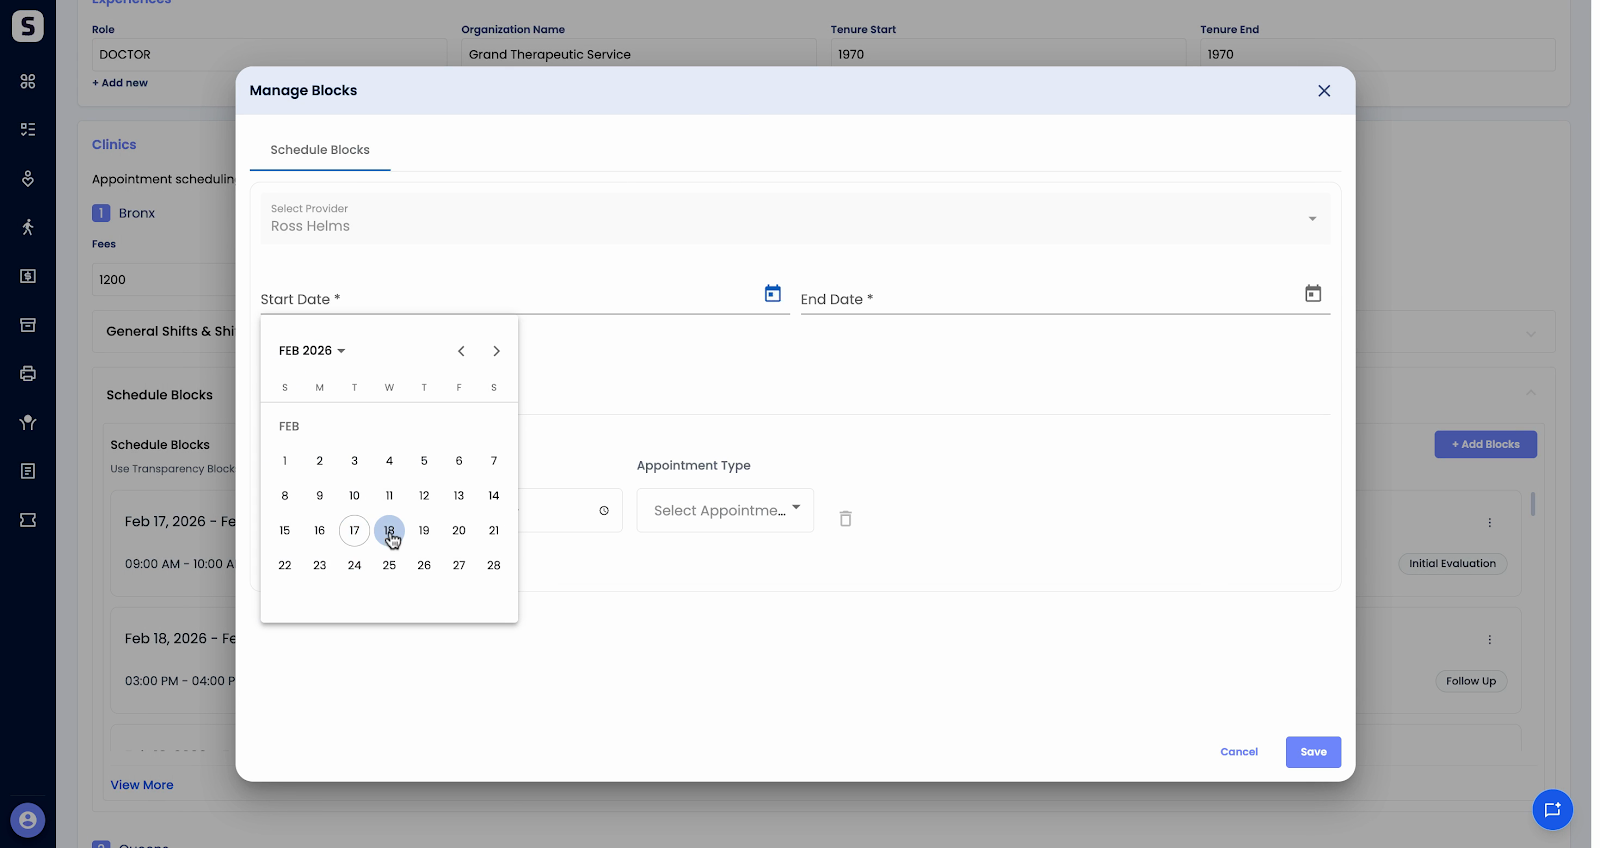
Step 6: Set the Start Date and End Date for this new block. For example, schedule from February 18th to February 20th.
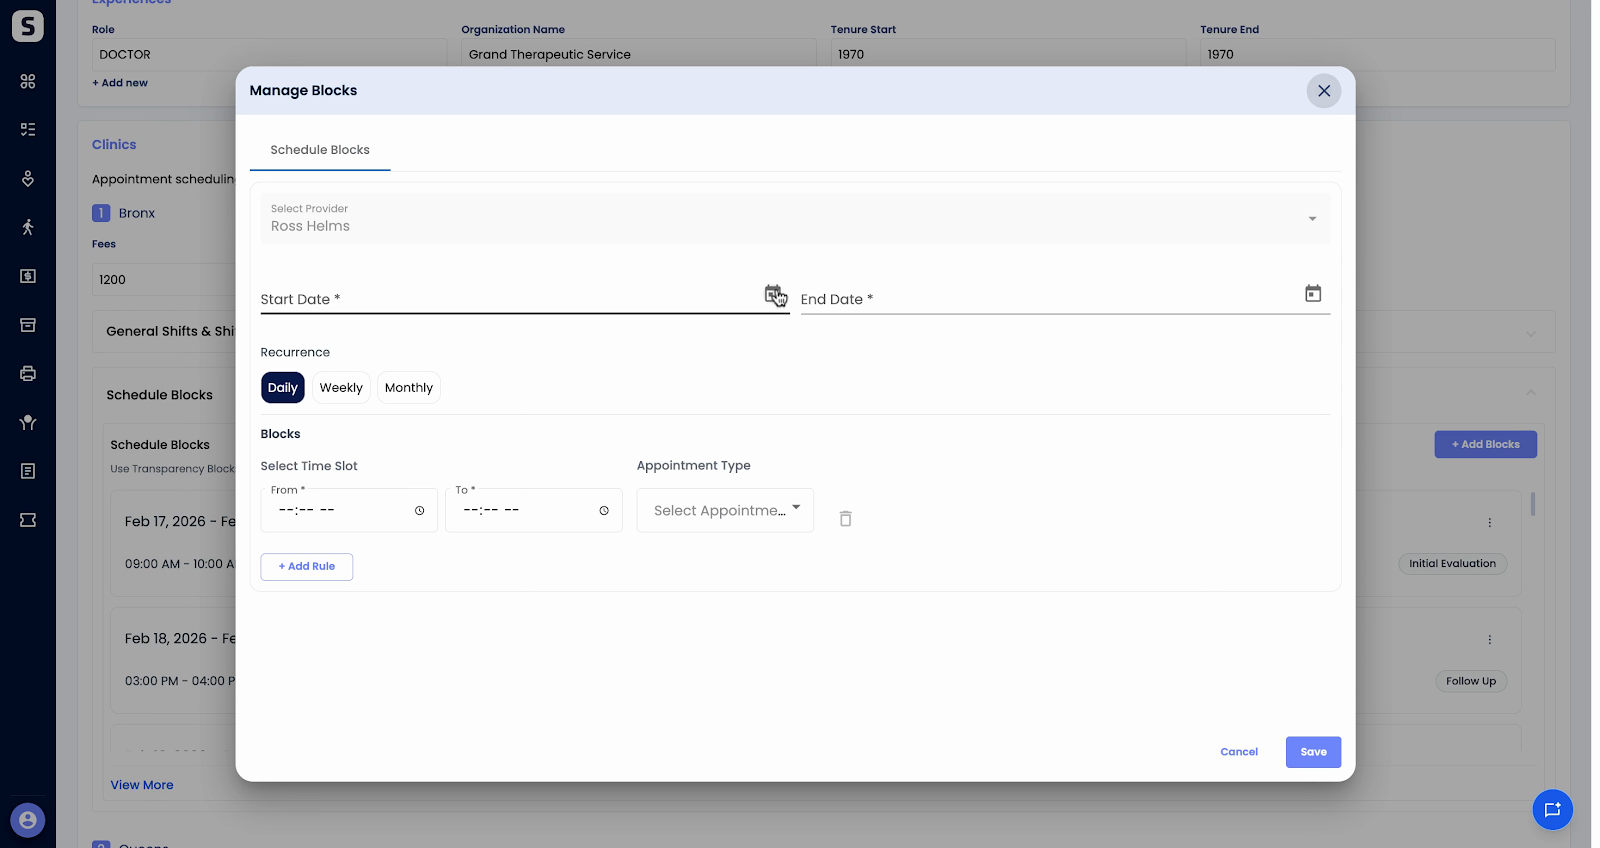
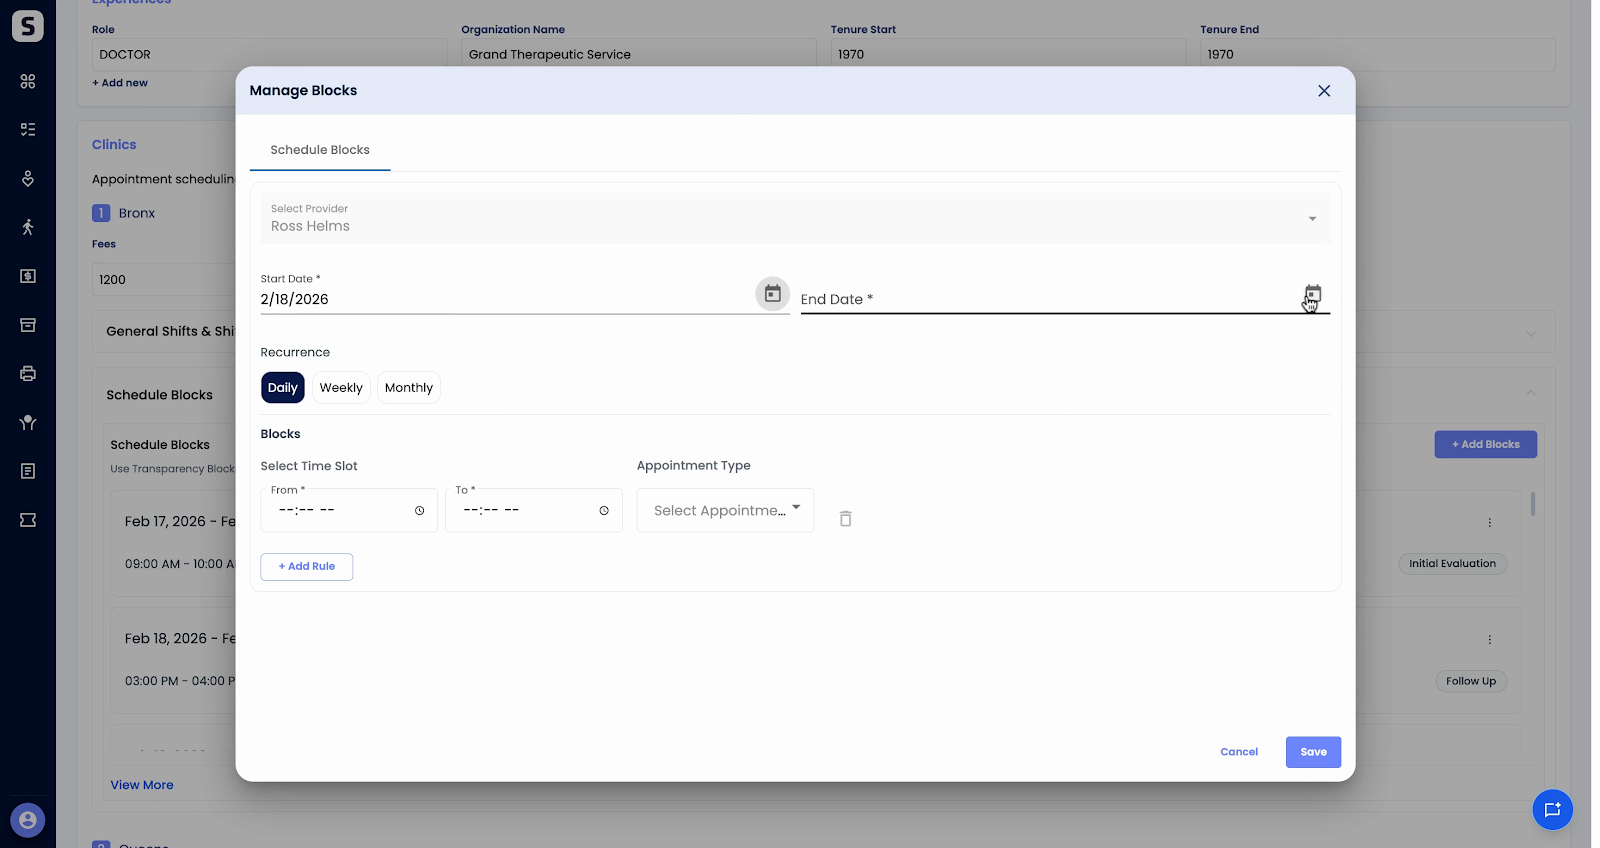
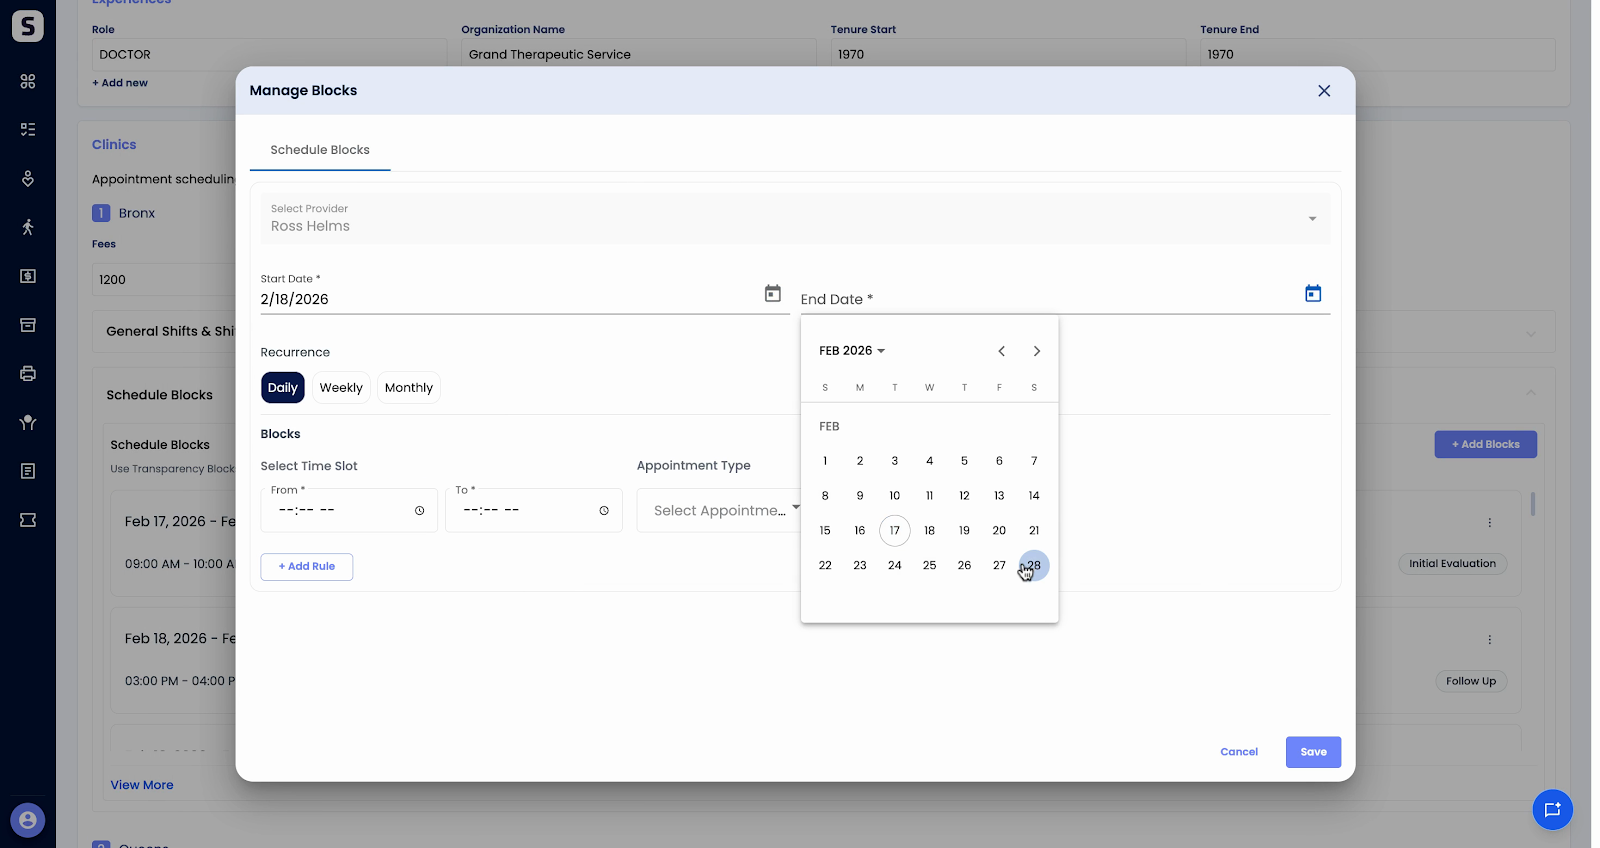
Step 7: Enter the Start Time and End Time for the block—such as 10:30 AM to 11:30 AM.
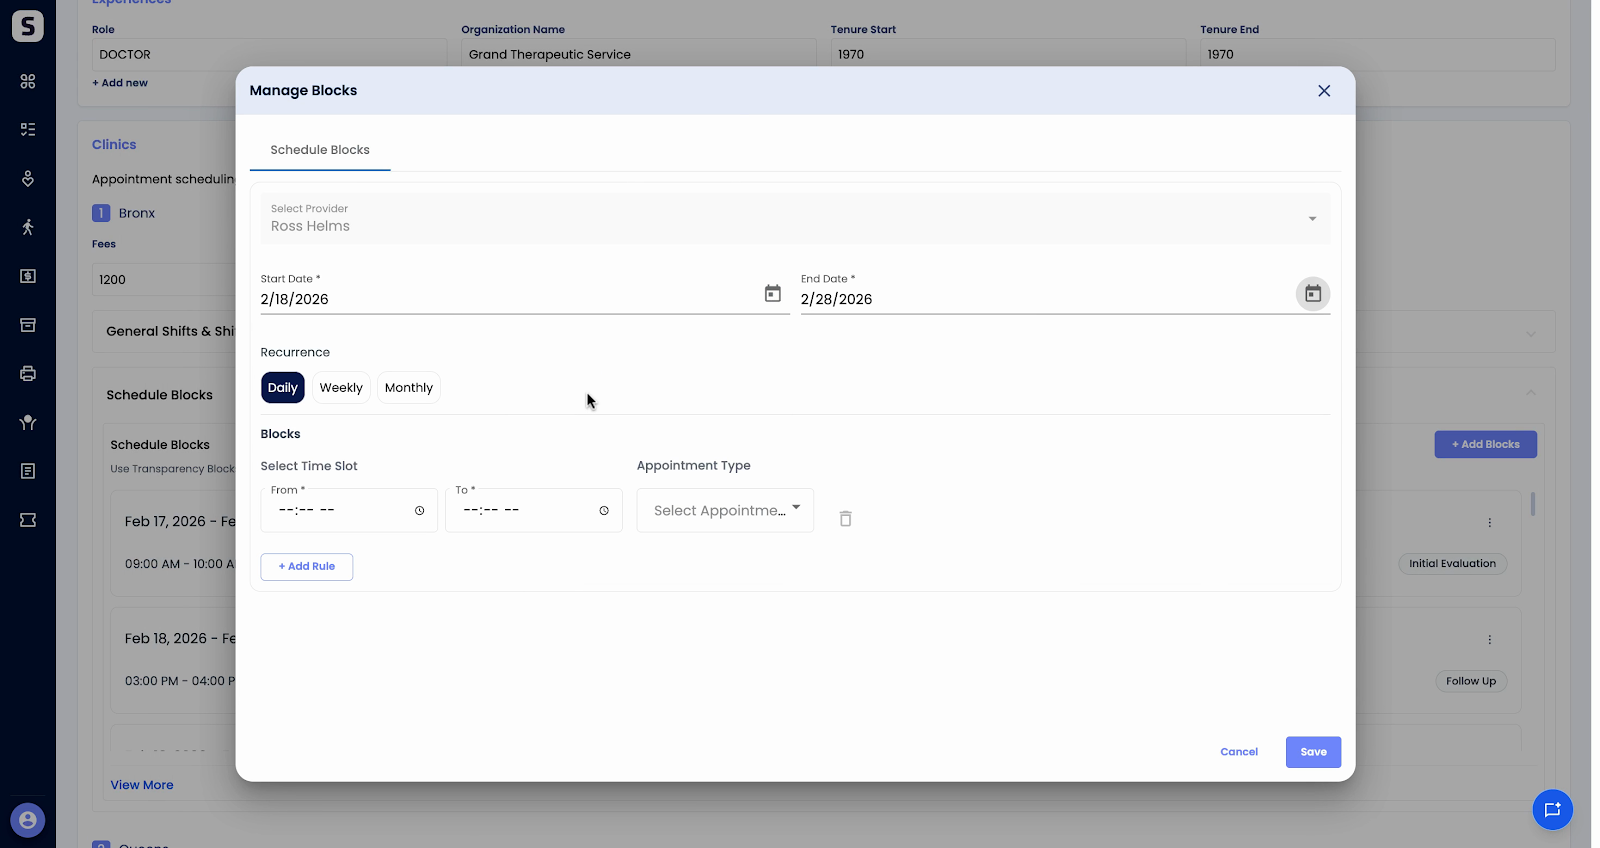
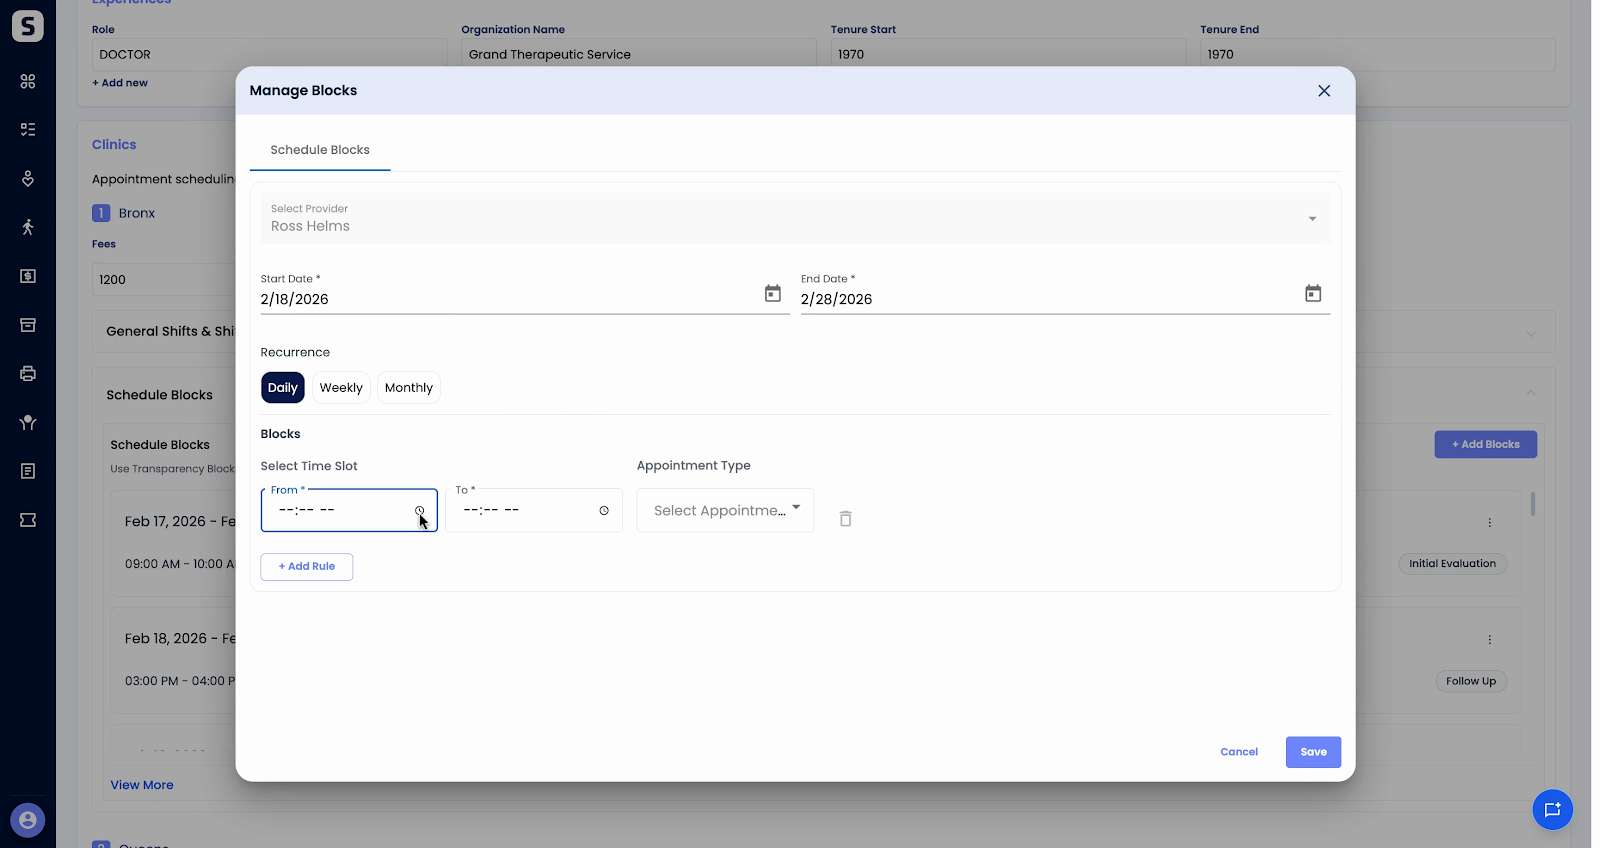
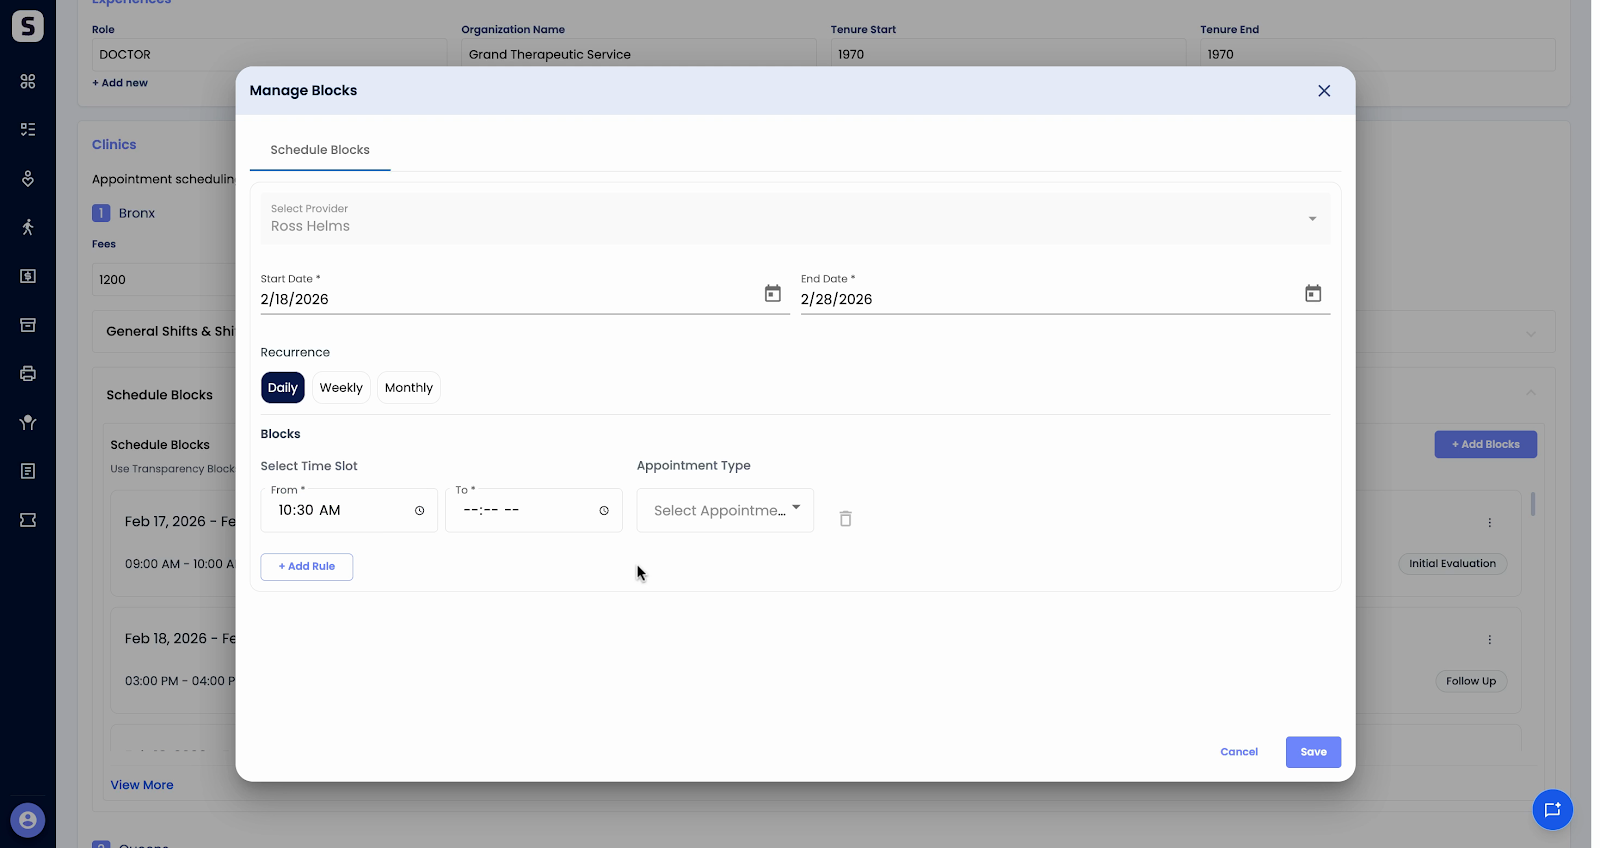
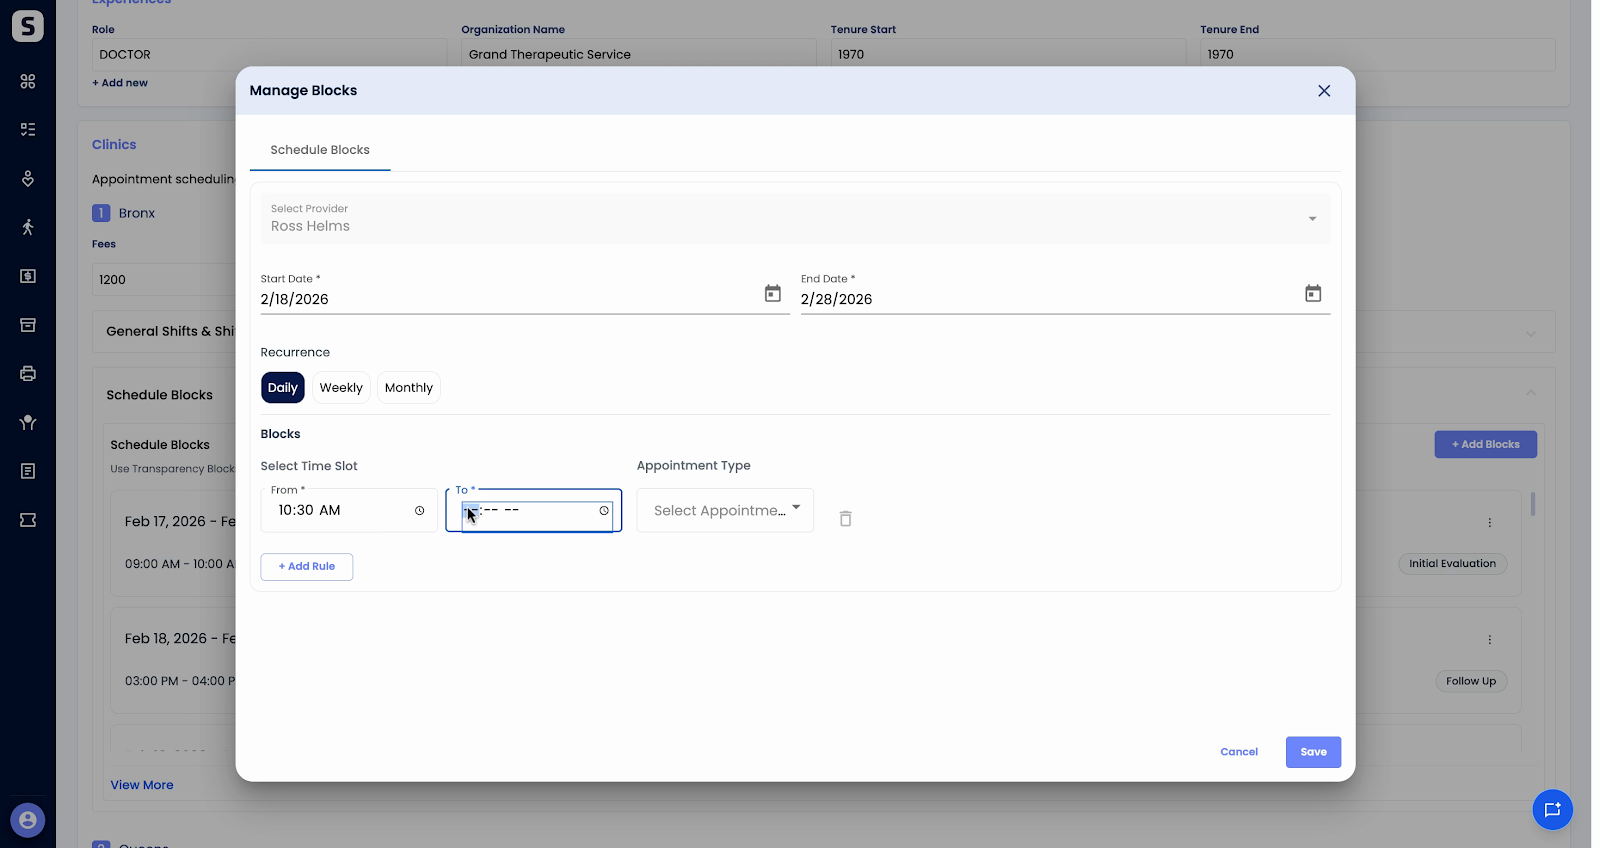
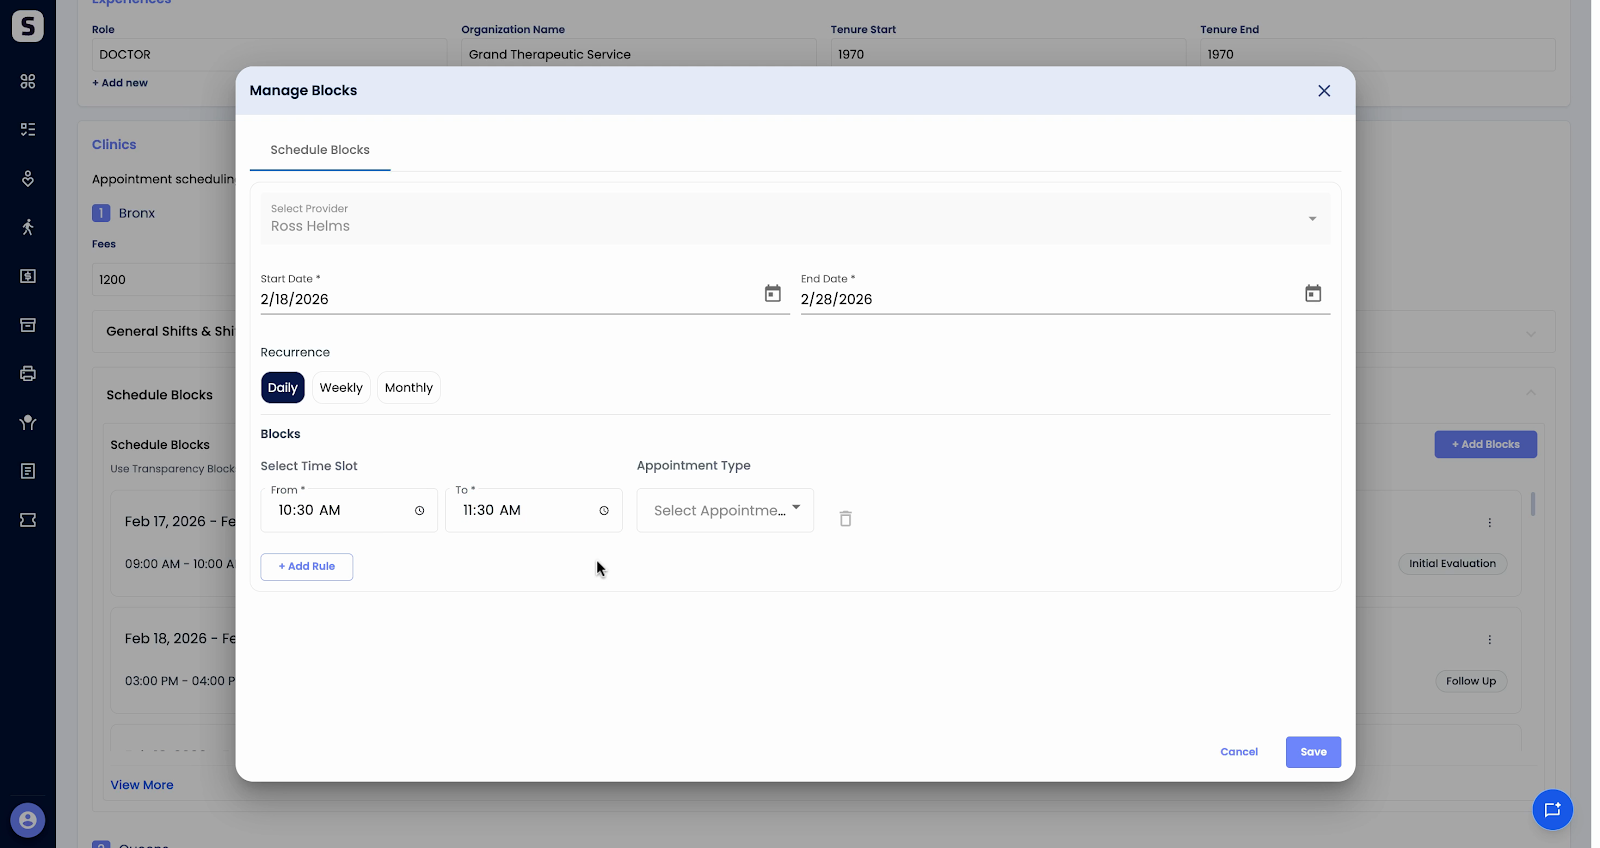
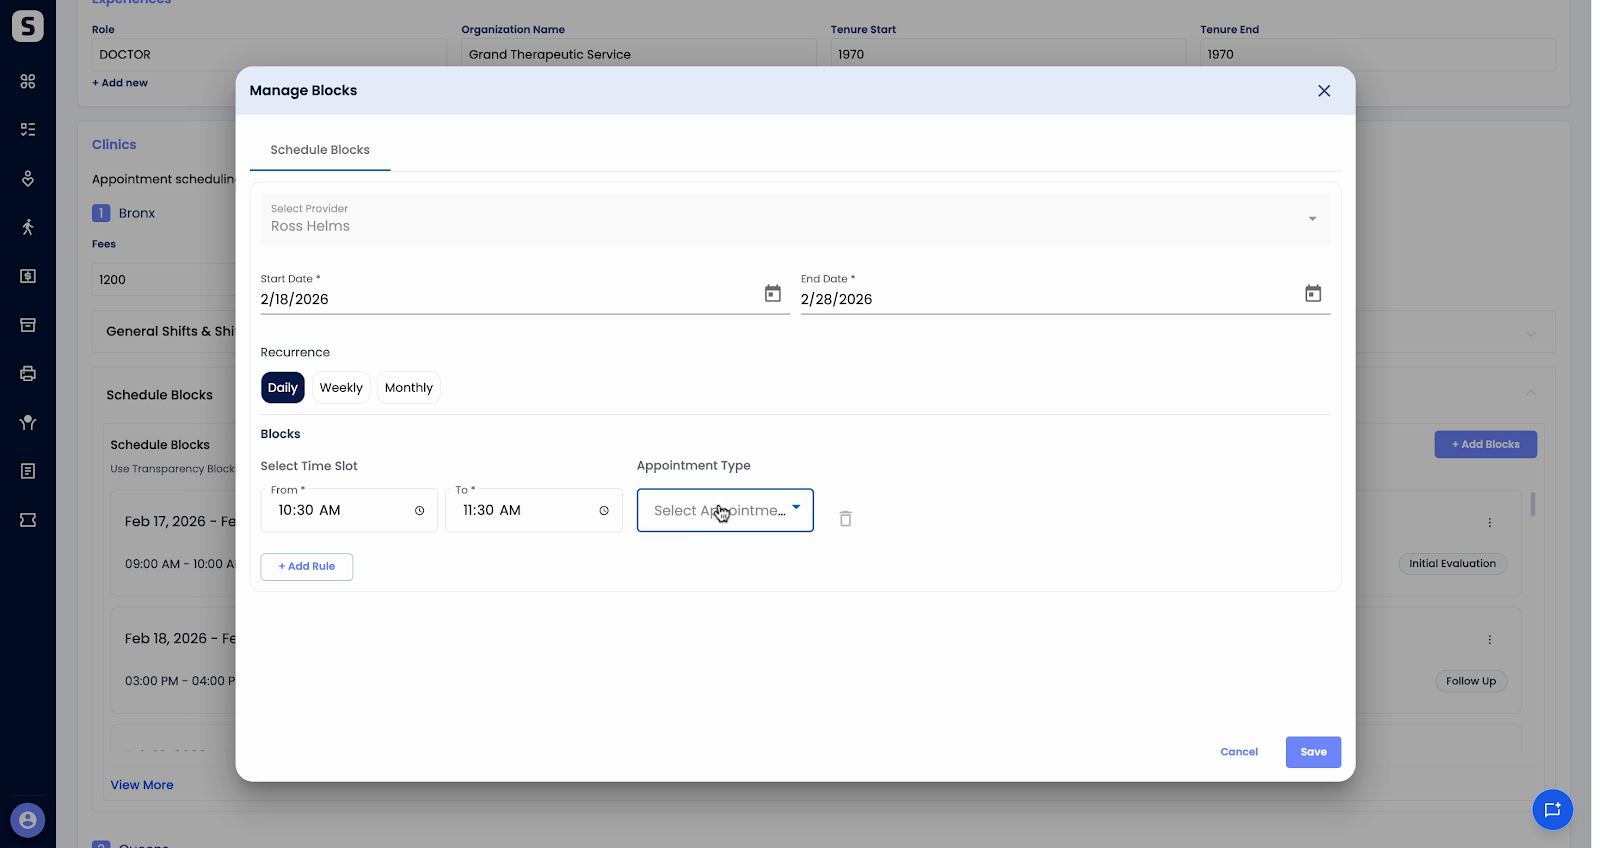
Step 8: Set the block so it’s Only for Initial Evaluation.
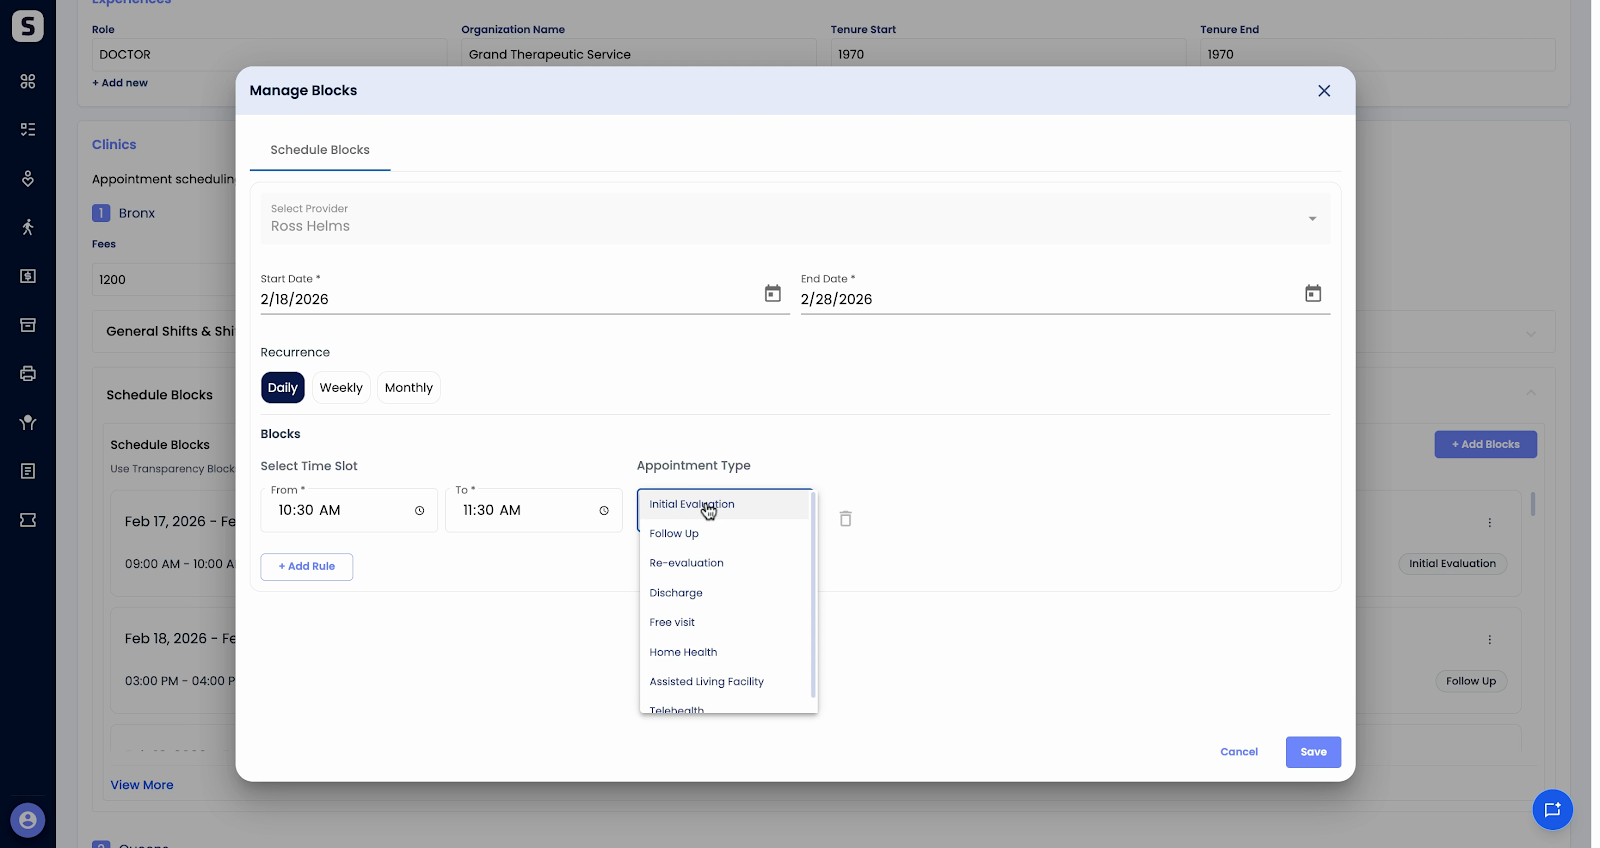
Step 9: When all details look correct, click Save.
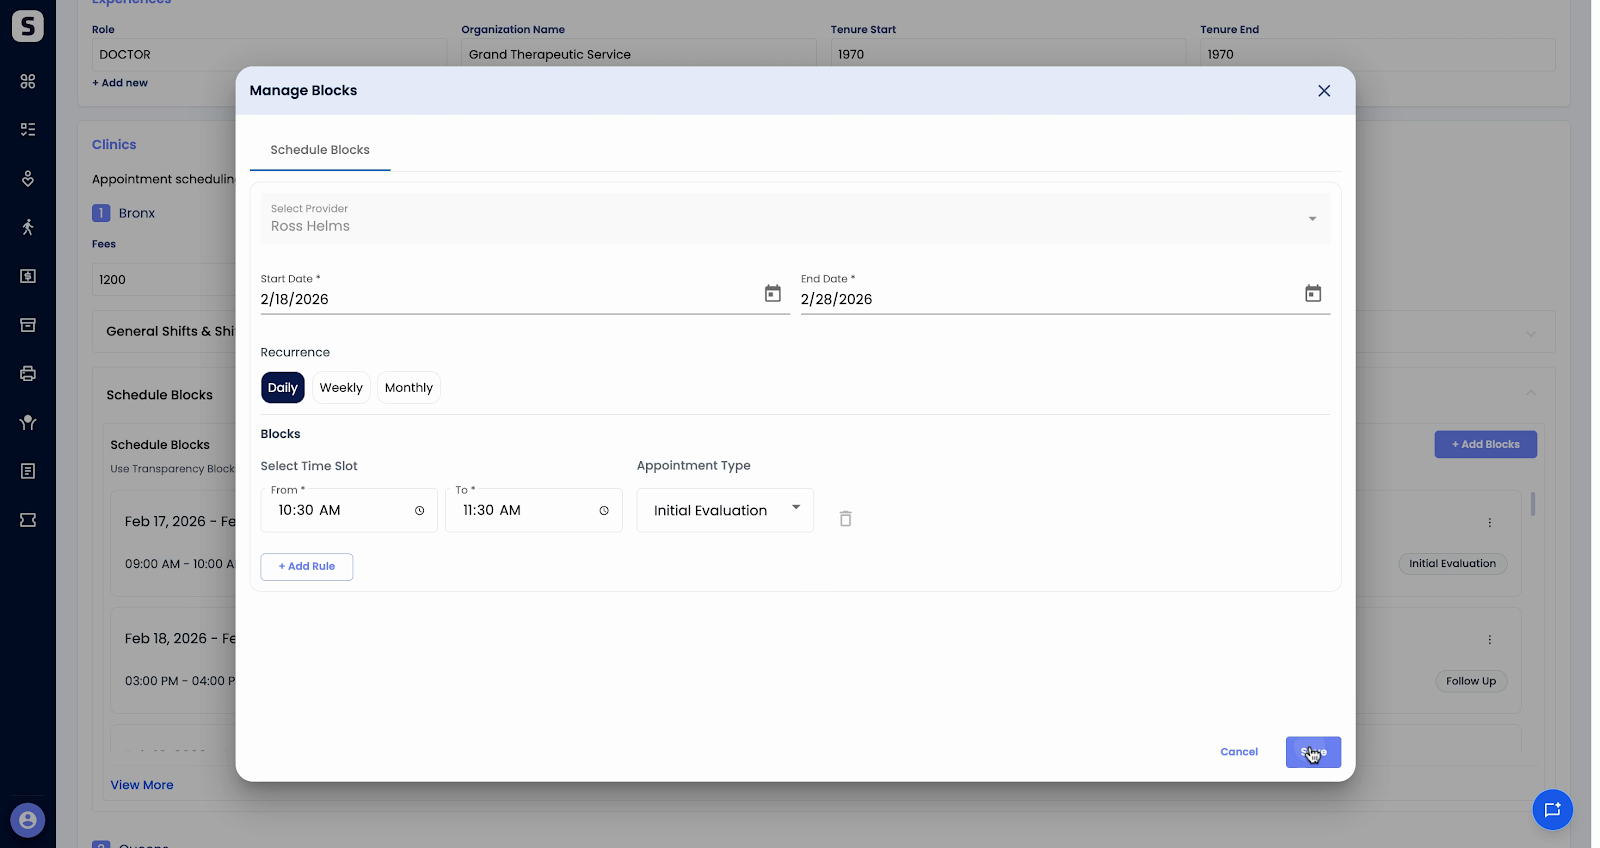
The new block now appears in the therapist’s schedule. When front desk staff use the scheduler, they’ll see that only initial evaluations are available from 10:30 to 11:30 during those dates. This keeps your appointments accurate and ensures therapists’ time is reserved properly.
Thanks for keeping your schedule blocks up-to-date!