Refunds & Move Balance to E-wallet
In this article, you'll learn how to process refunds on Spry, a feature useful for front desk staff or administrators.
Step 1: Start by selecting a patient whose charges you want to refund. Navigate to the billing screen. Here, you'll see a list of charge IDs for various services.
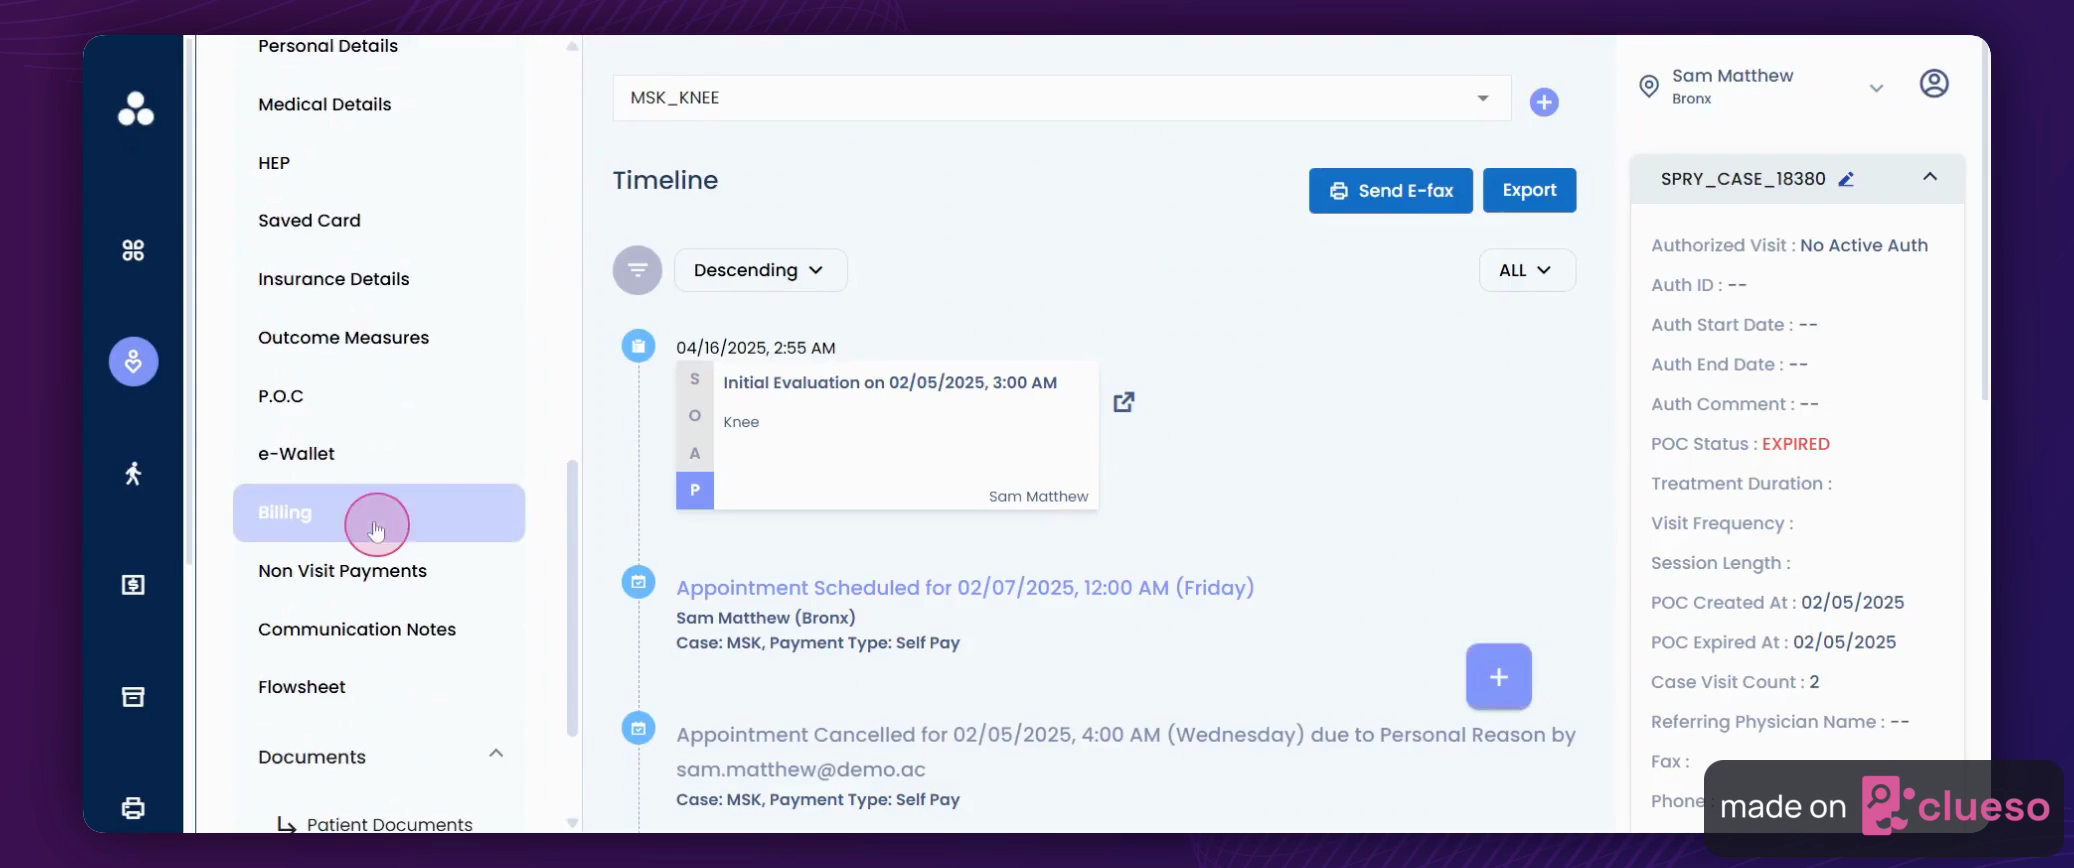
Step 2: To refund charges for a specific service, locate the refund button next to the service.
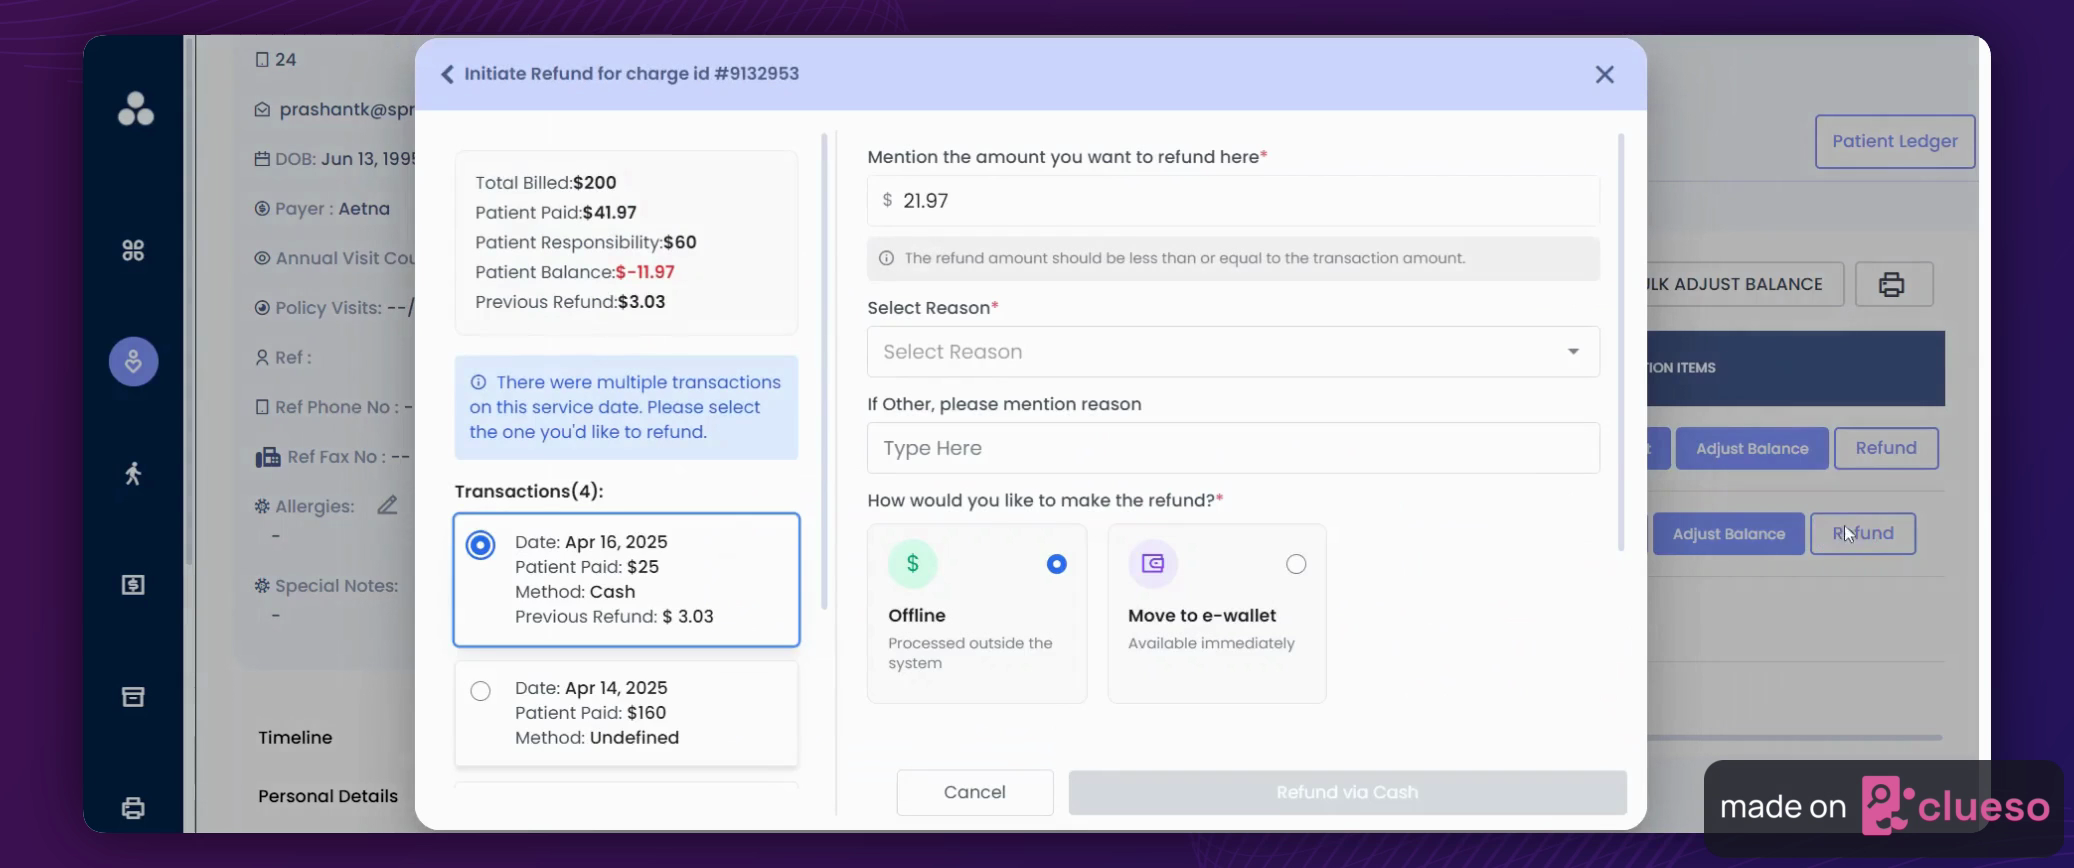
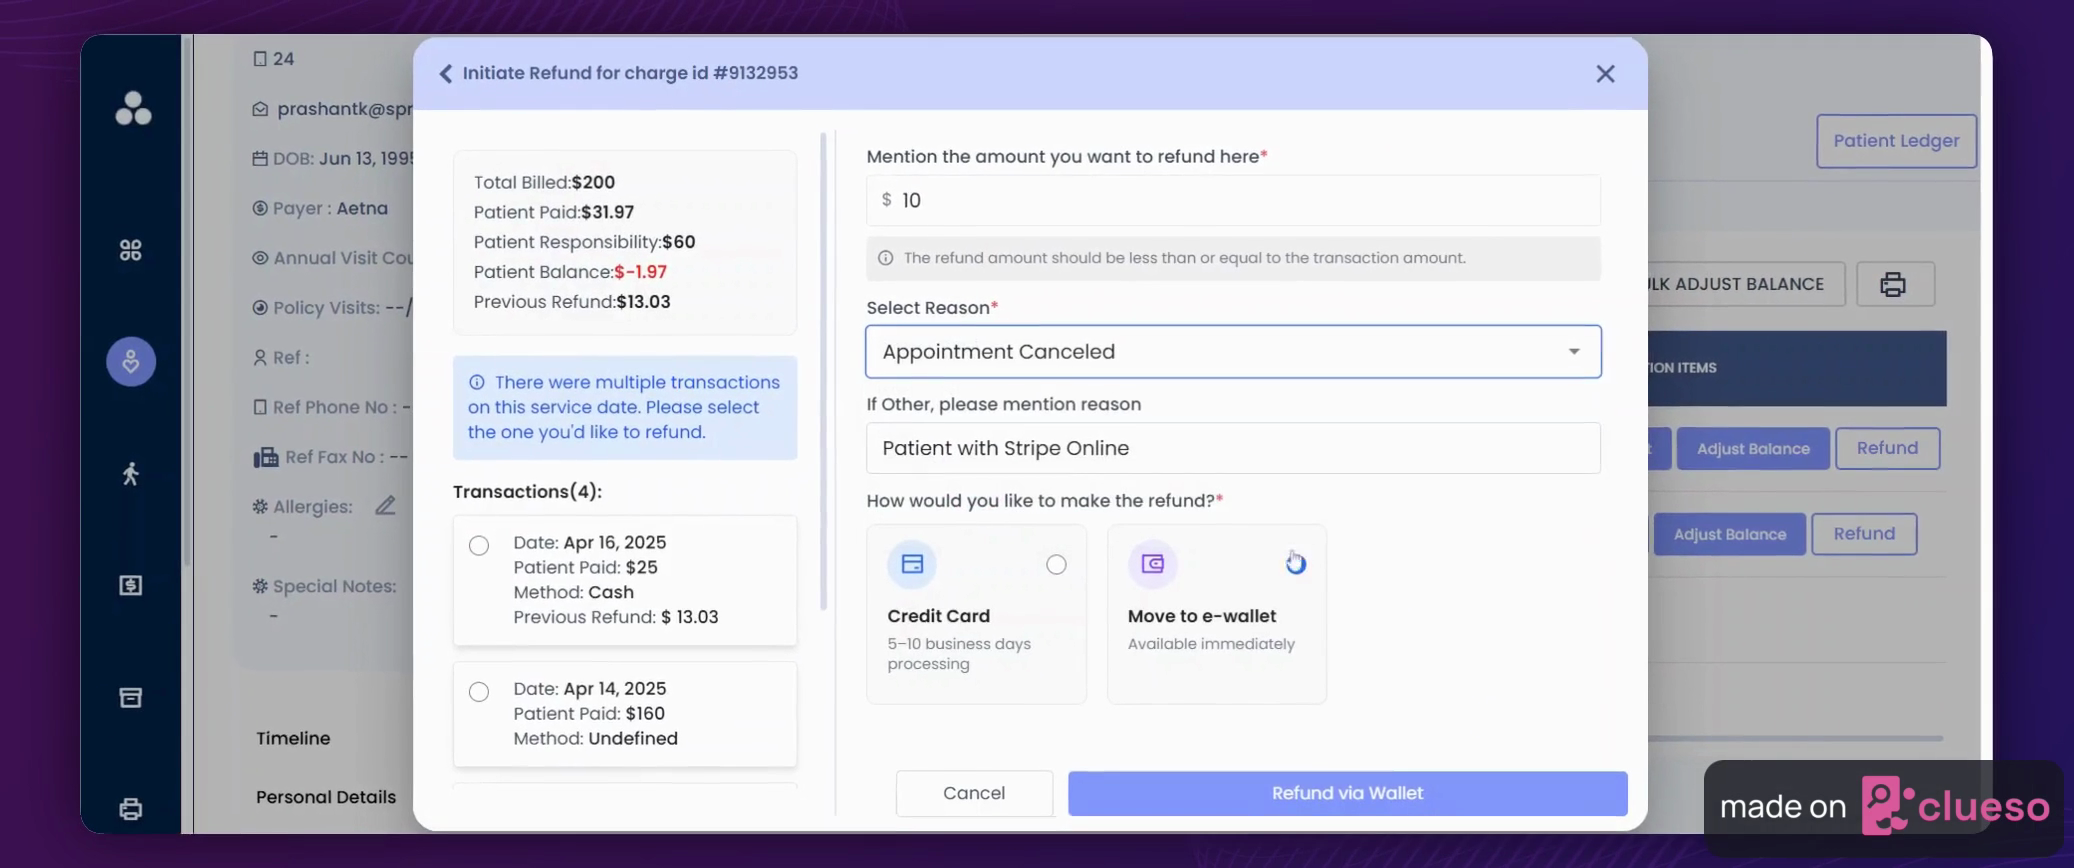
Step 3: Clicking the refund button reveals all information related to that particular charge ID, including past transactions, transaction methods, and any refunds previously processed.
Step 4: Let's assume a transaction occurred on this charge ID on April 16th and the patient paid $25. Now, you need to refund an amount. Enter the amount you wish to refund.

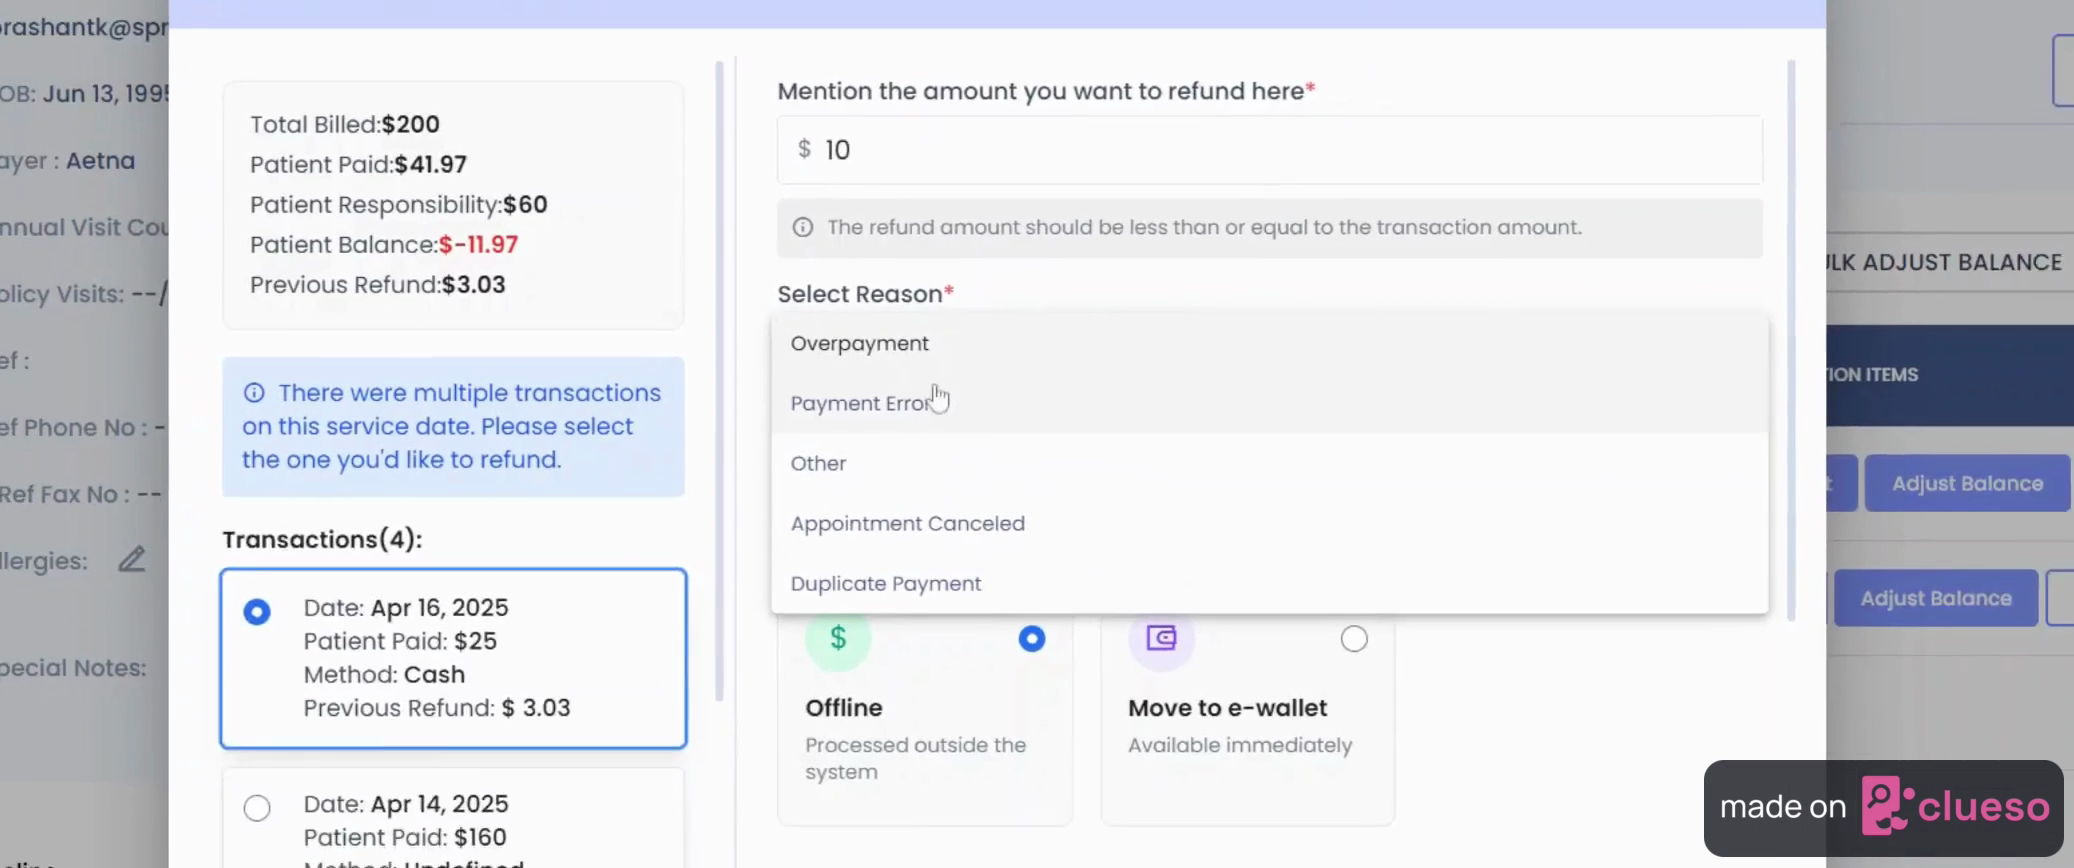
Step 5: After entering the amount, select a reason for the refund.
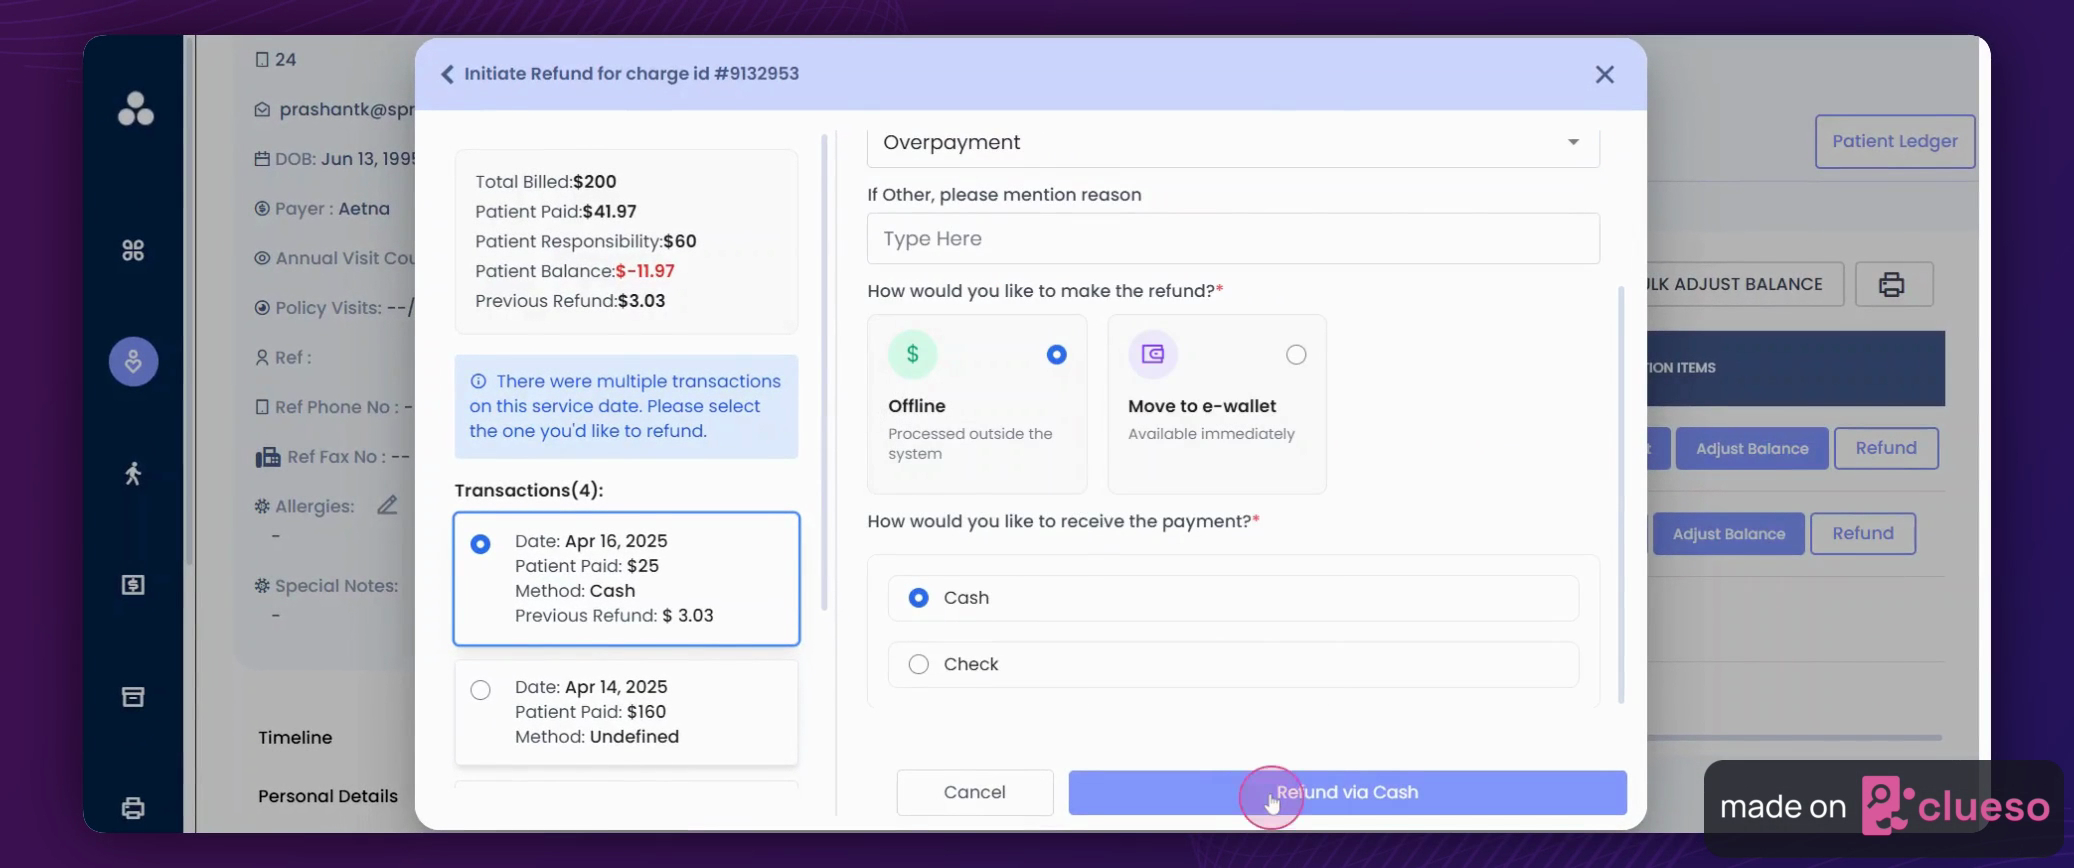
Step 6: By default, the refund processes using the same method as the original transaction. Click on Refund to finalize the process.
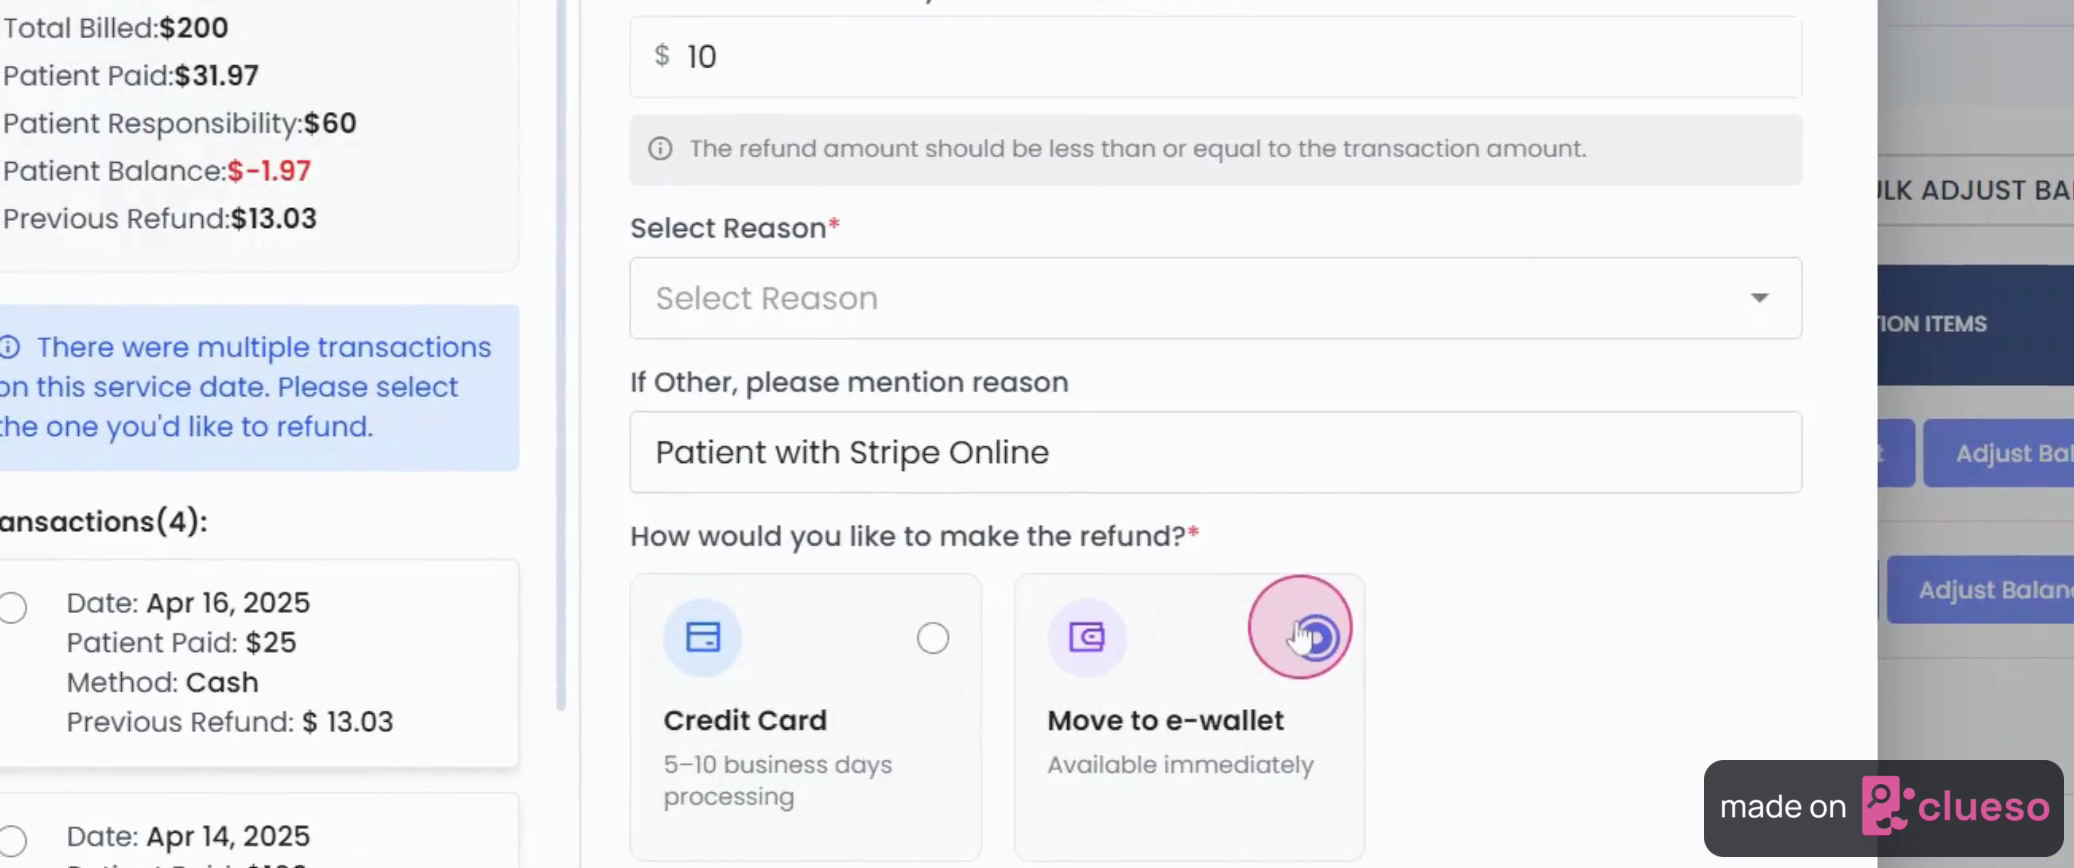
Step 7: You'll notice that the amount has been successfully refunded. Now, if you want to transfer this balance to the E Wallet instead of a refund, select a specific transaction. For example, if you want to move $10 to the eWallet, choose the move to eWallet option.

Step 8: After selecting the move to eWallet option, select a reason and click on refund to eWallet.
Step 9: The specific transaction moves to the eWallet, updating the balance accordingly.
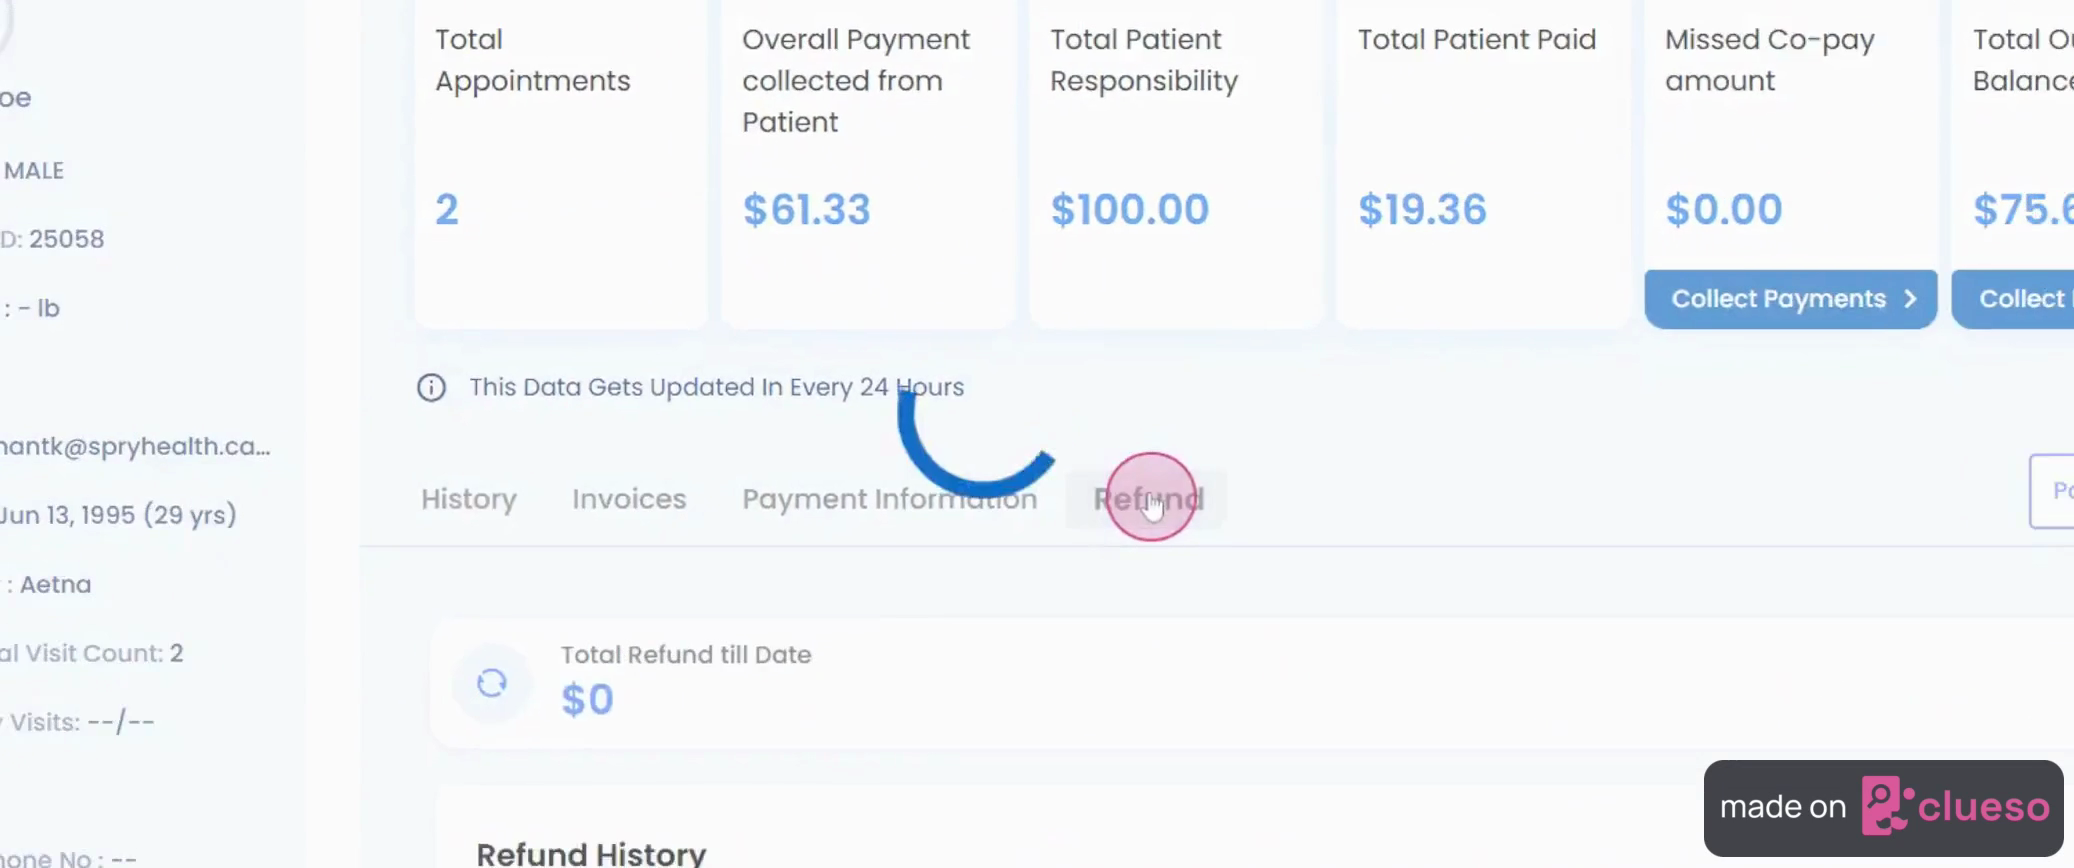
Step 10: You can view all the refund history, including the total number of refunds processed to date and the refund transactions, in the refund history section.
And that's it! You've successfully processed a refund on Spry.