
New ERA Management Feature Overview
Introducing the New ERA Management Feature
The new ERA management feature streamlines how you handle ERA files, making uploads, edits, and status monitoring simple and efficient. Here’s how to use it, from uploading files to posting and managing ERAs.
Step 1: Go to Billings in your main menu.
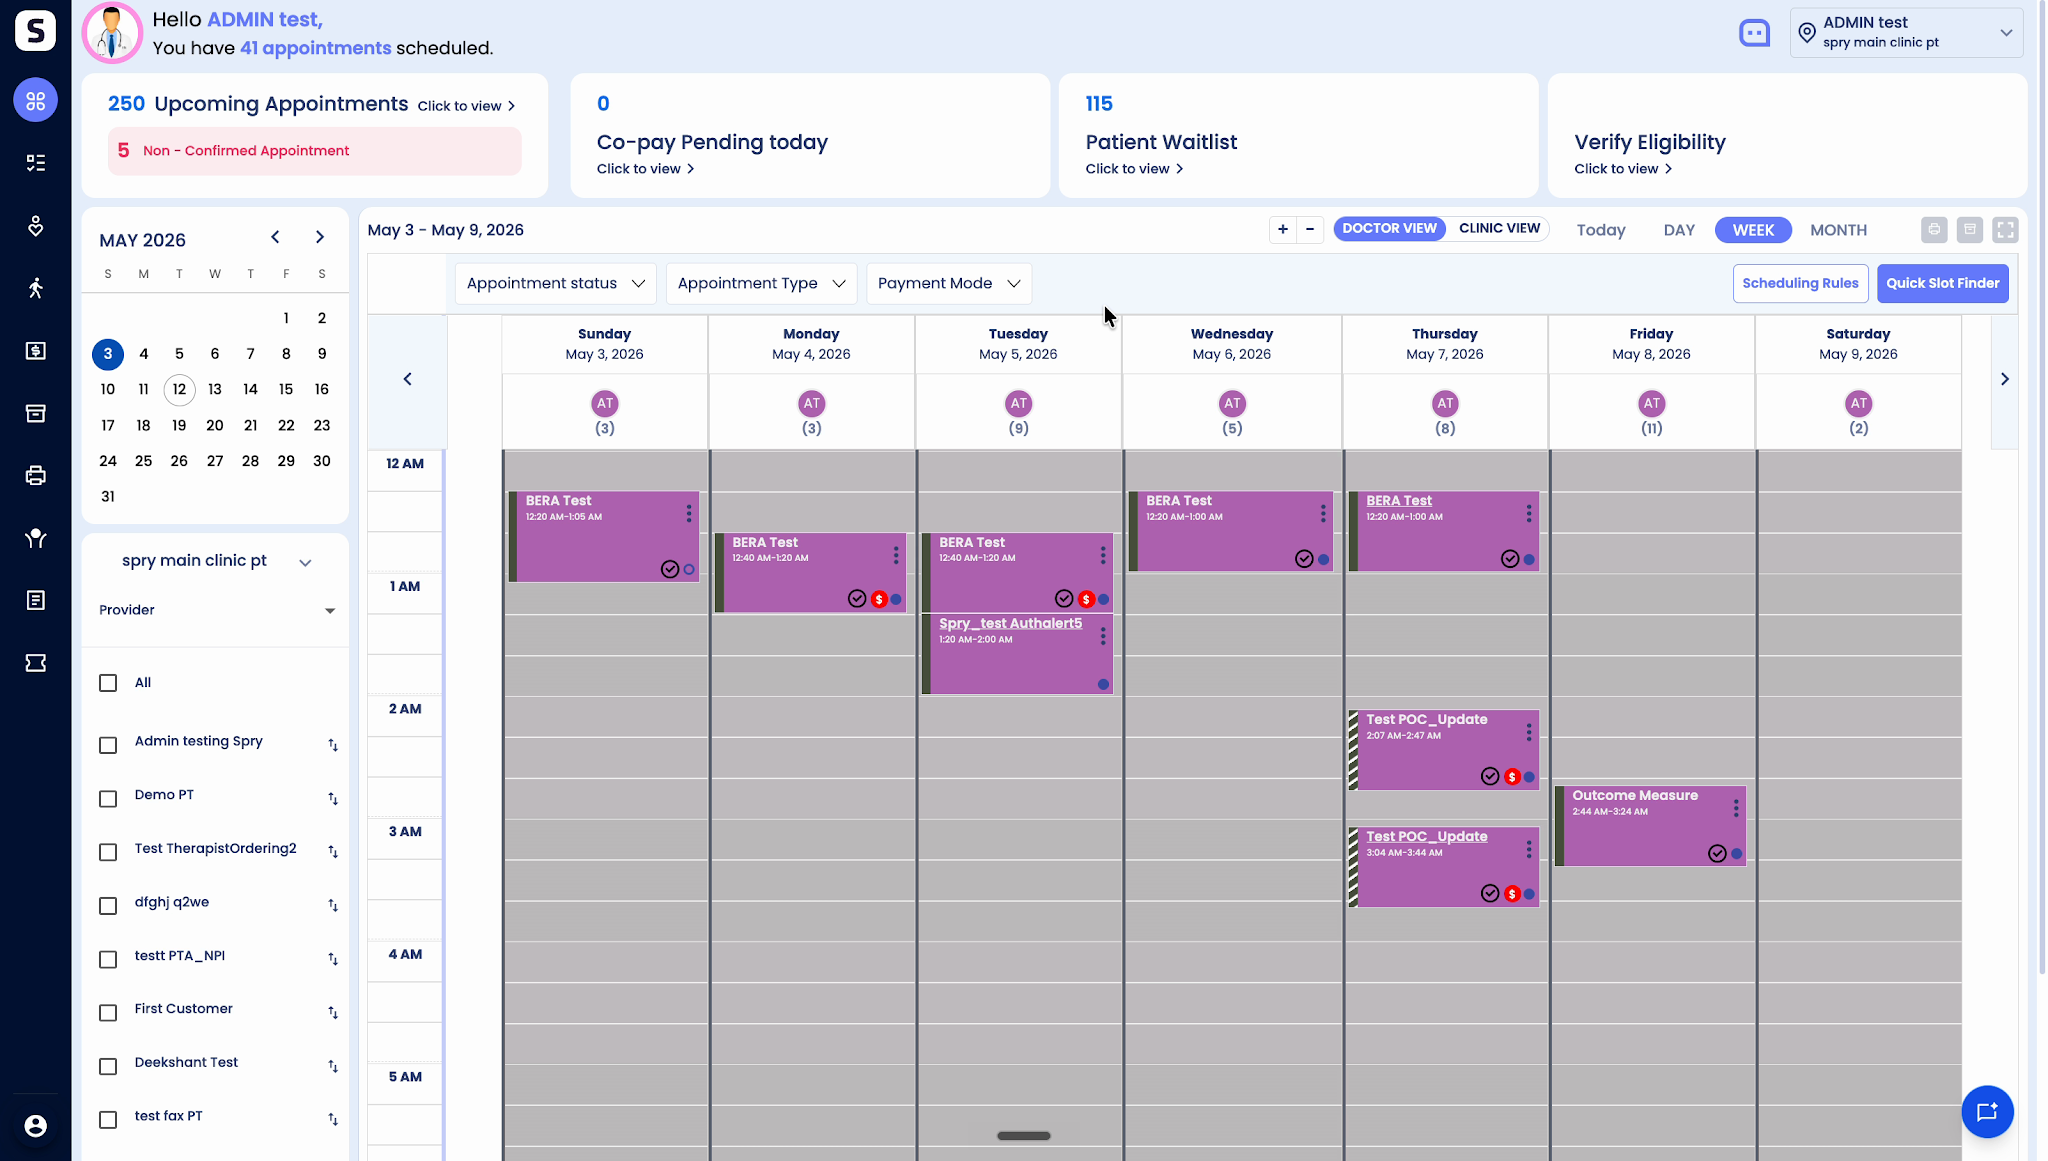
Step 2: Click on ERA to enter the ERA management section.
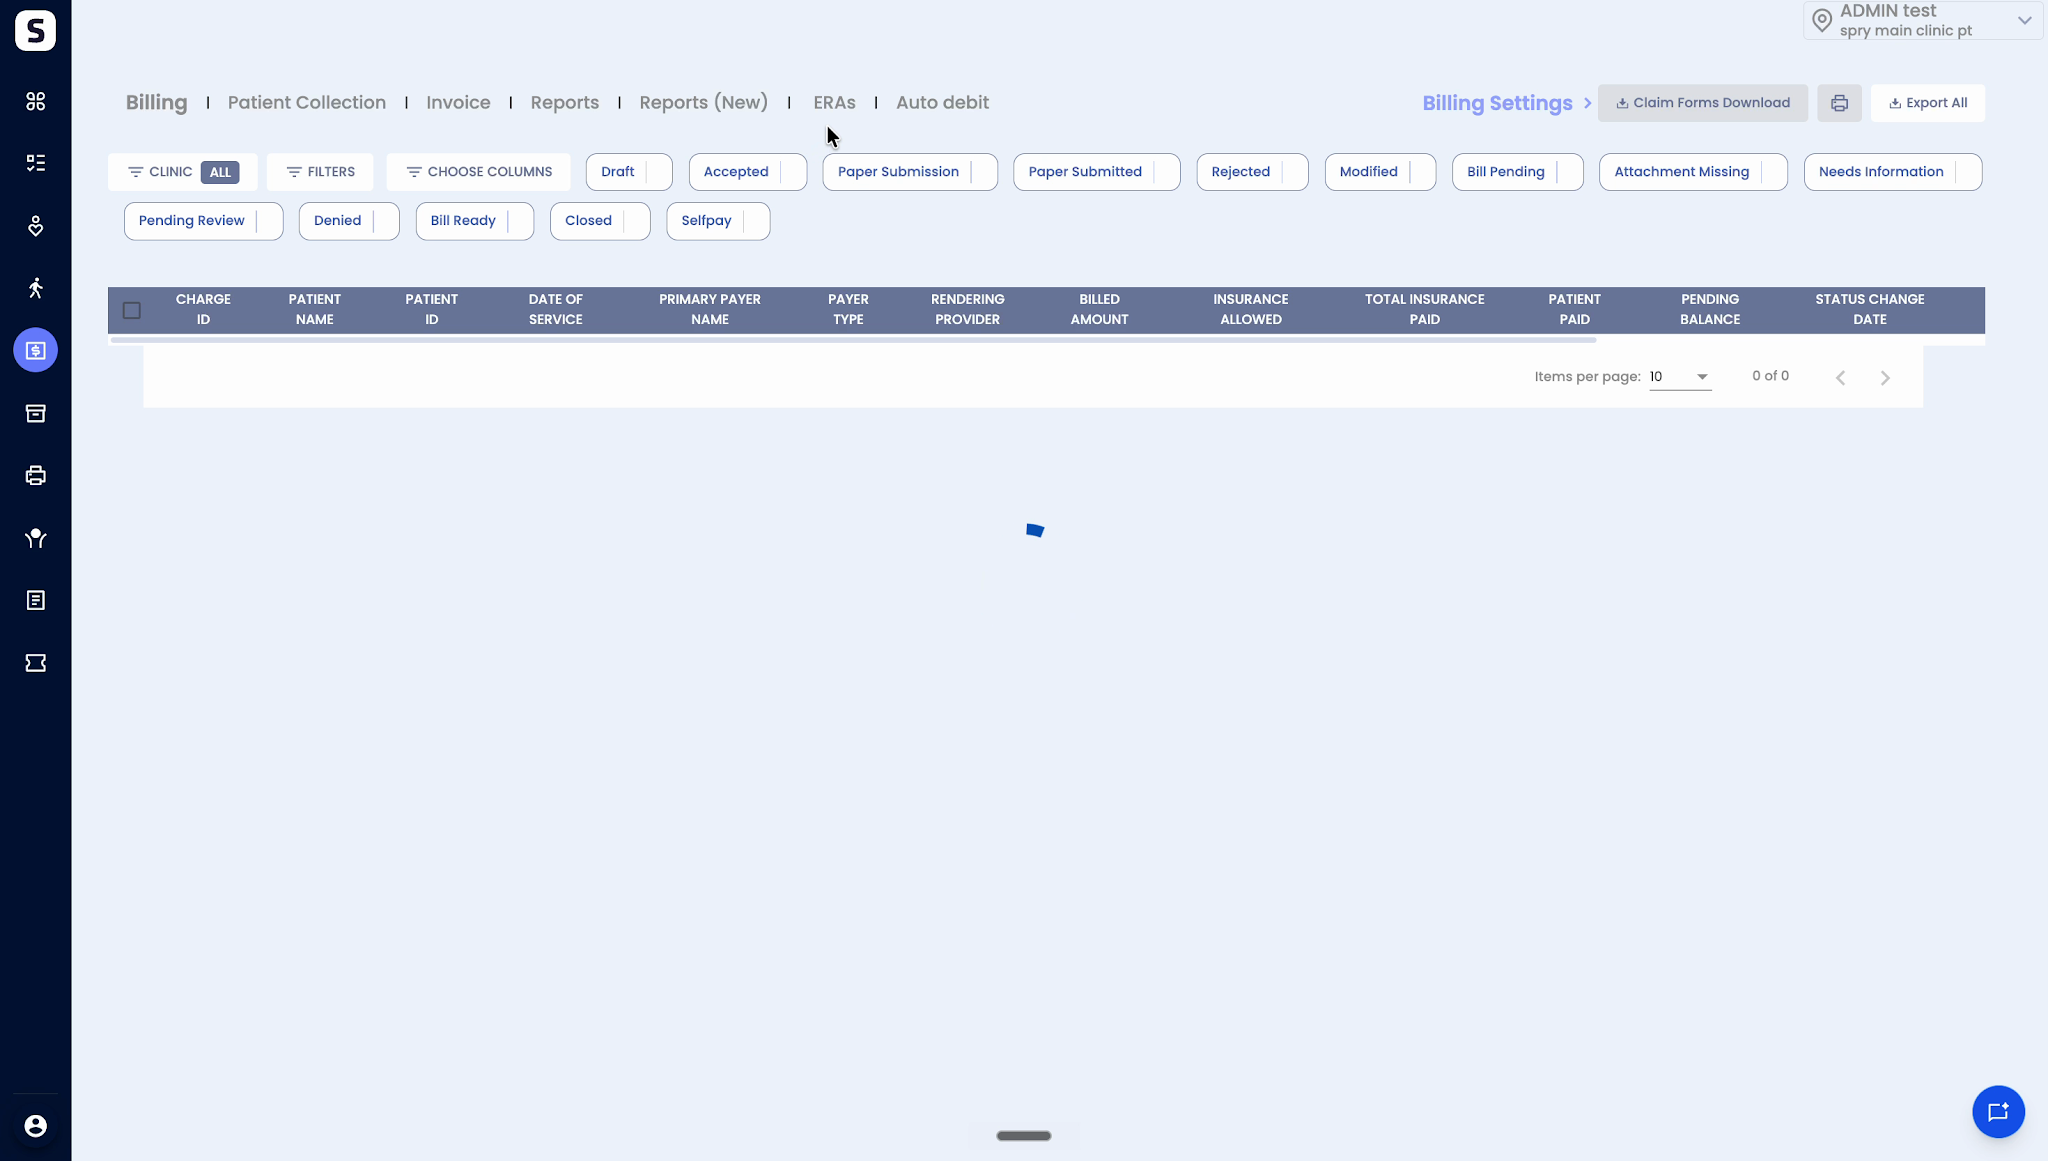
Step 3: View the ERA dashboard. The main screen has a new tab where you’ll see all ERA-related details.
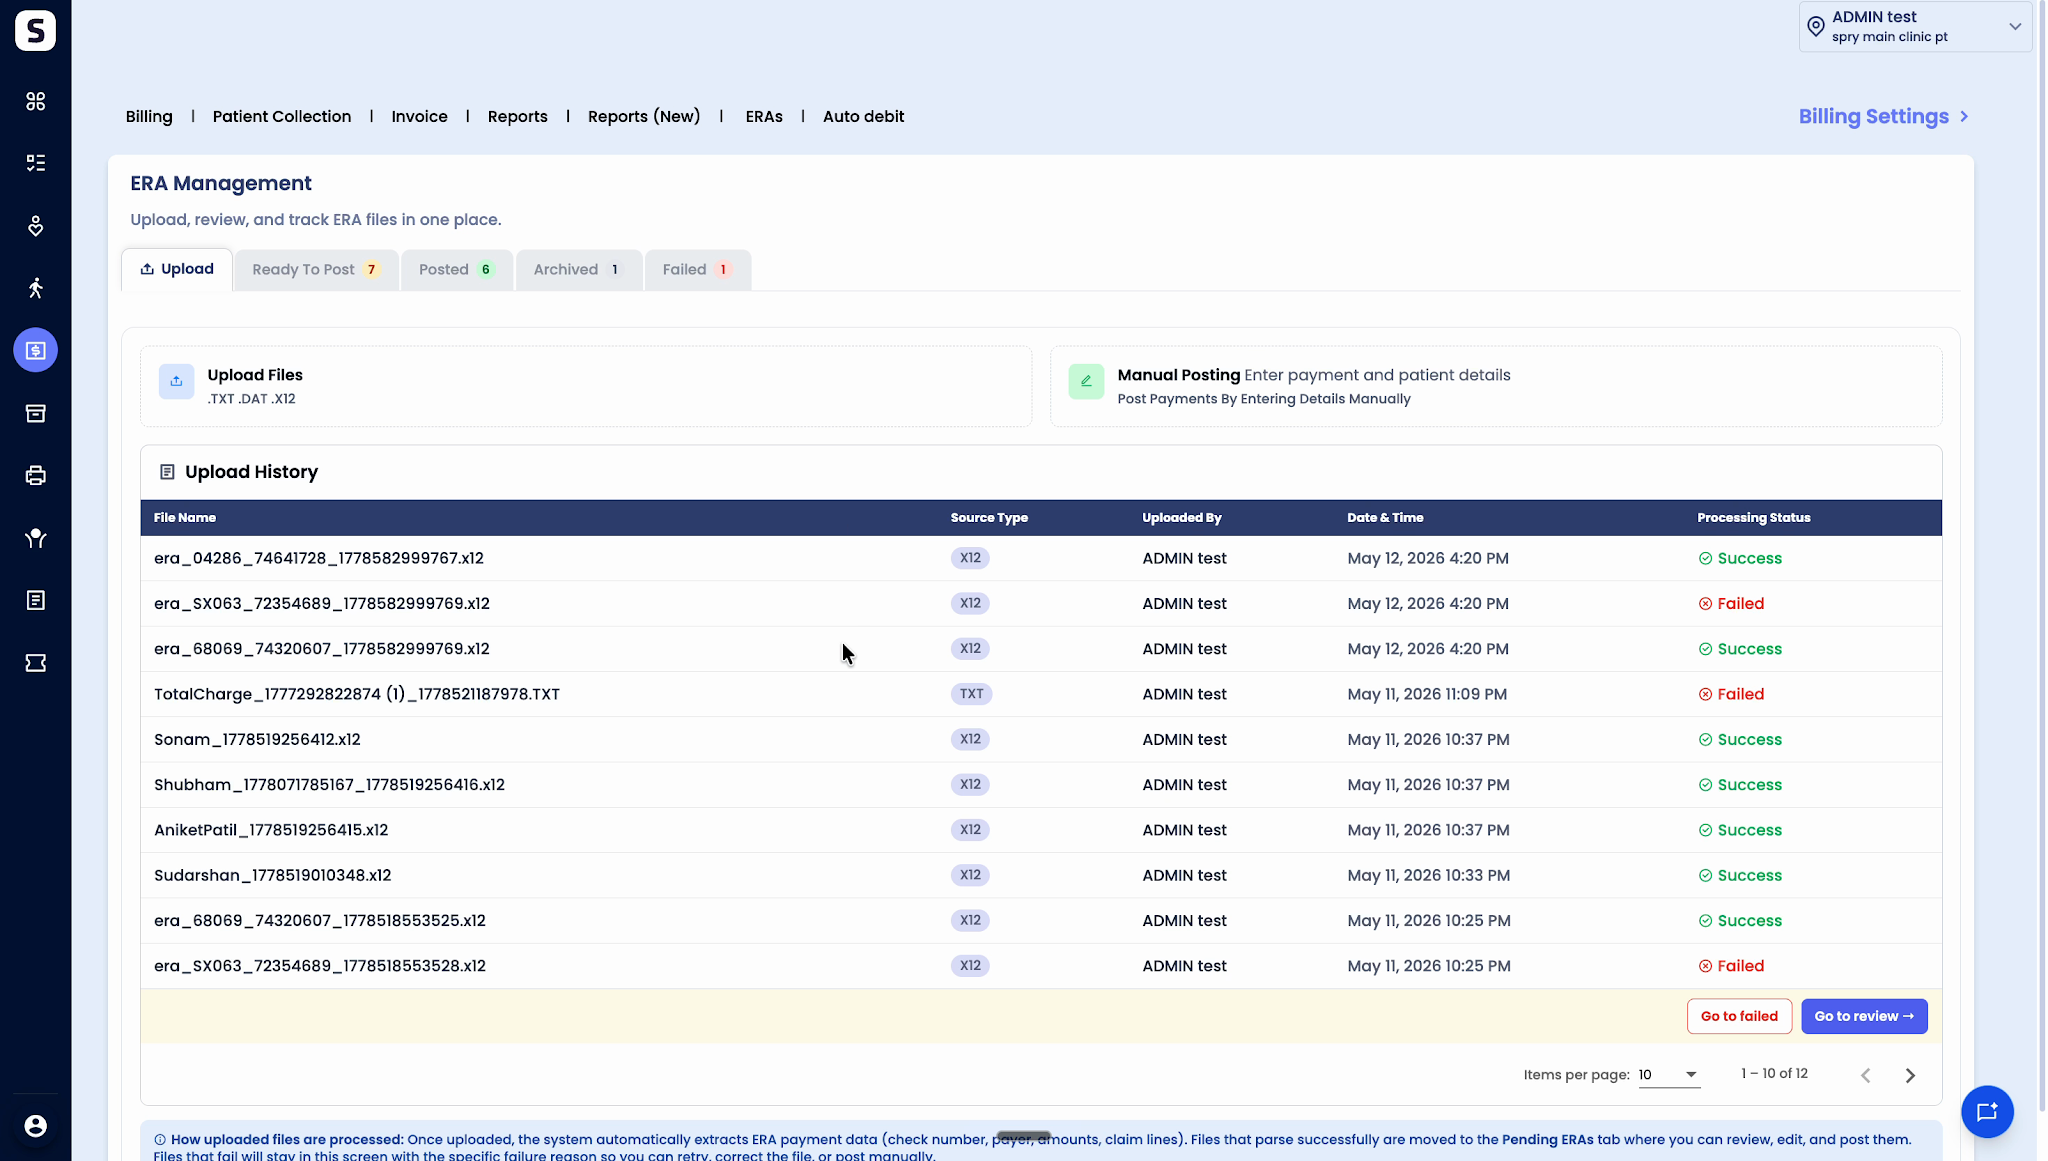
Step 4: Upload ERA files in TXT, DAT or X12 format. You can upload multiple files at once.

Step 5: Watch the upload process at the top of the screen. Files process in real time, and you’ll see their status as they complete.

Step 6: Check the processing status. The system shows which uploads succeeded and which failed.
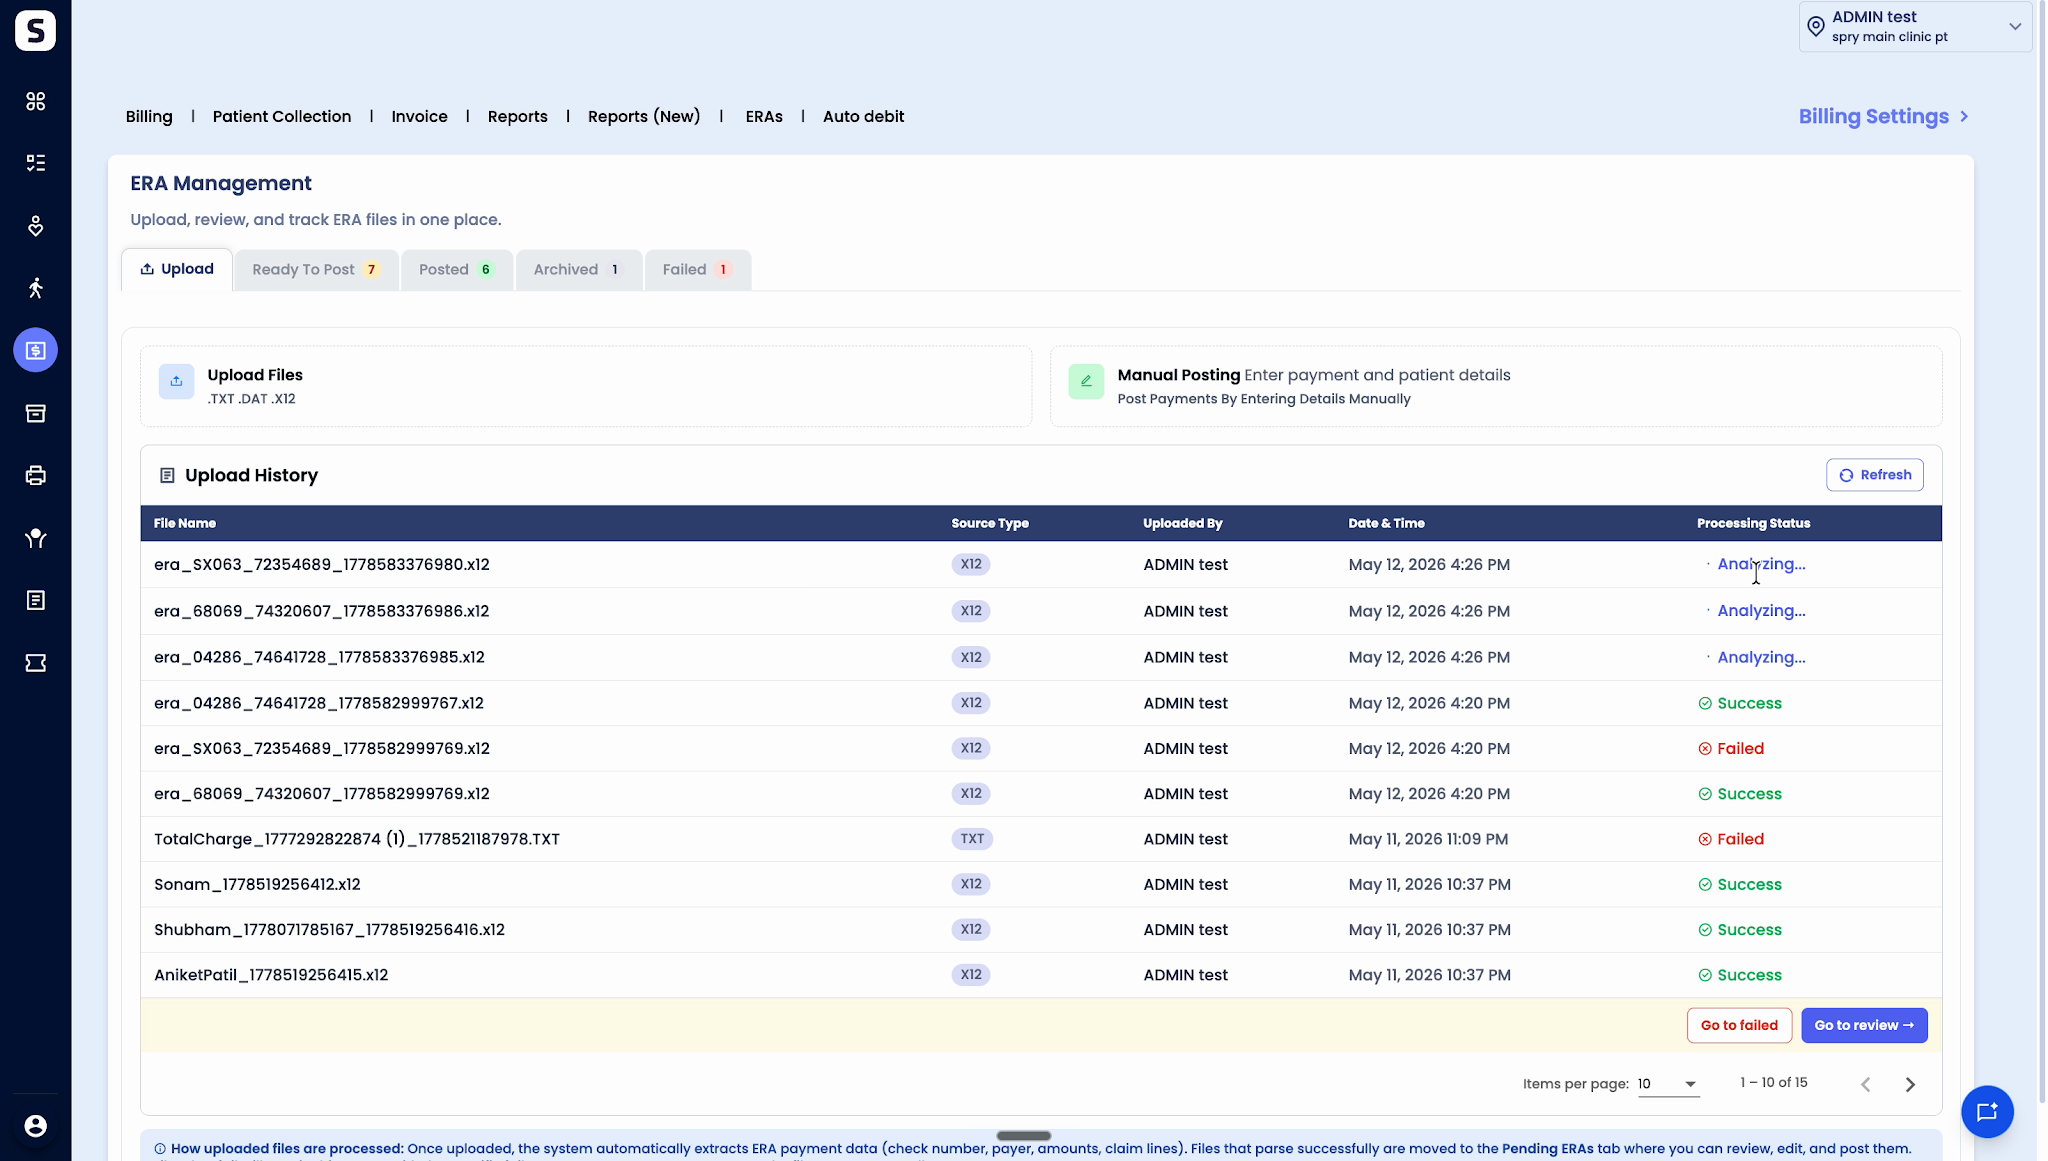

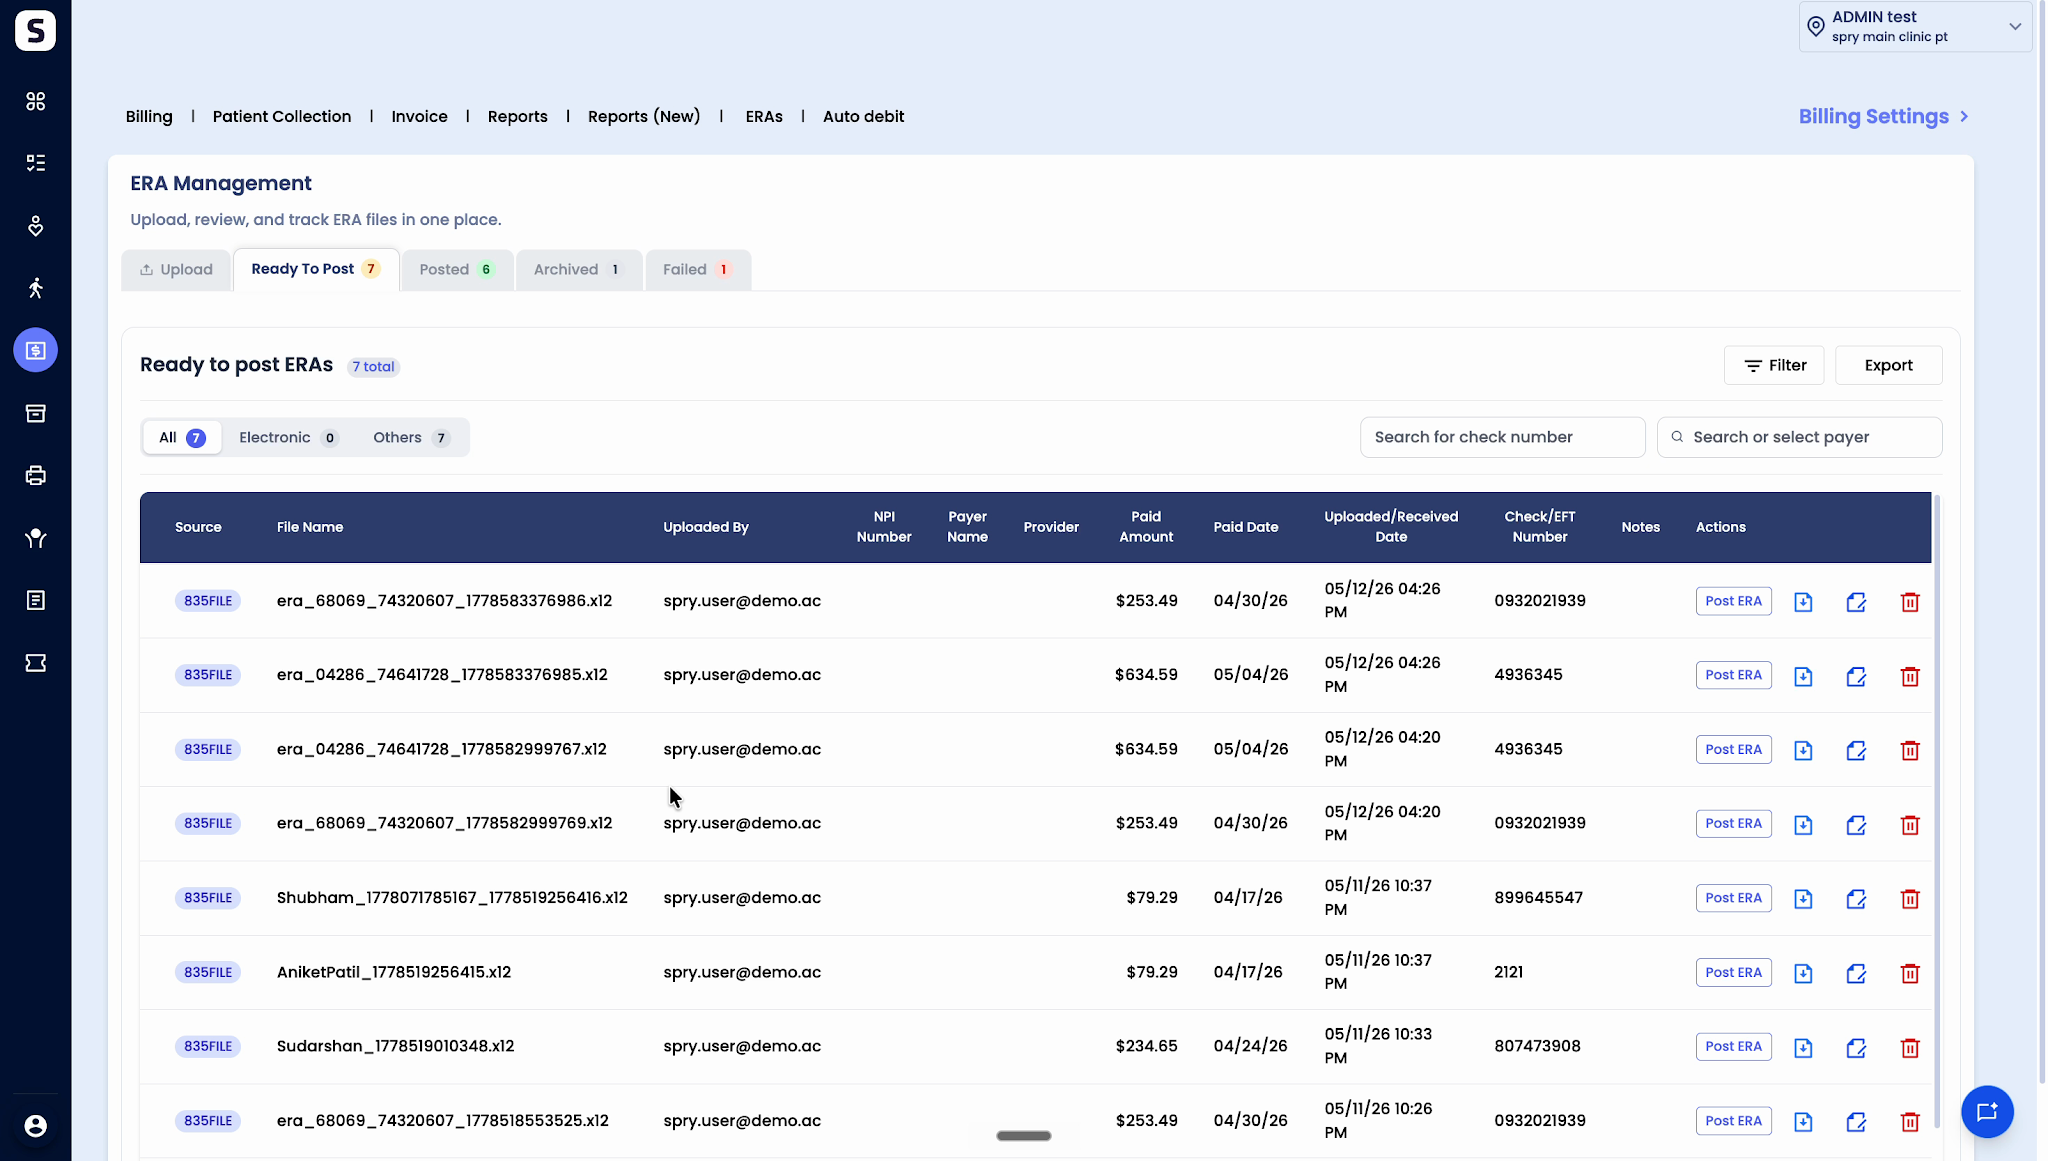
Step 7: Access all uploaded ERAs under the Ready to post section. Here, all your electronic ERAs are visible in one place.


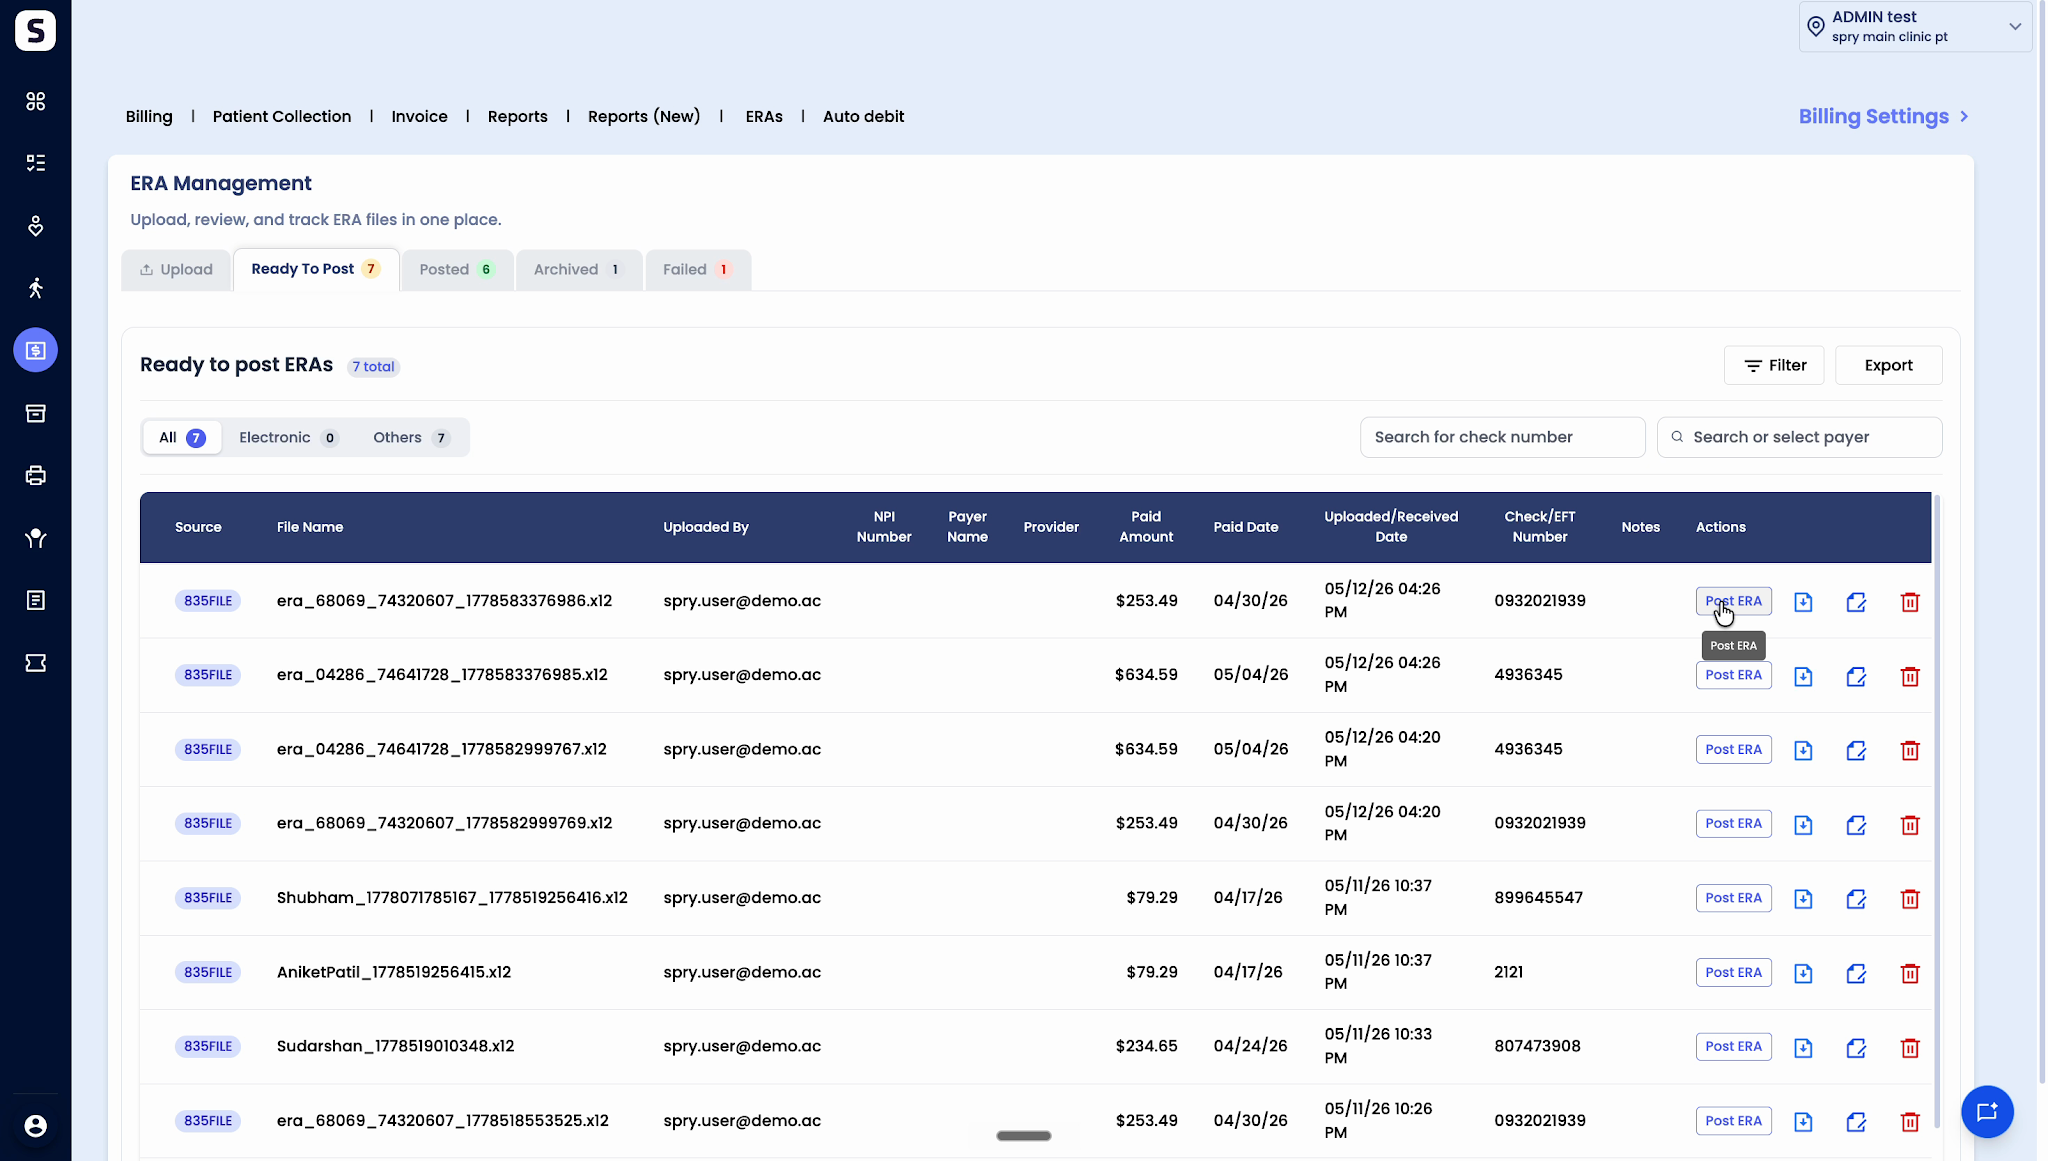
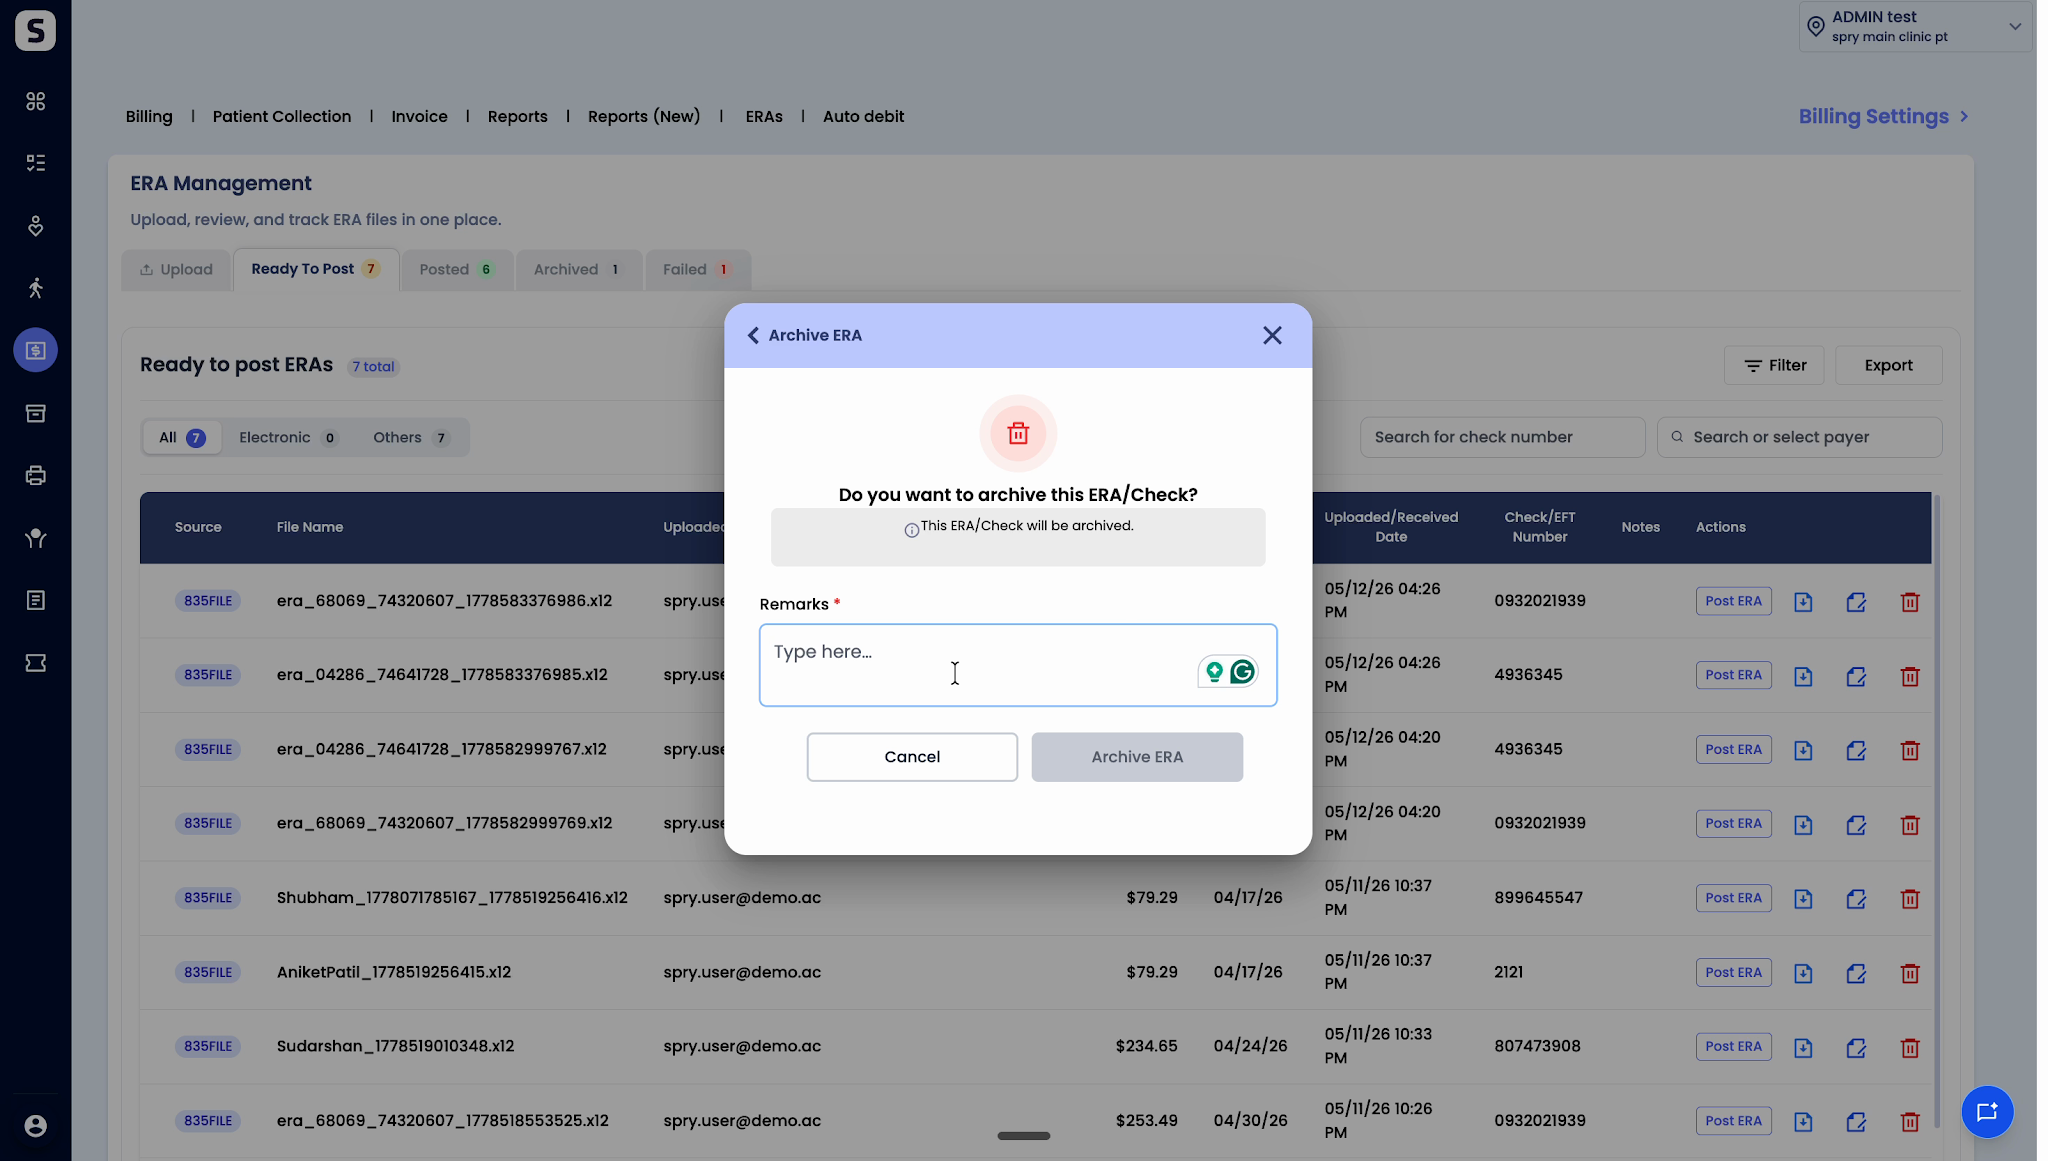
Step 8: If auto-posting is off, you'll find electronic ERAs here as well. Directly post, view, or preview attachments as needed. You can also choose to archive ERAs you don’t want to post.
Editing and Managing ERAs
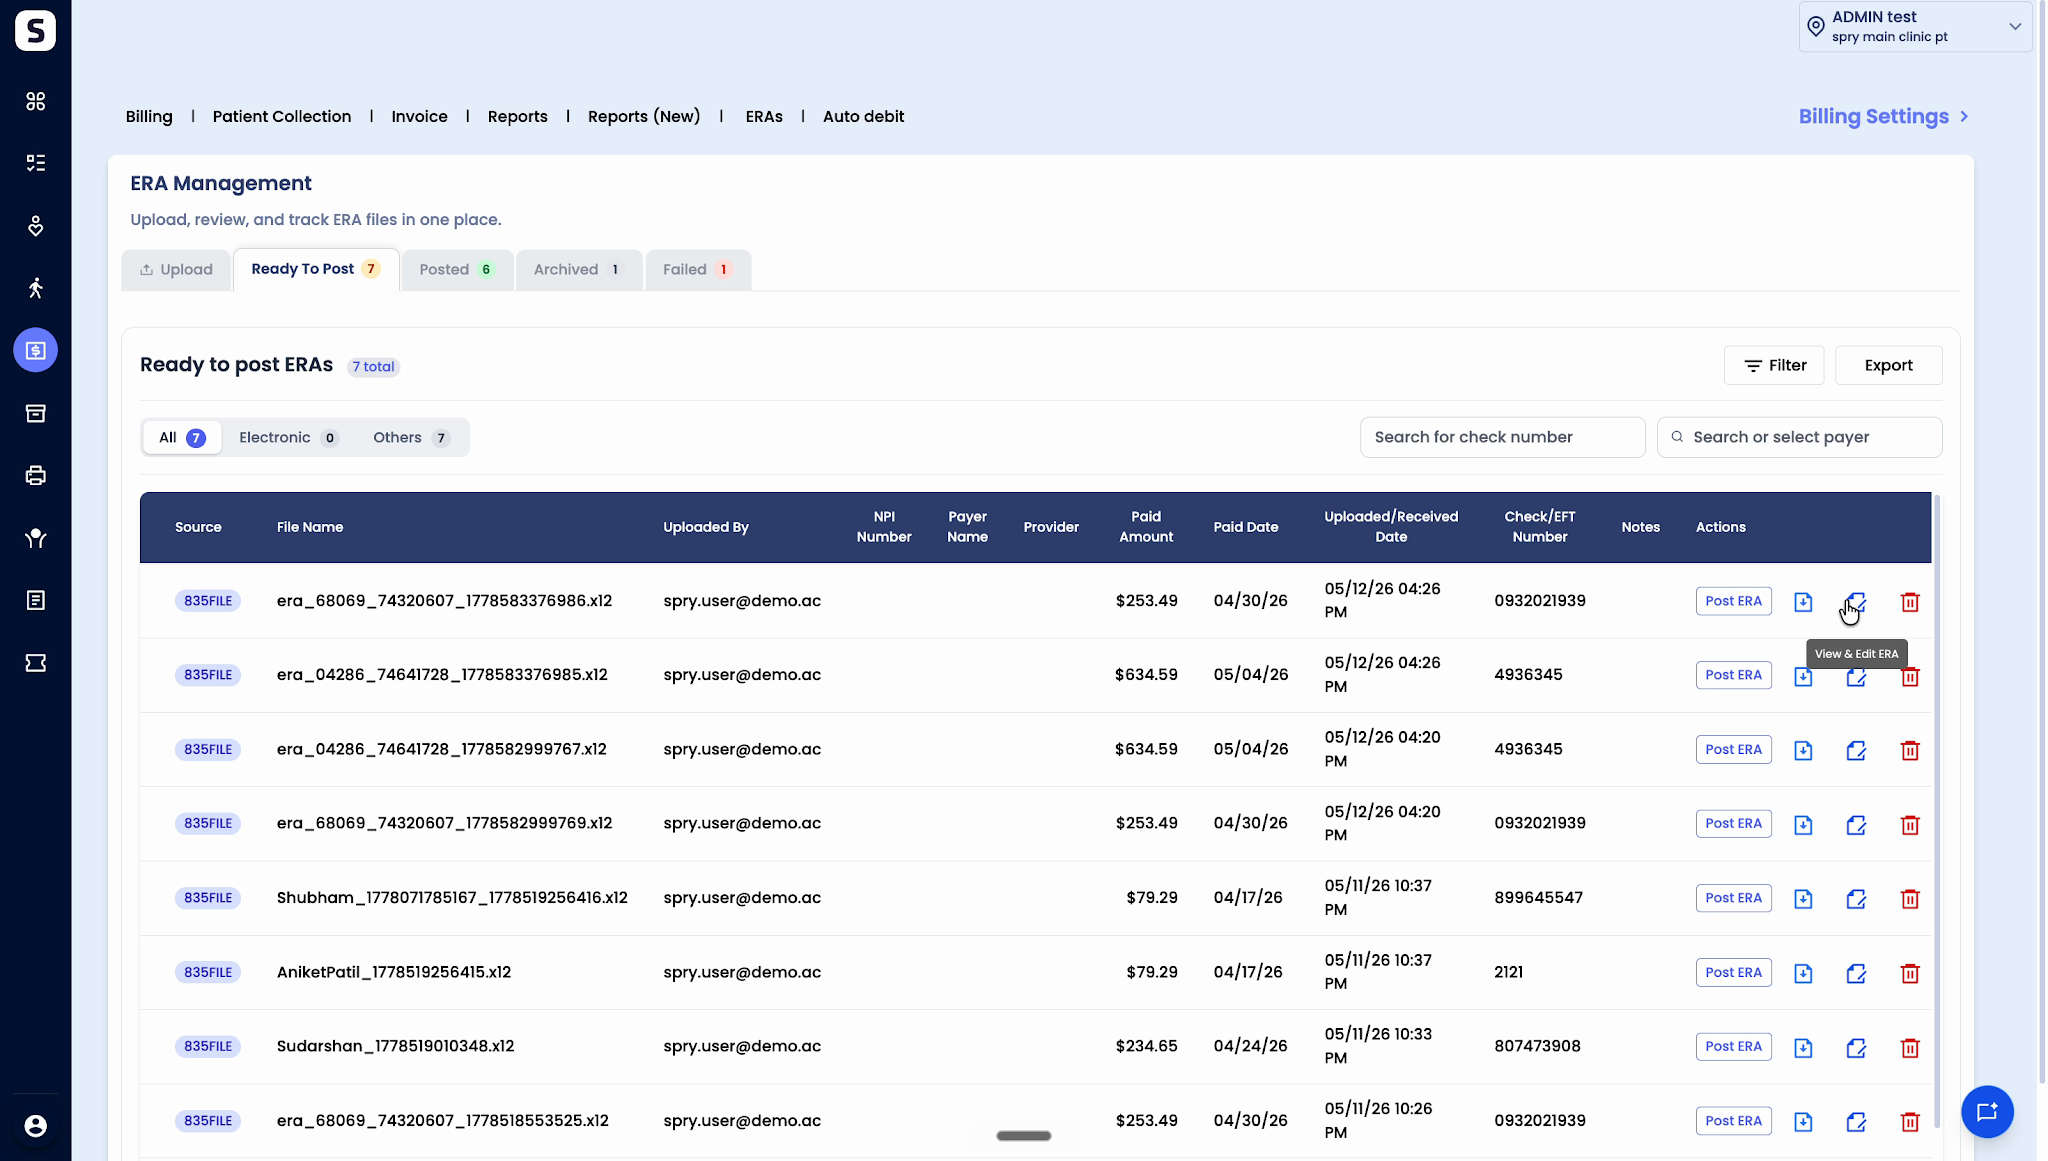
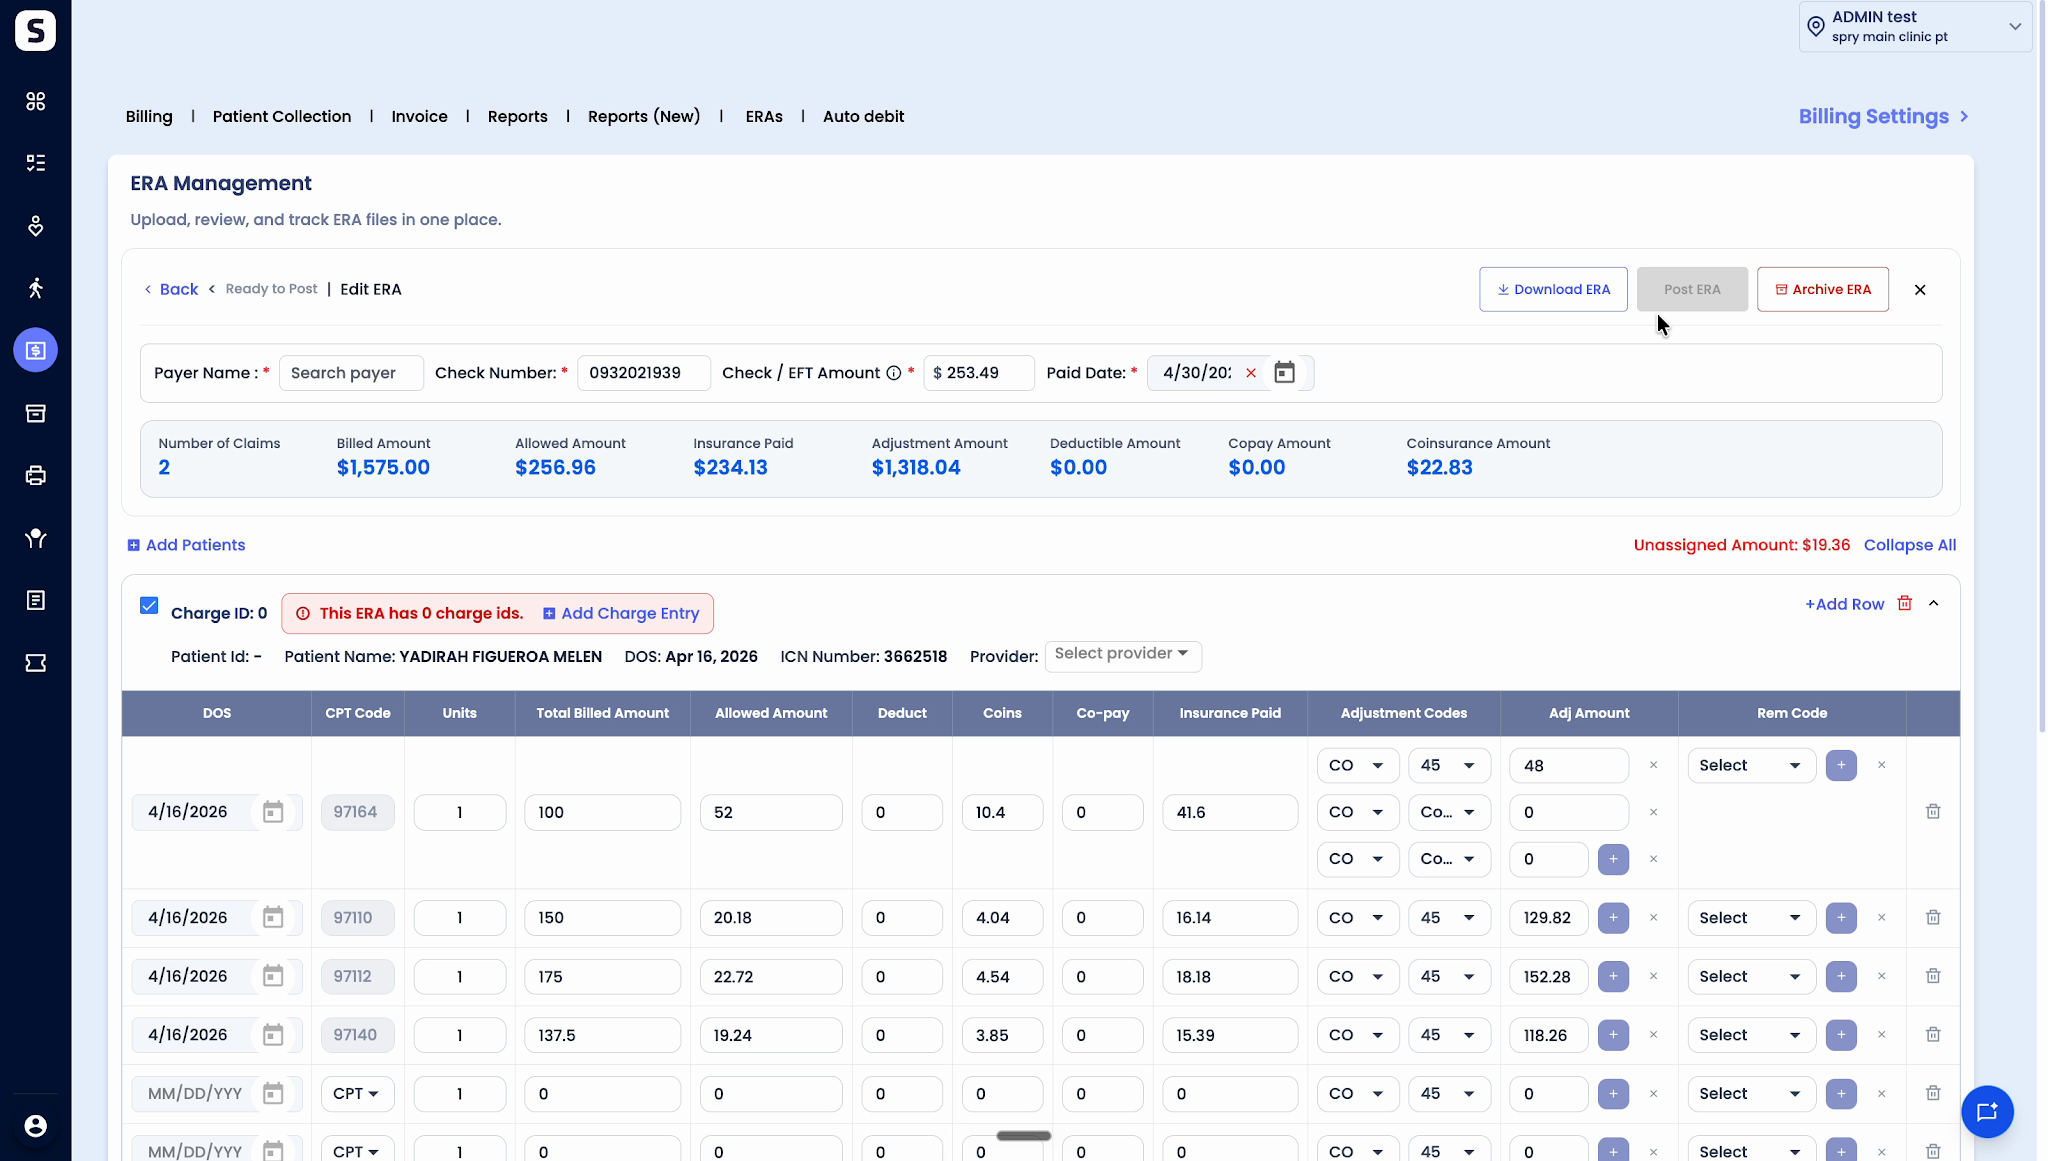
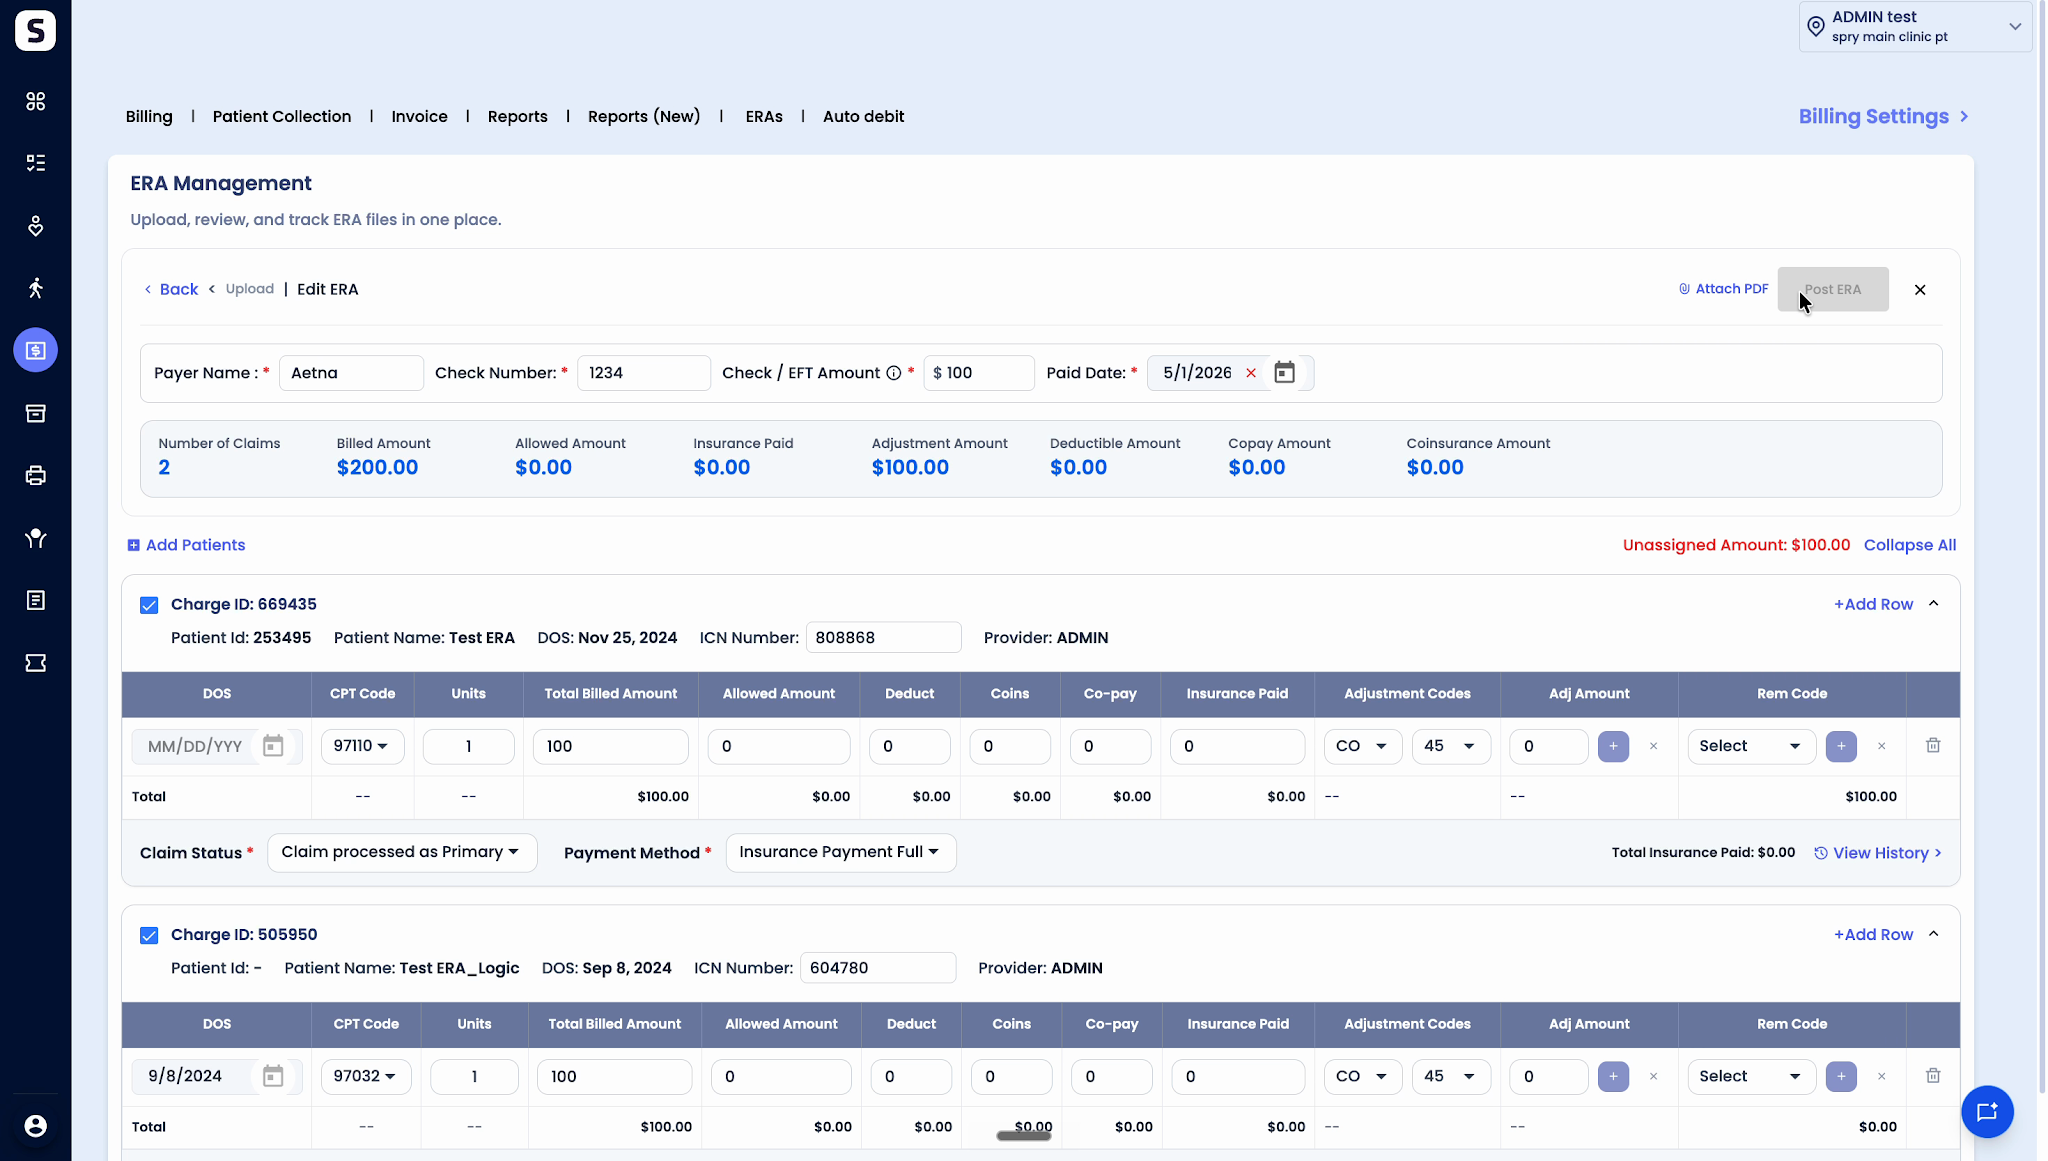
Step 1: Click View/Edit ERA to open the detailed editing screen.

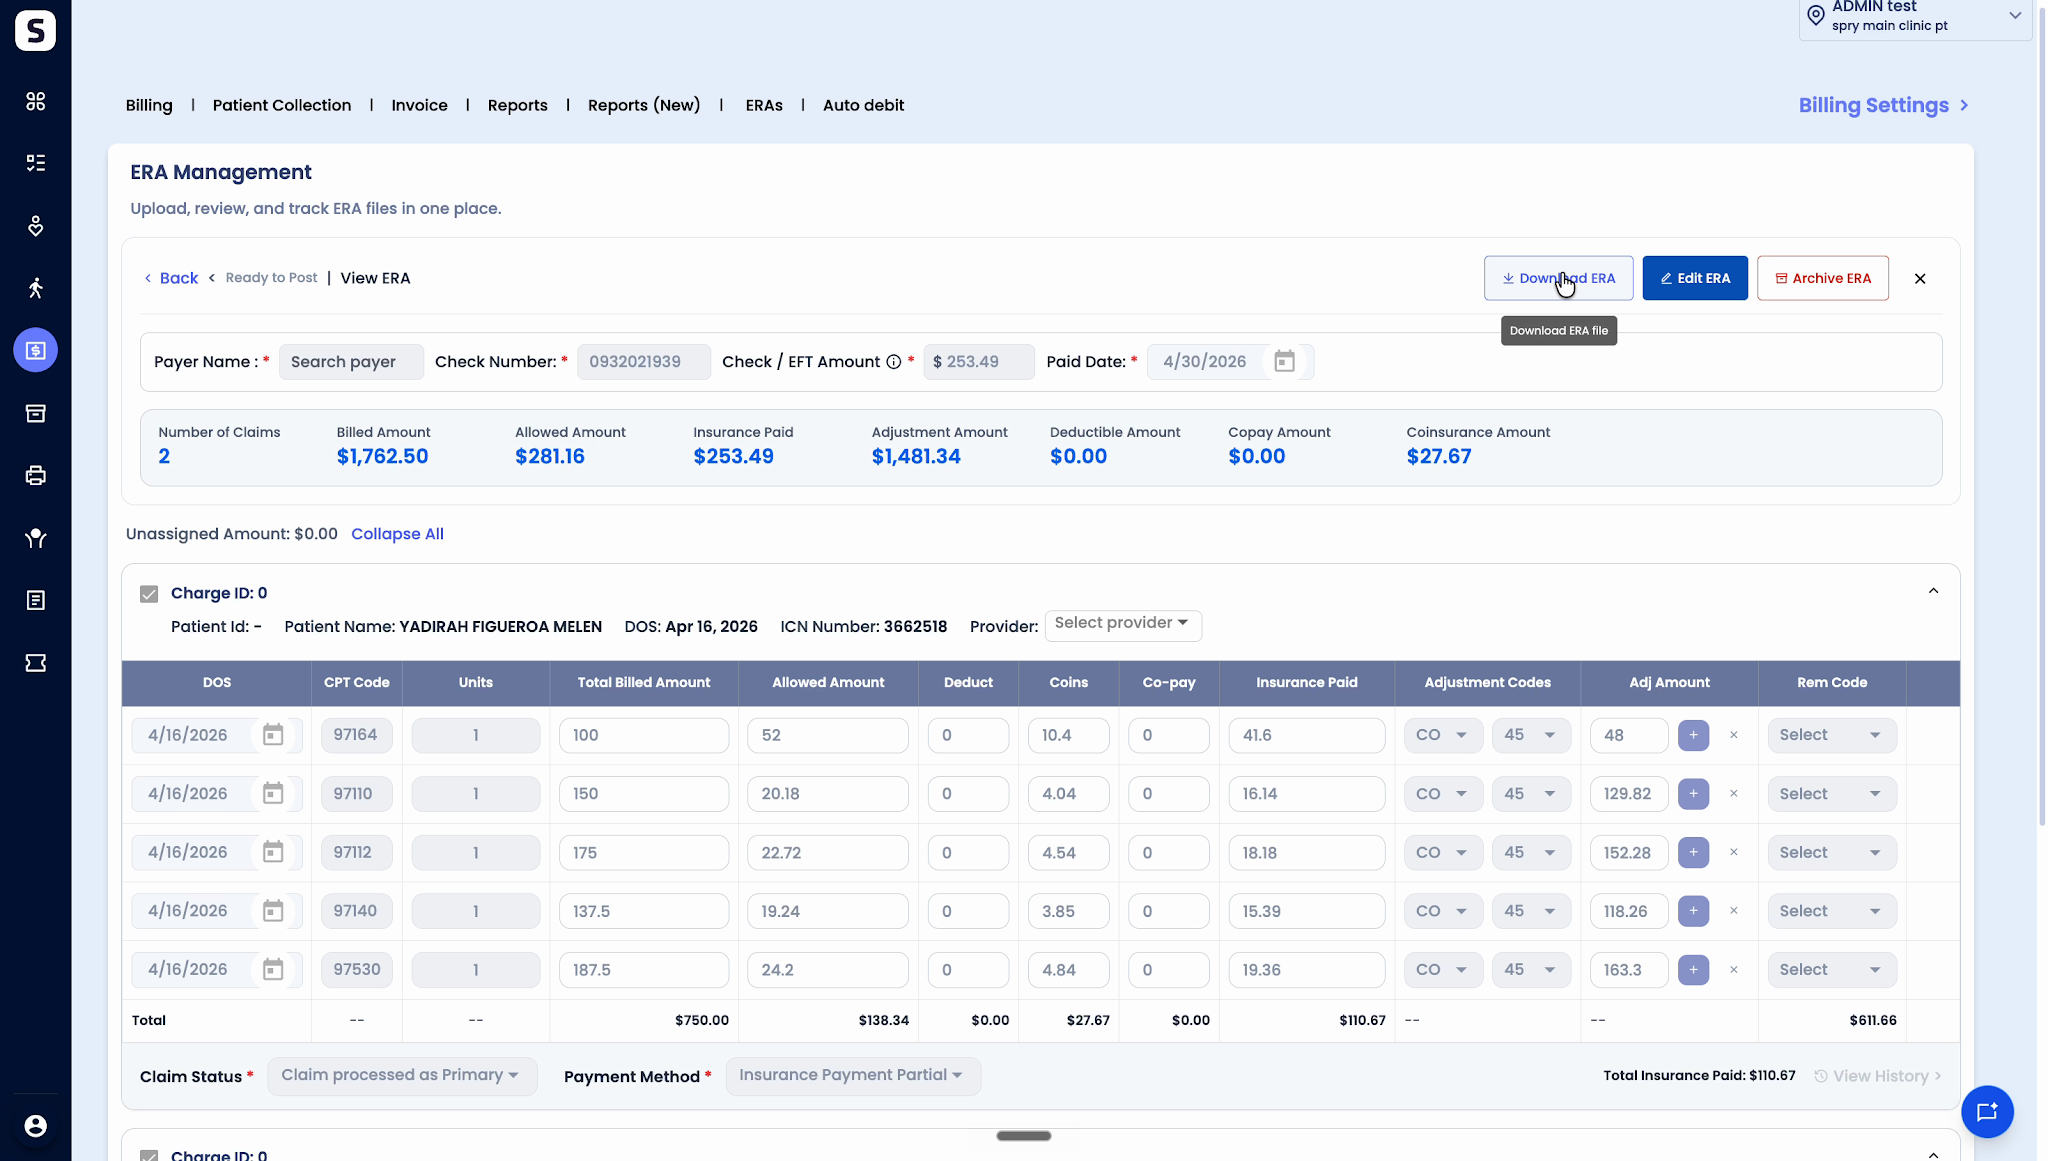
Step 2: Download, edit, or archive the ERA from this screen. Review details and post when ready. To edit further, select Edit ERA.
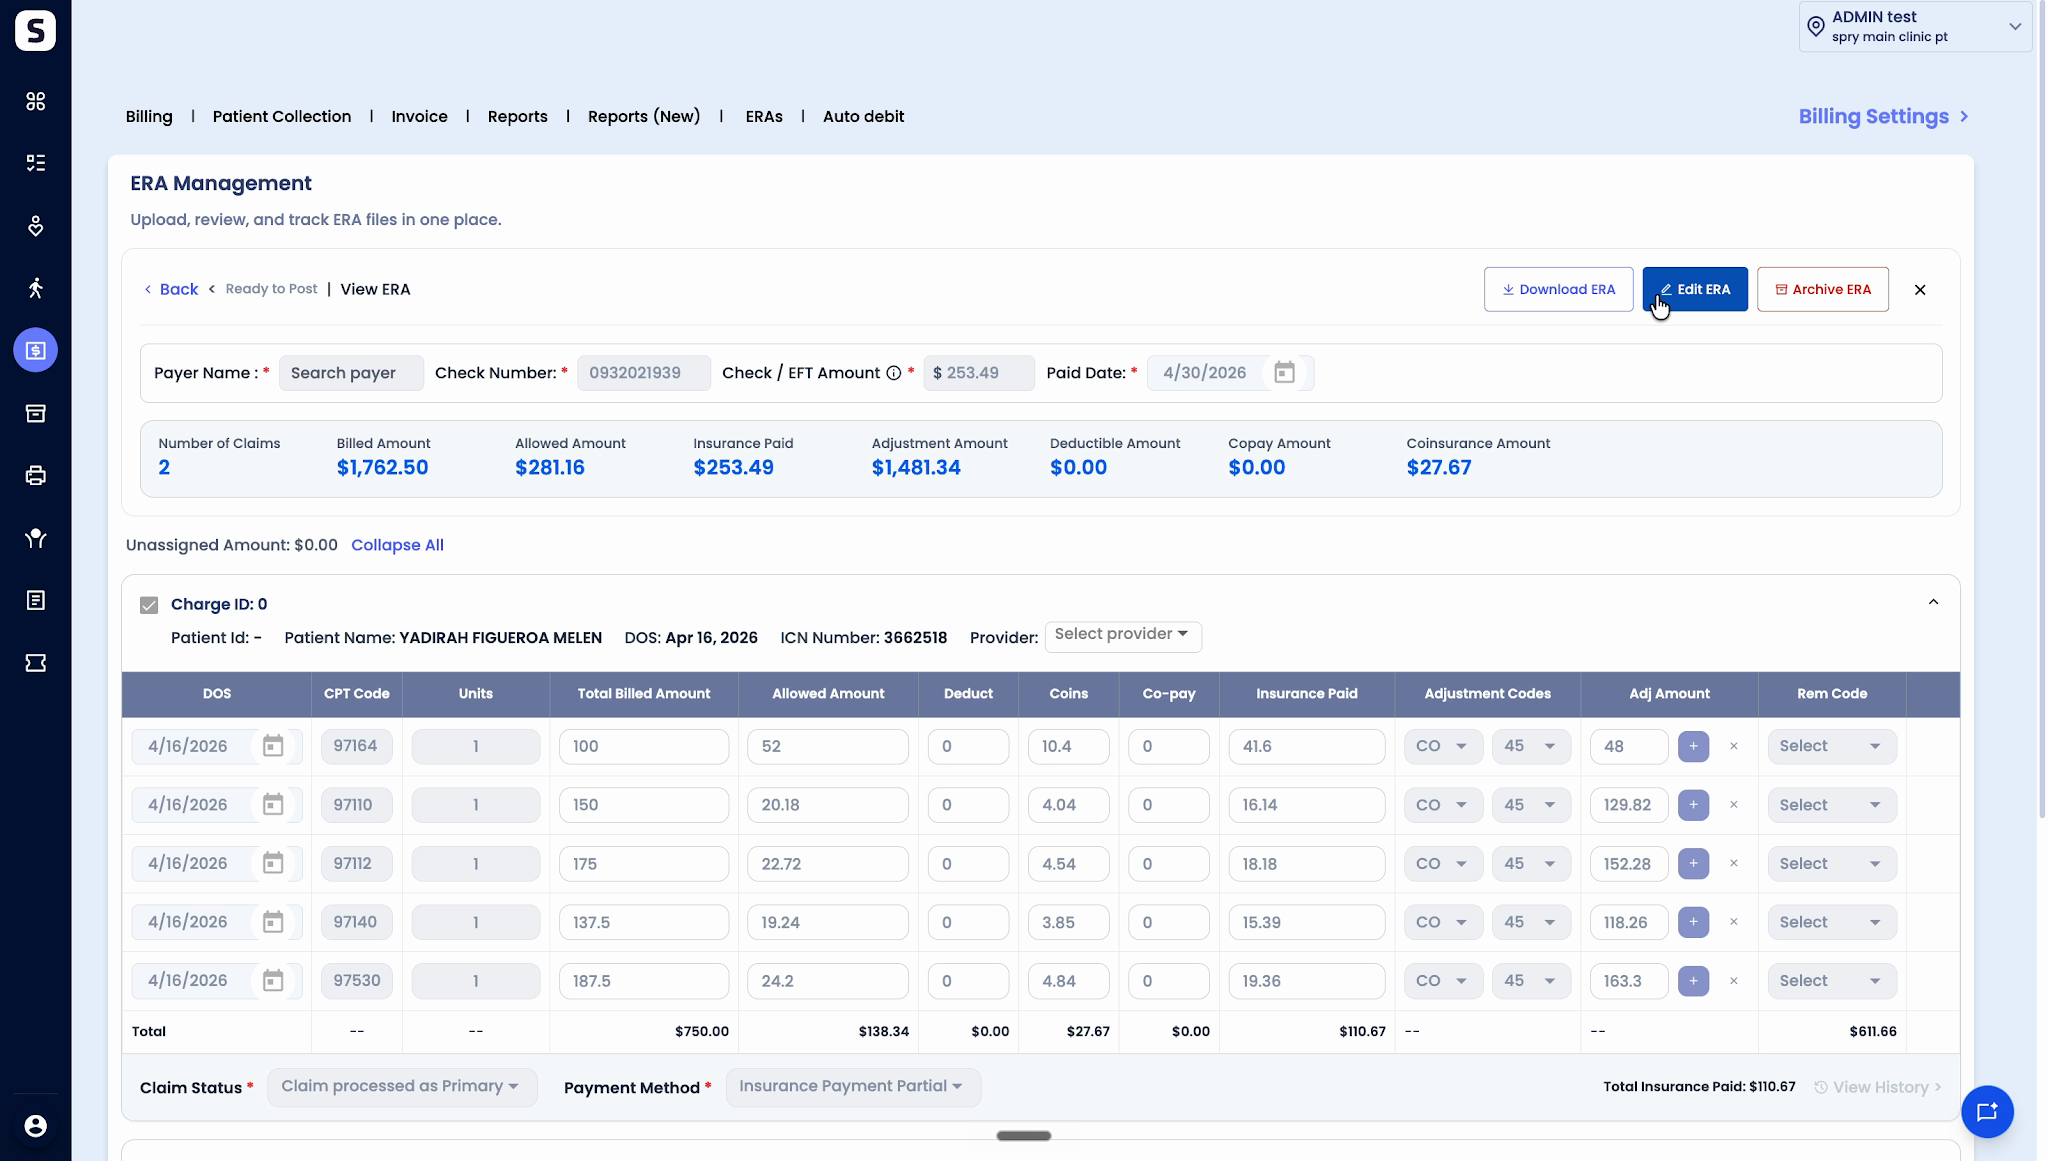
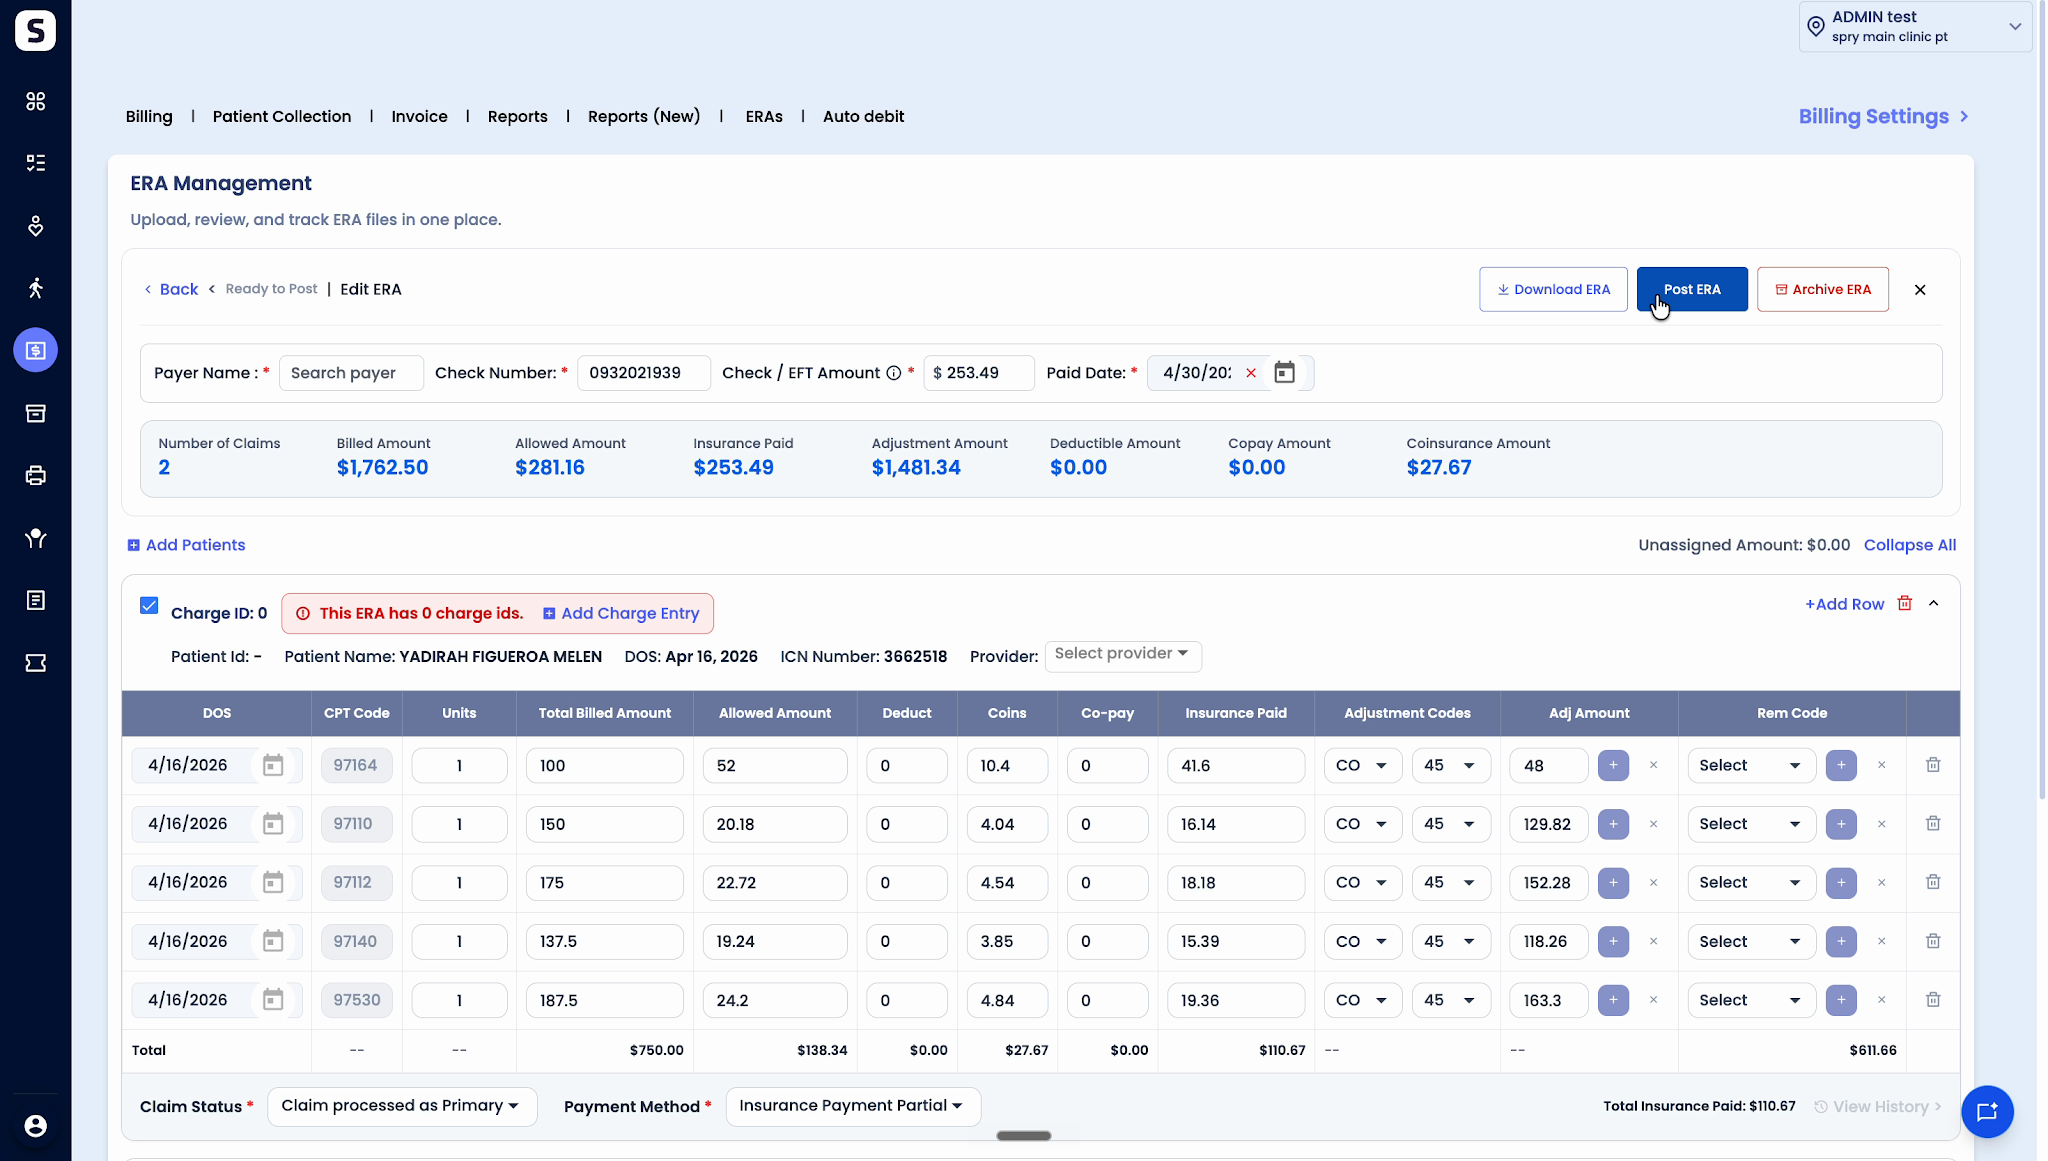
Step 3: Edit ERA details, such as payer name or paid date, or assign missing charge IDs.

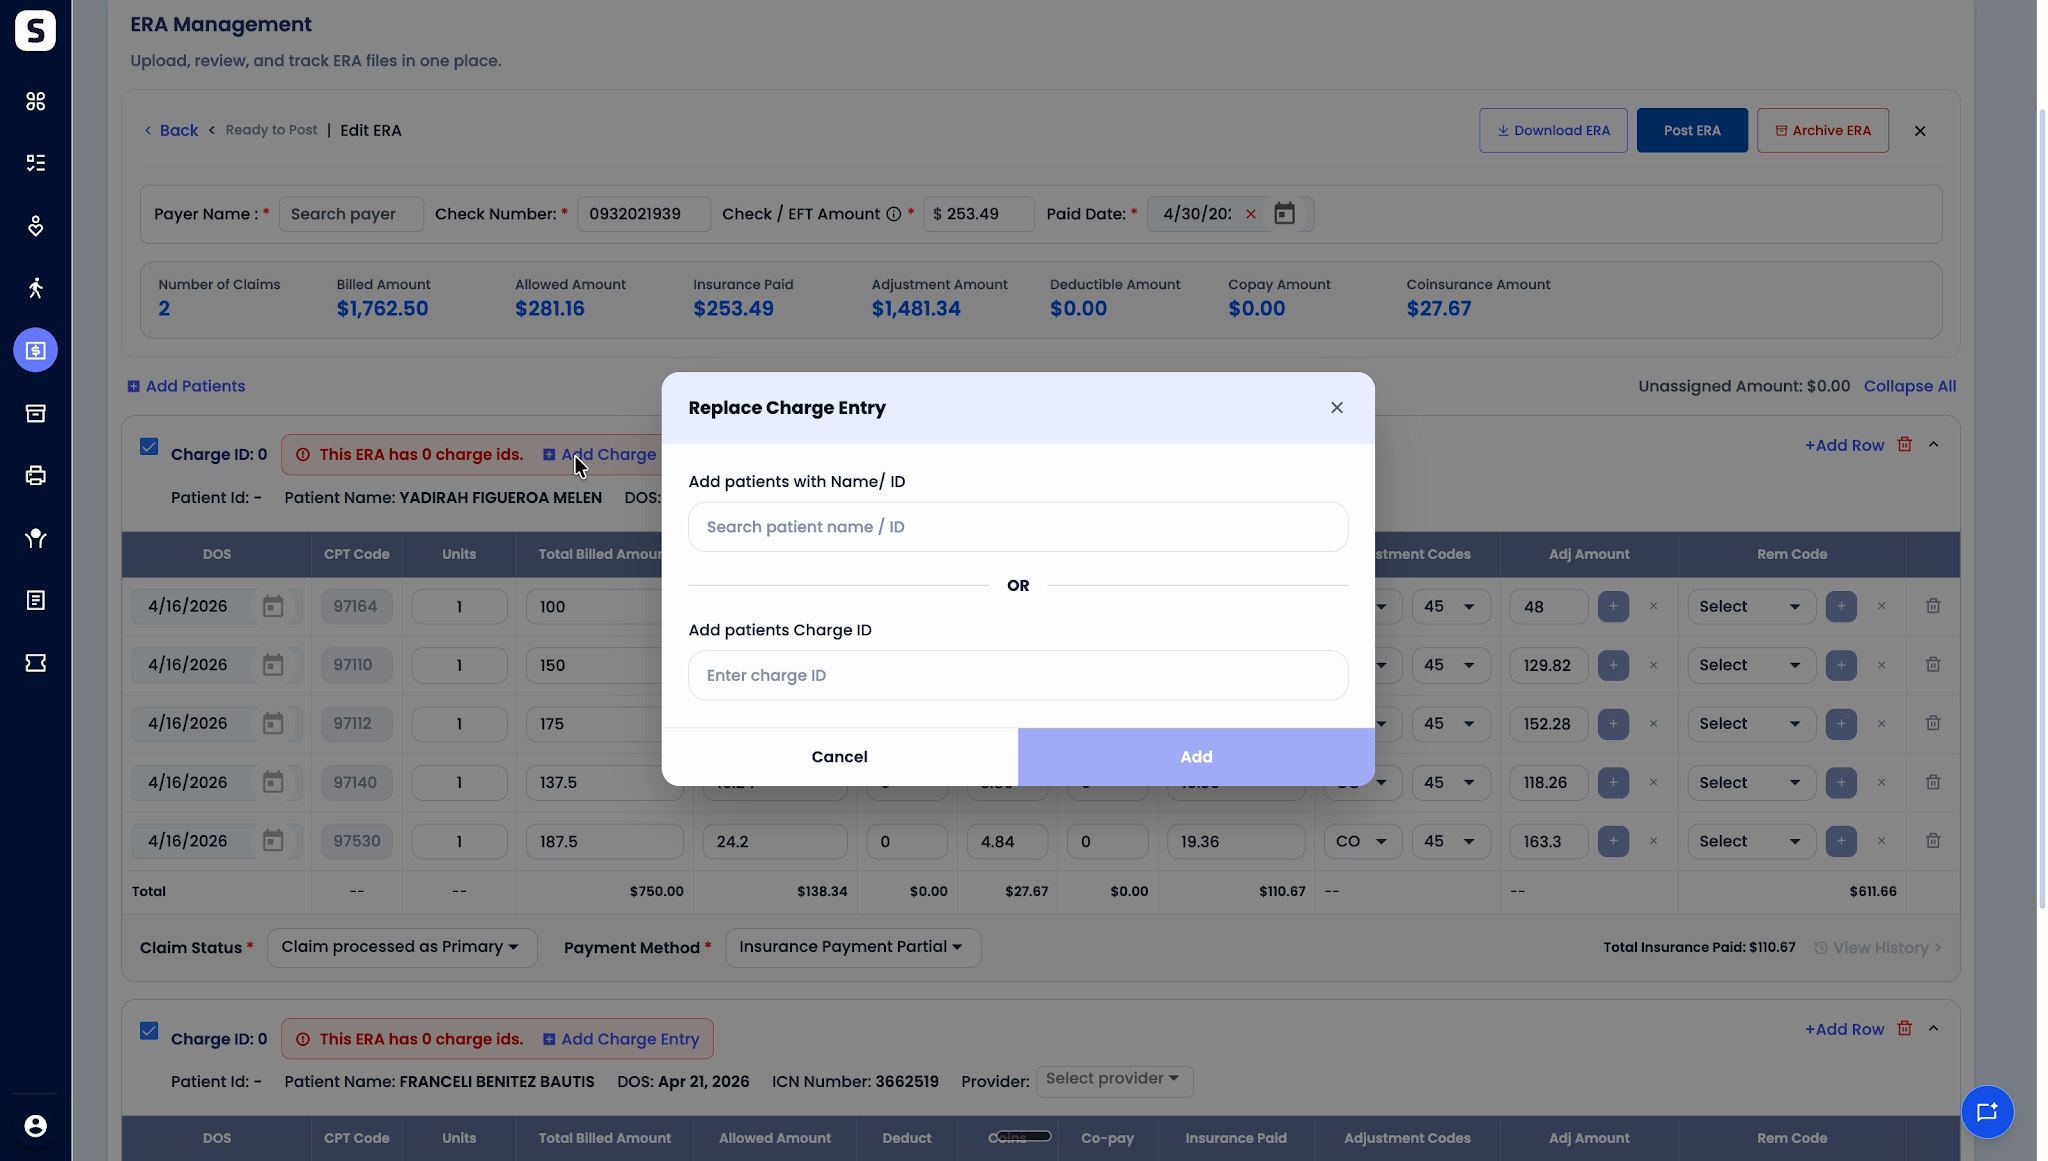
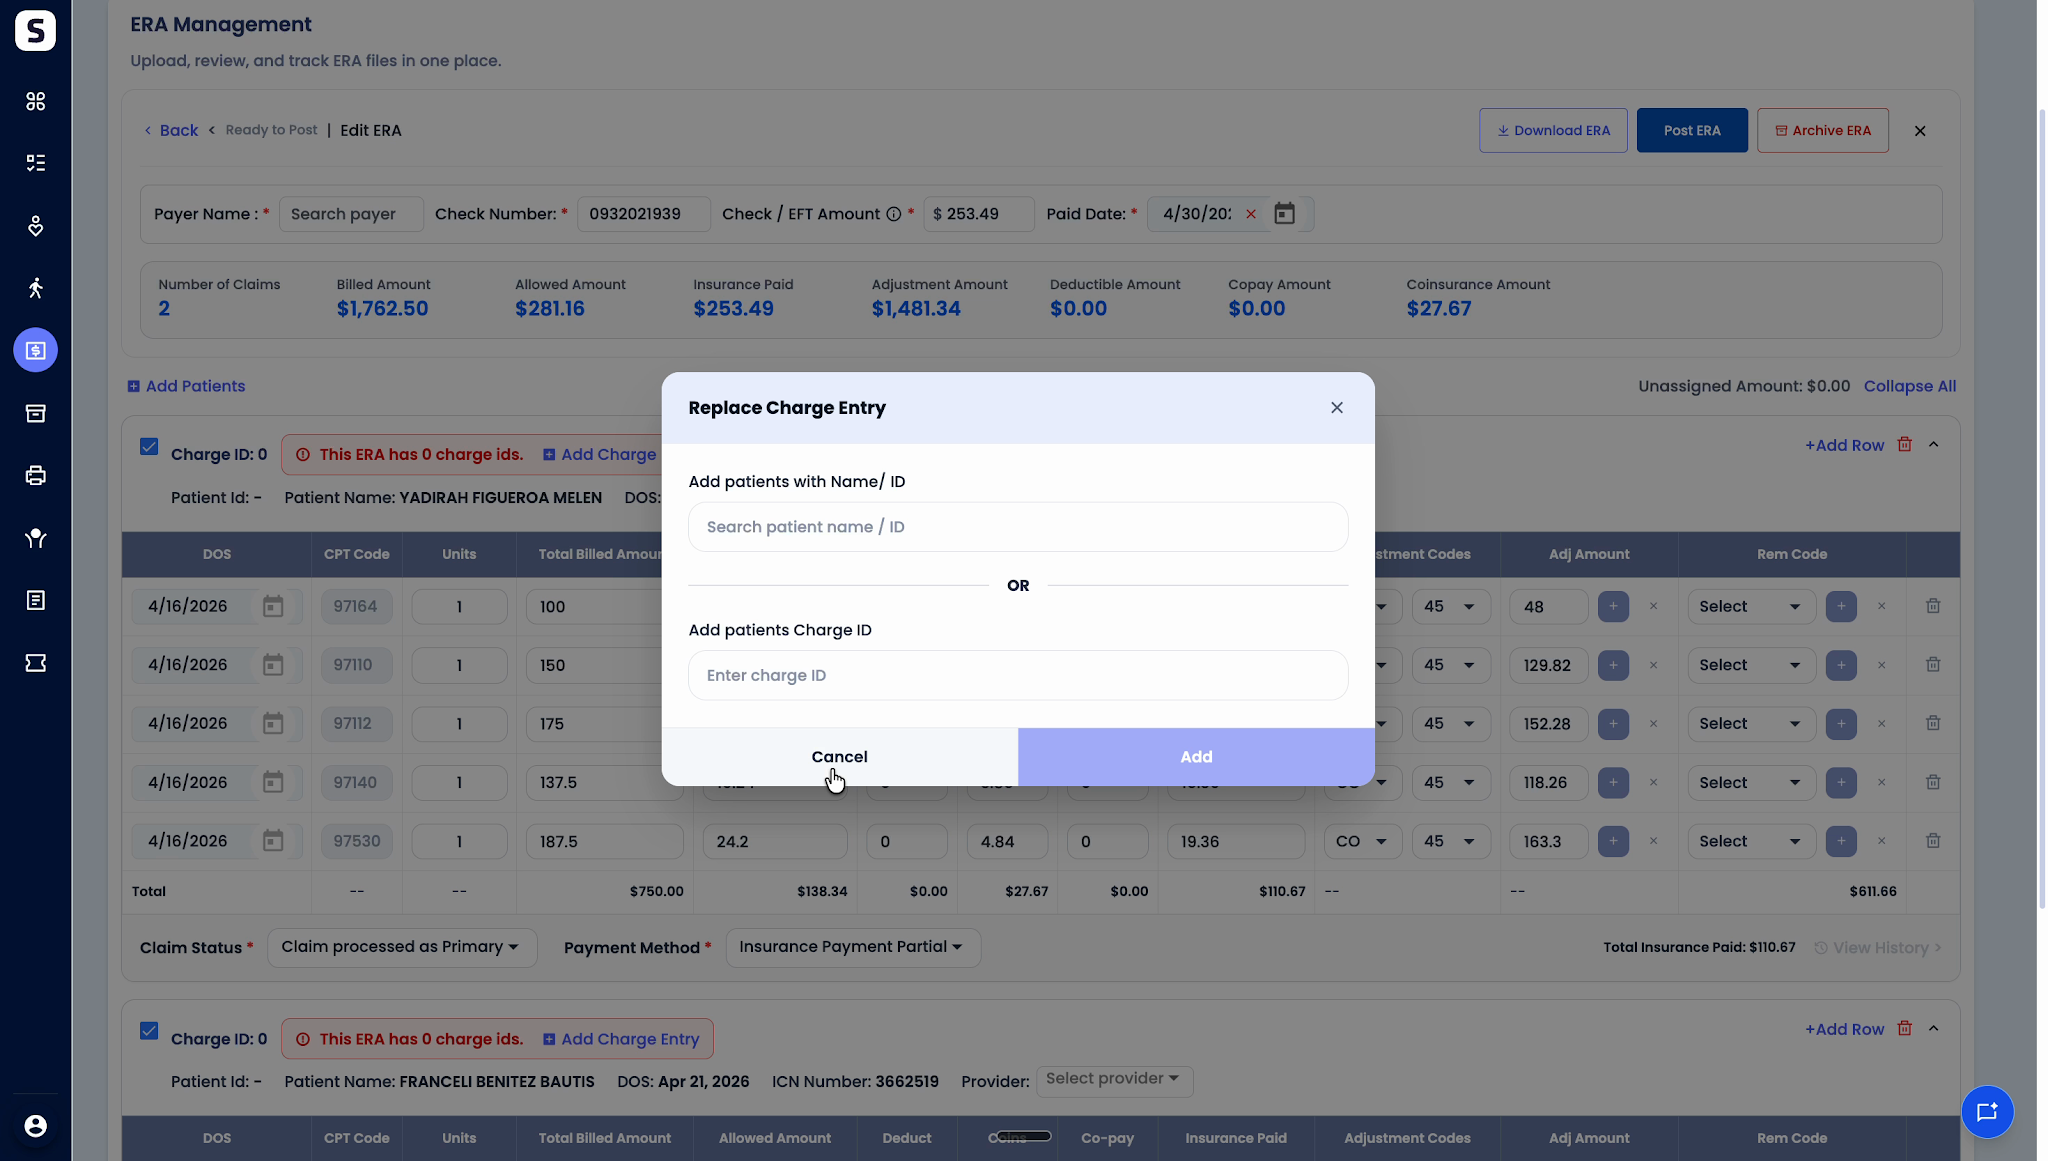
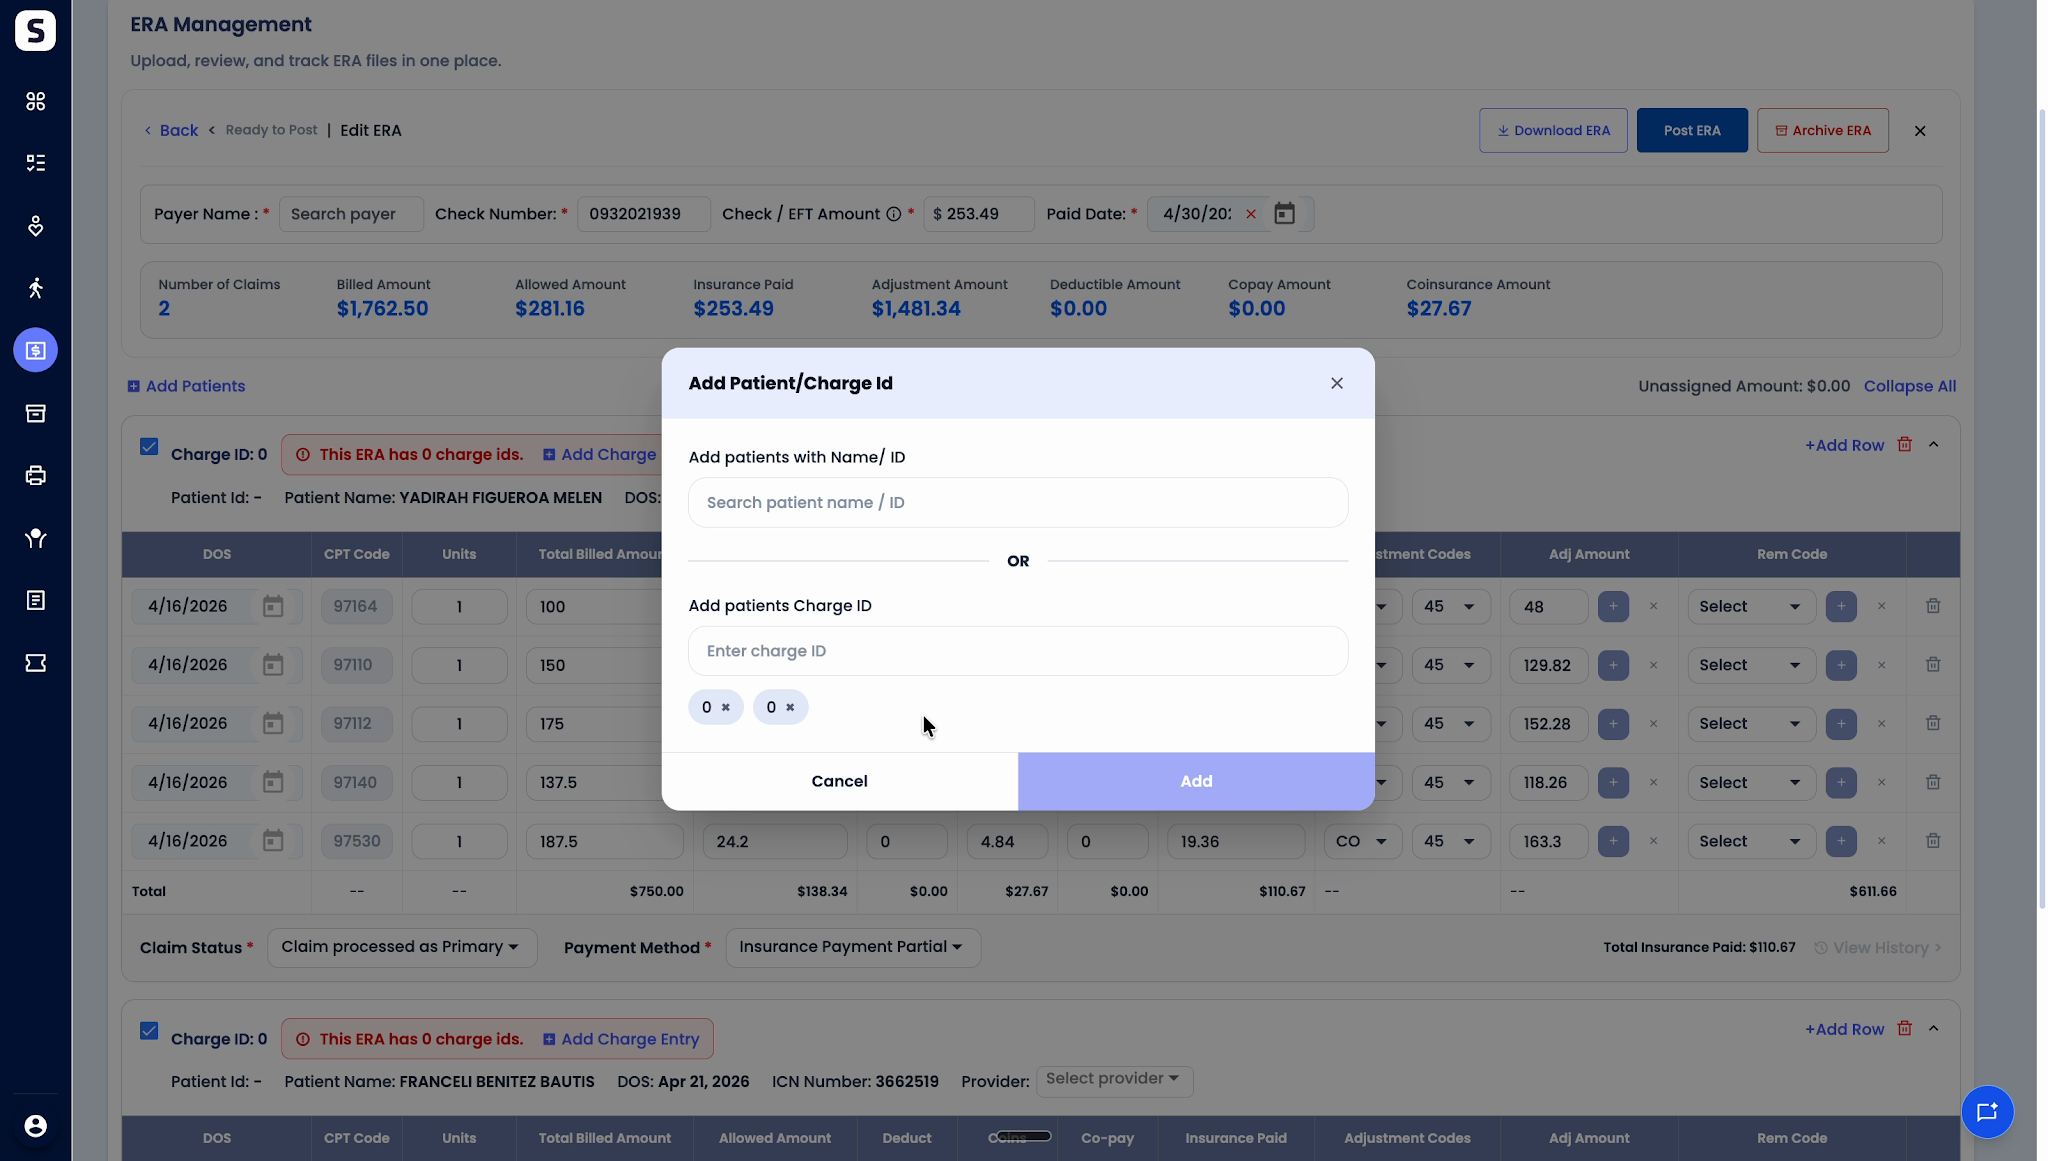
Step 4: Add a charge ID if necessary. Search by patient name or charge ID to assign or add a claim.

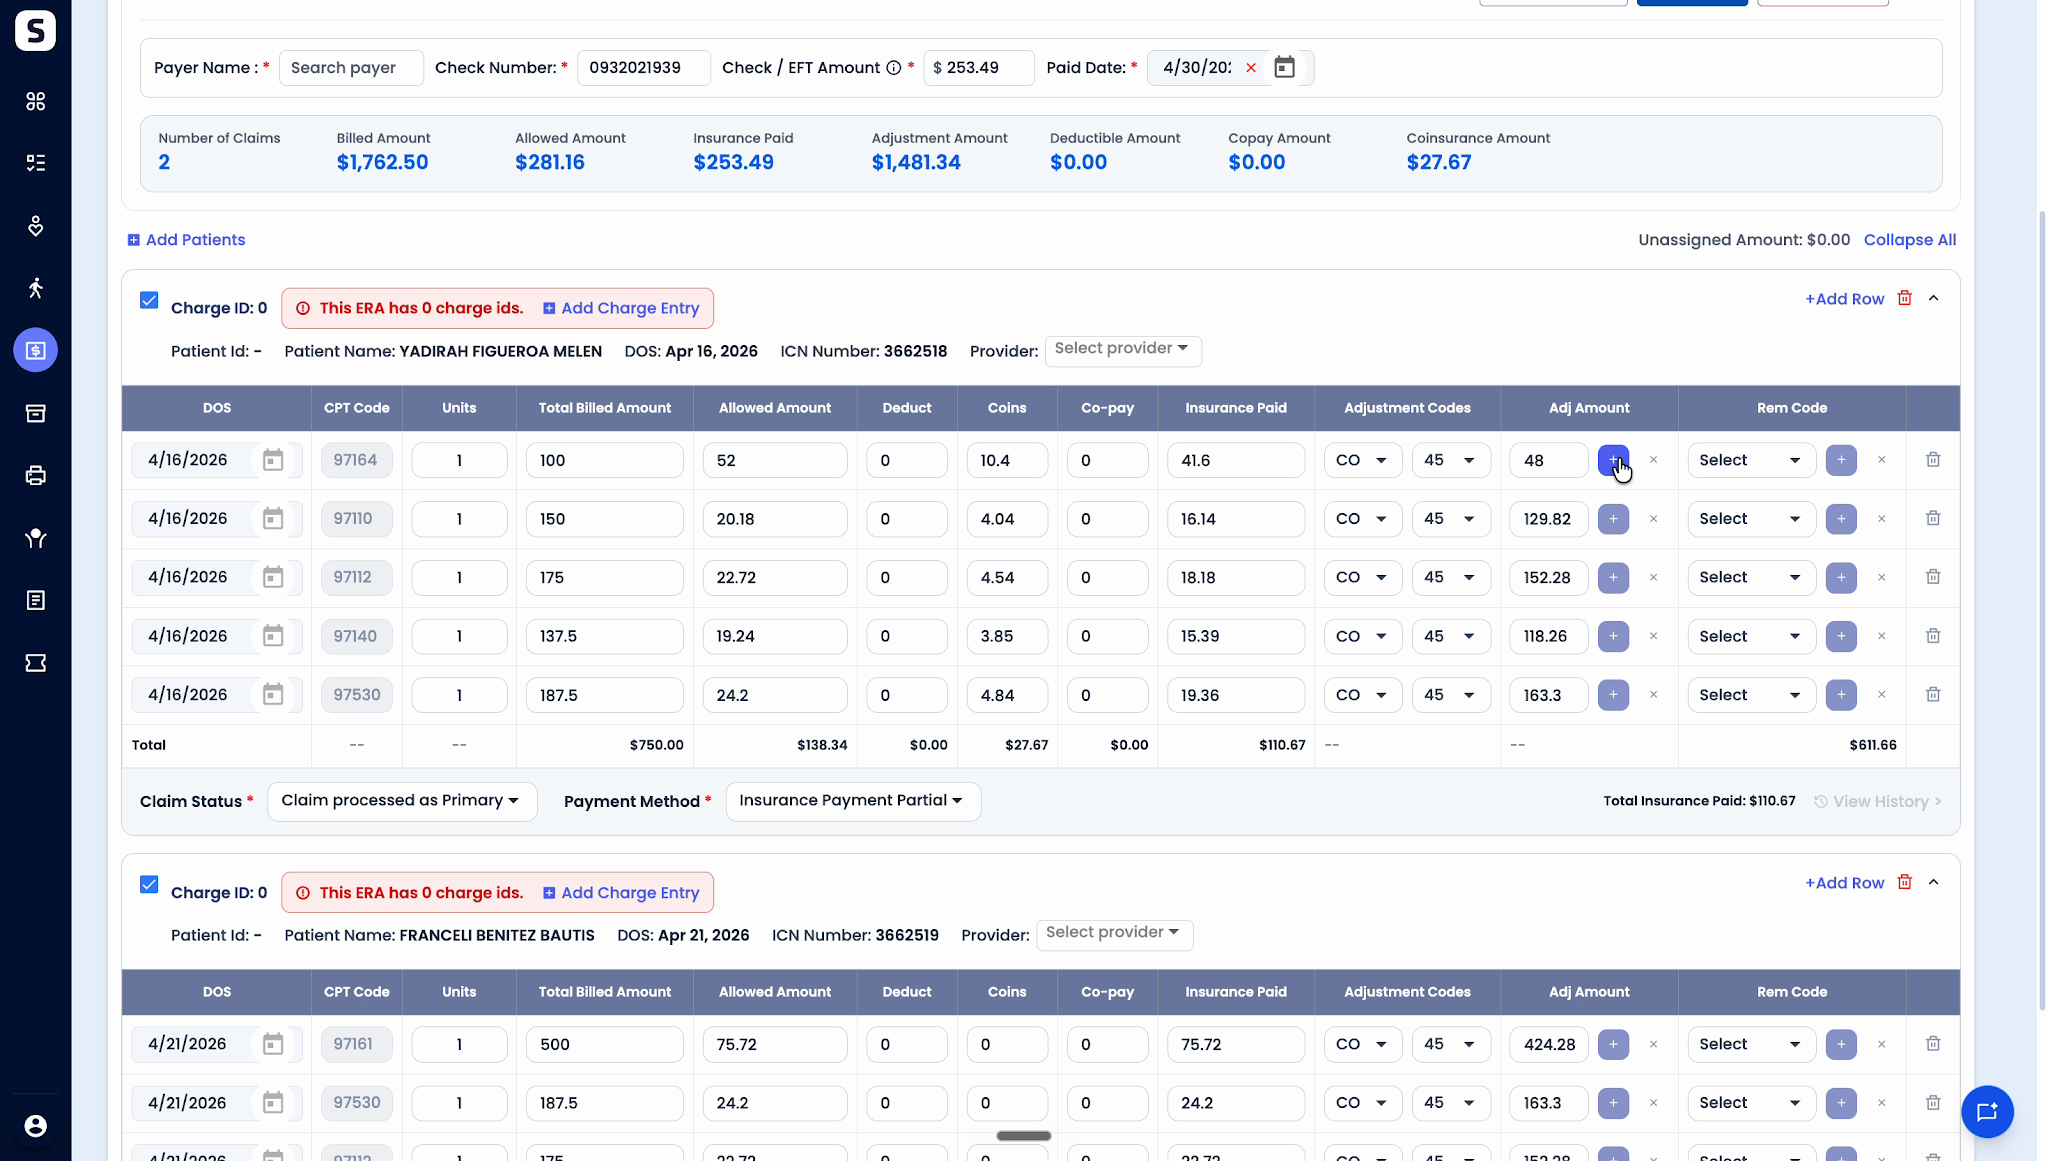
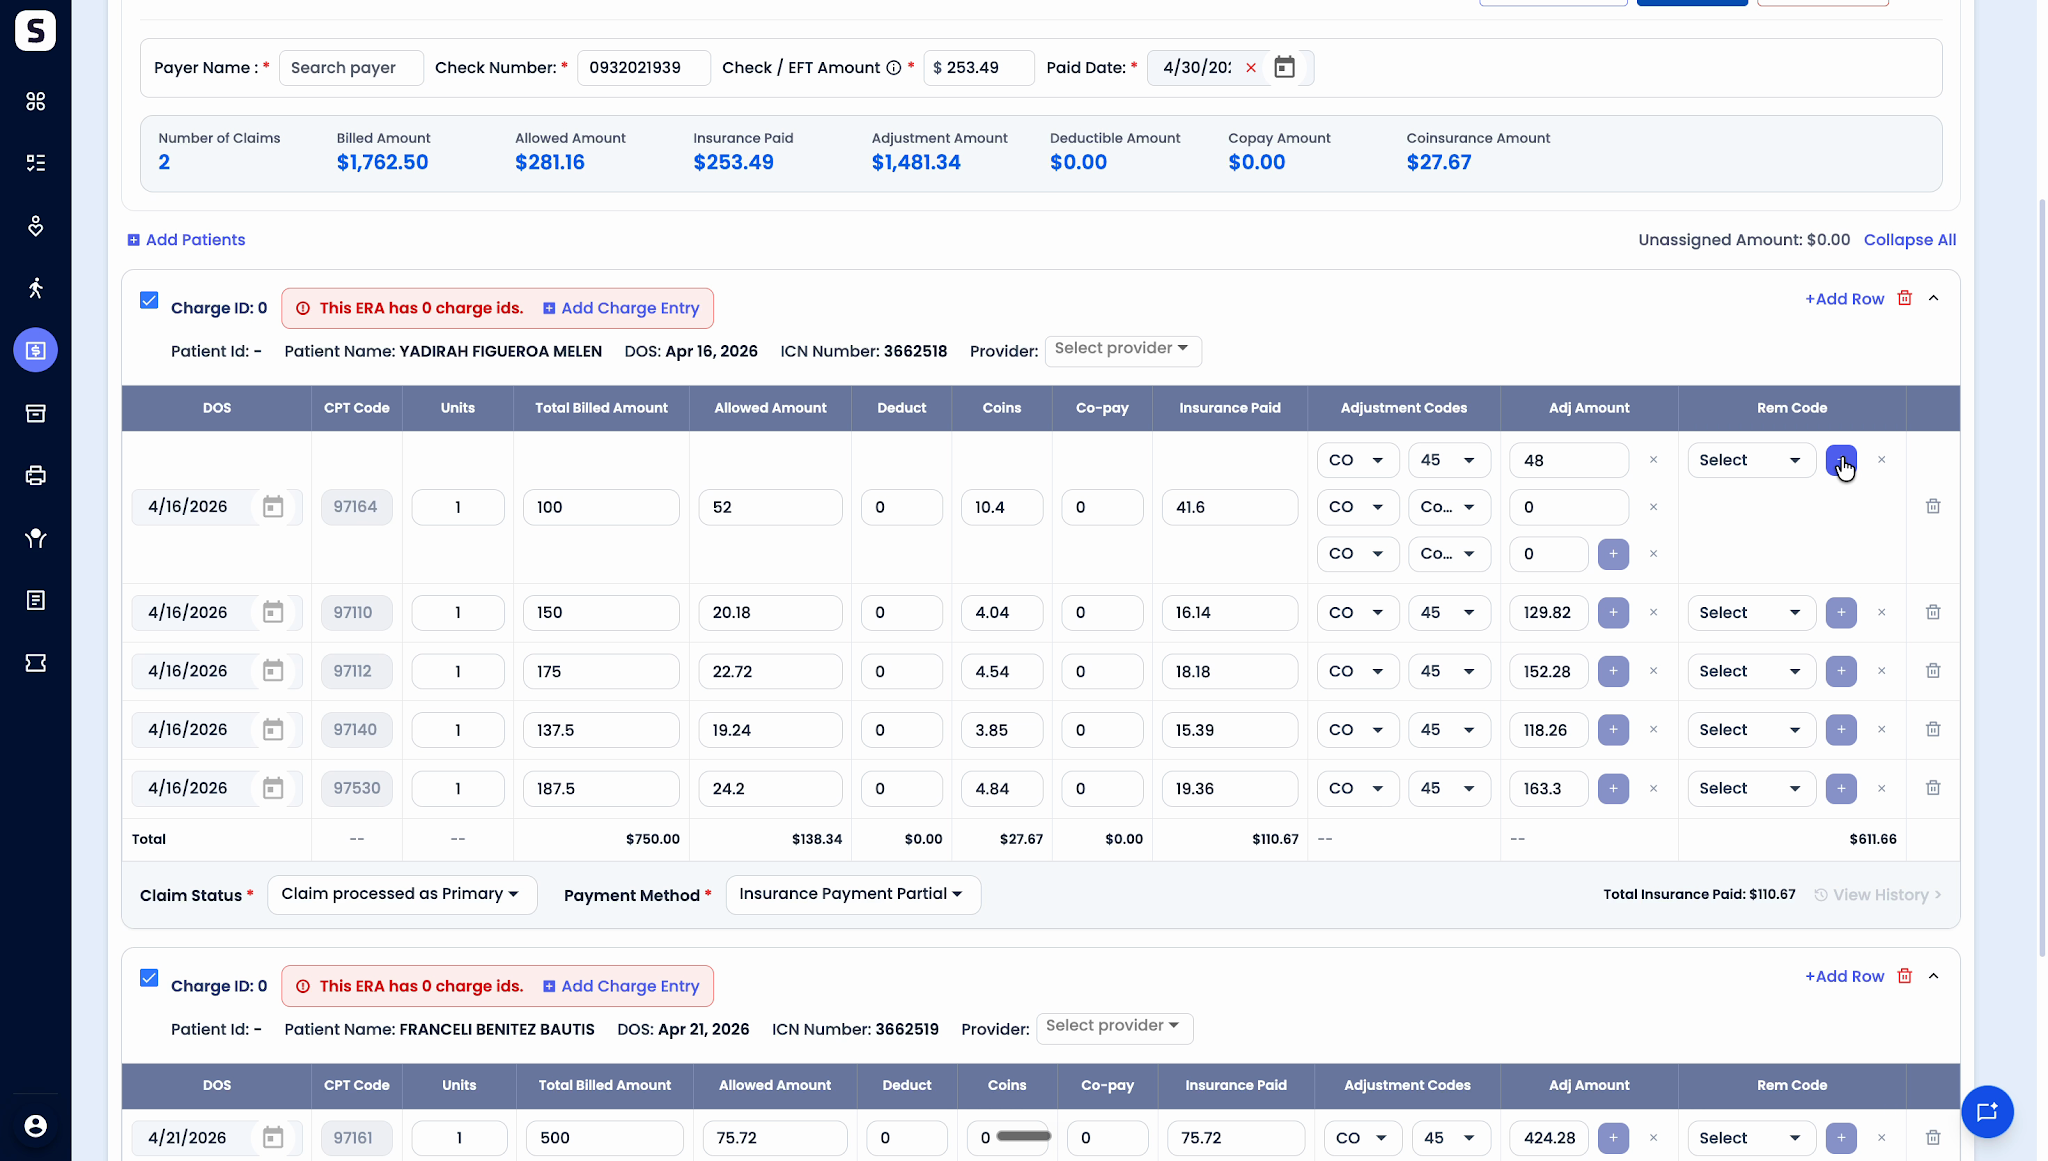
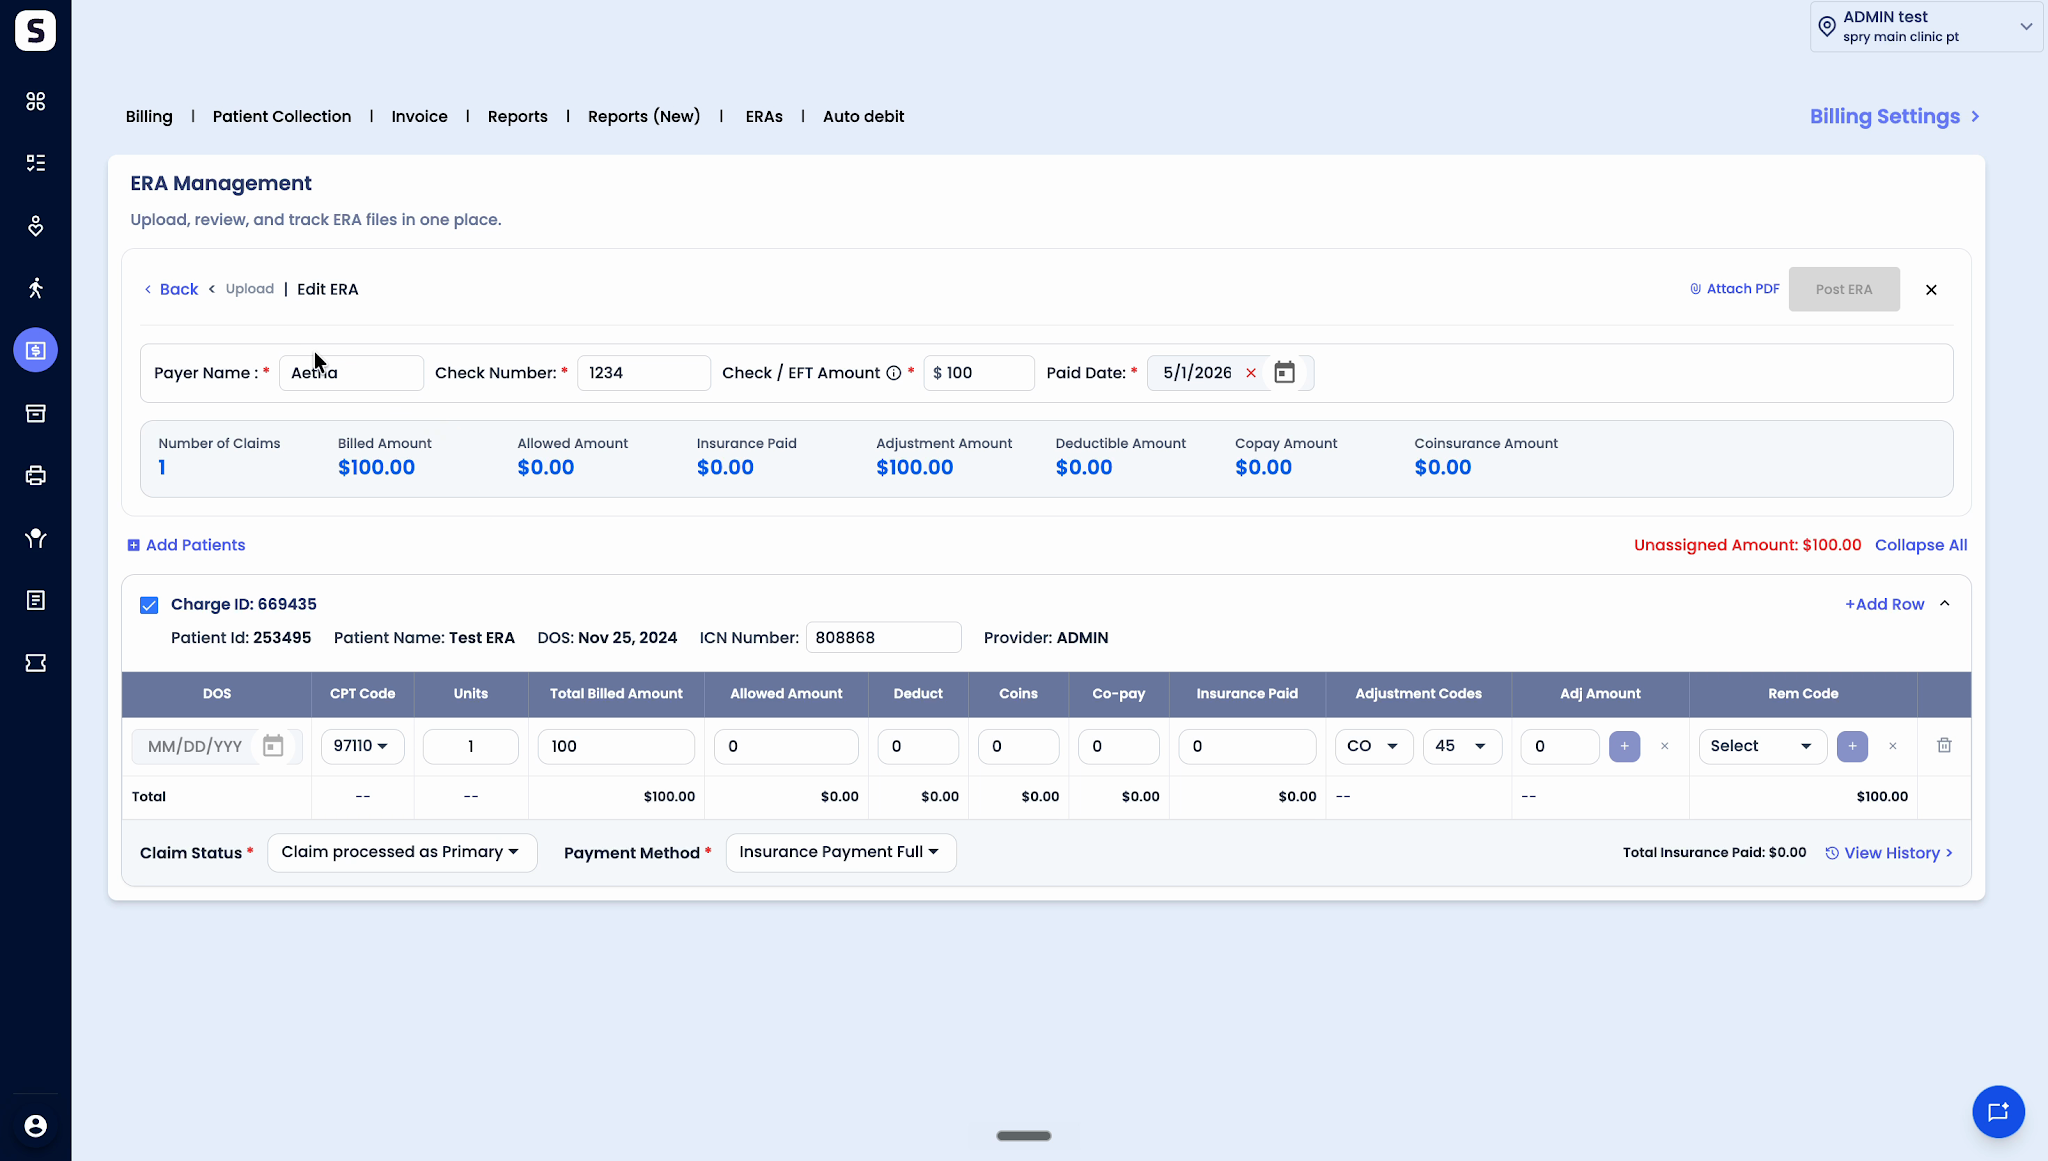
Step 5: Edit claim details like allowed amount, deductible, coinsurance, copay, and insurance payment. Add adjustment codes or multiple remark codes as required.
Step 6: Remove unnecessary charge lines using Delete or add new ones with Add Row.

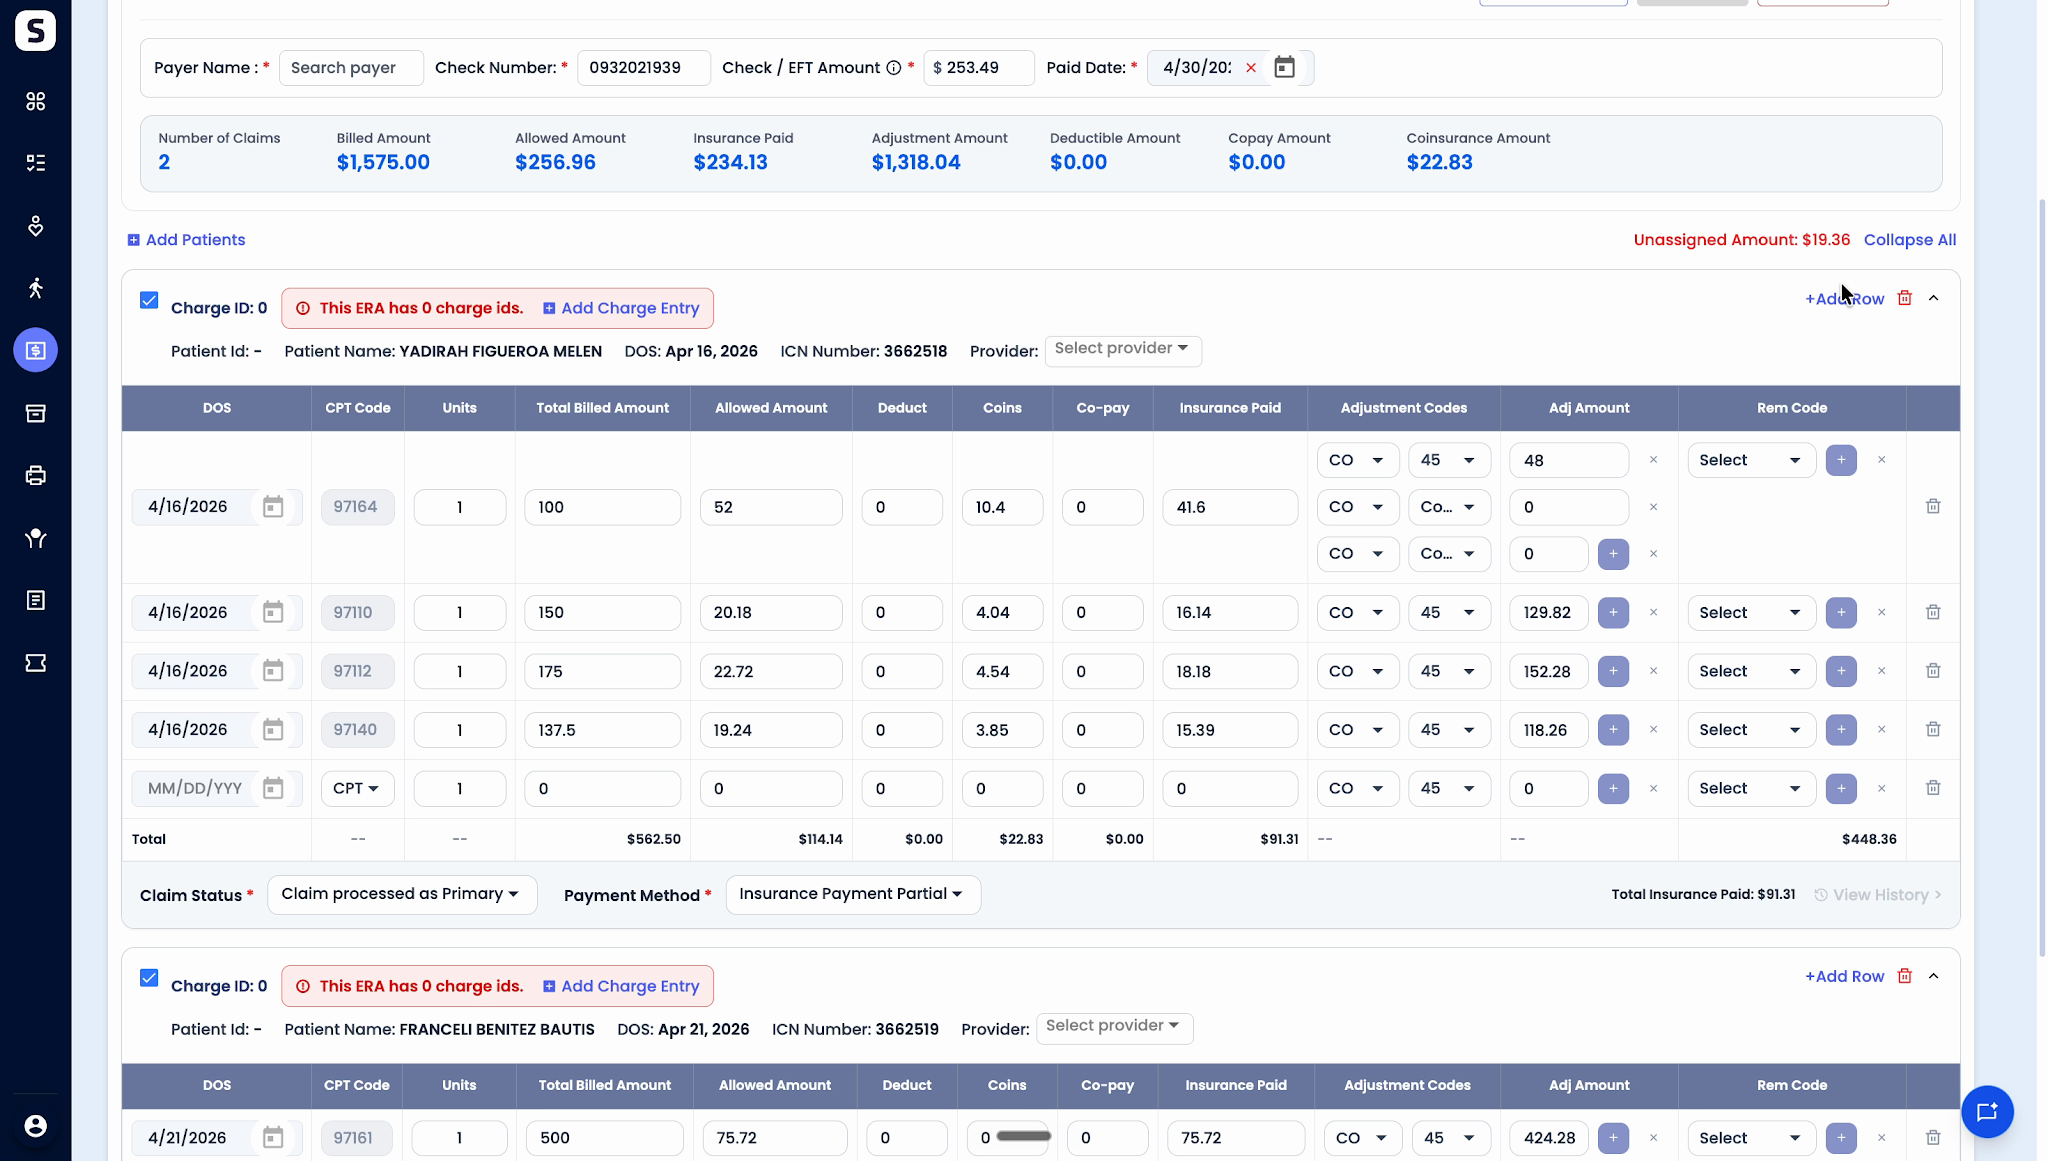
Step 7: Choose the process type (primary, secondary, tertiary, denied, or reversal). Manage payments and take backs.

Step 8: Expand or collapse claim details as needed. The Post ERA button appears once all validations pass.

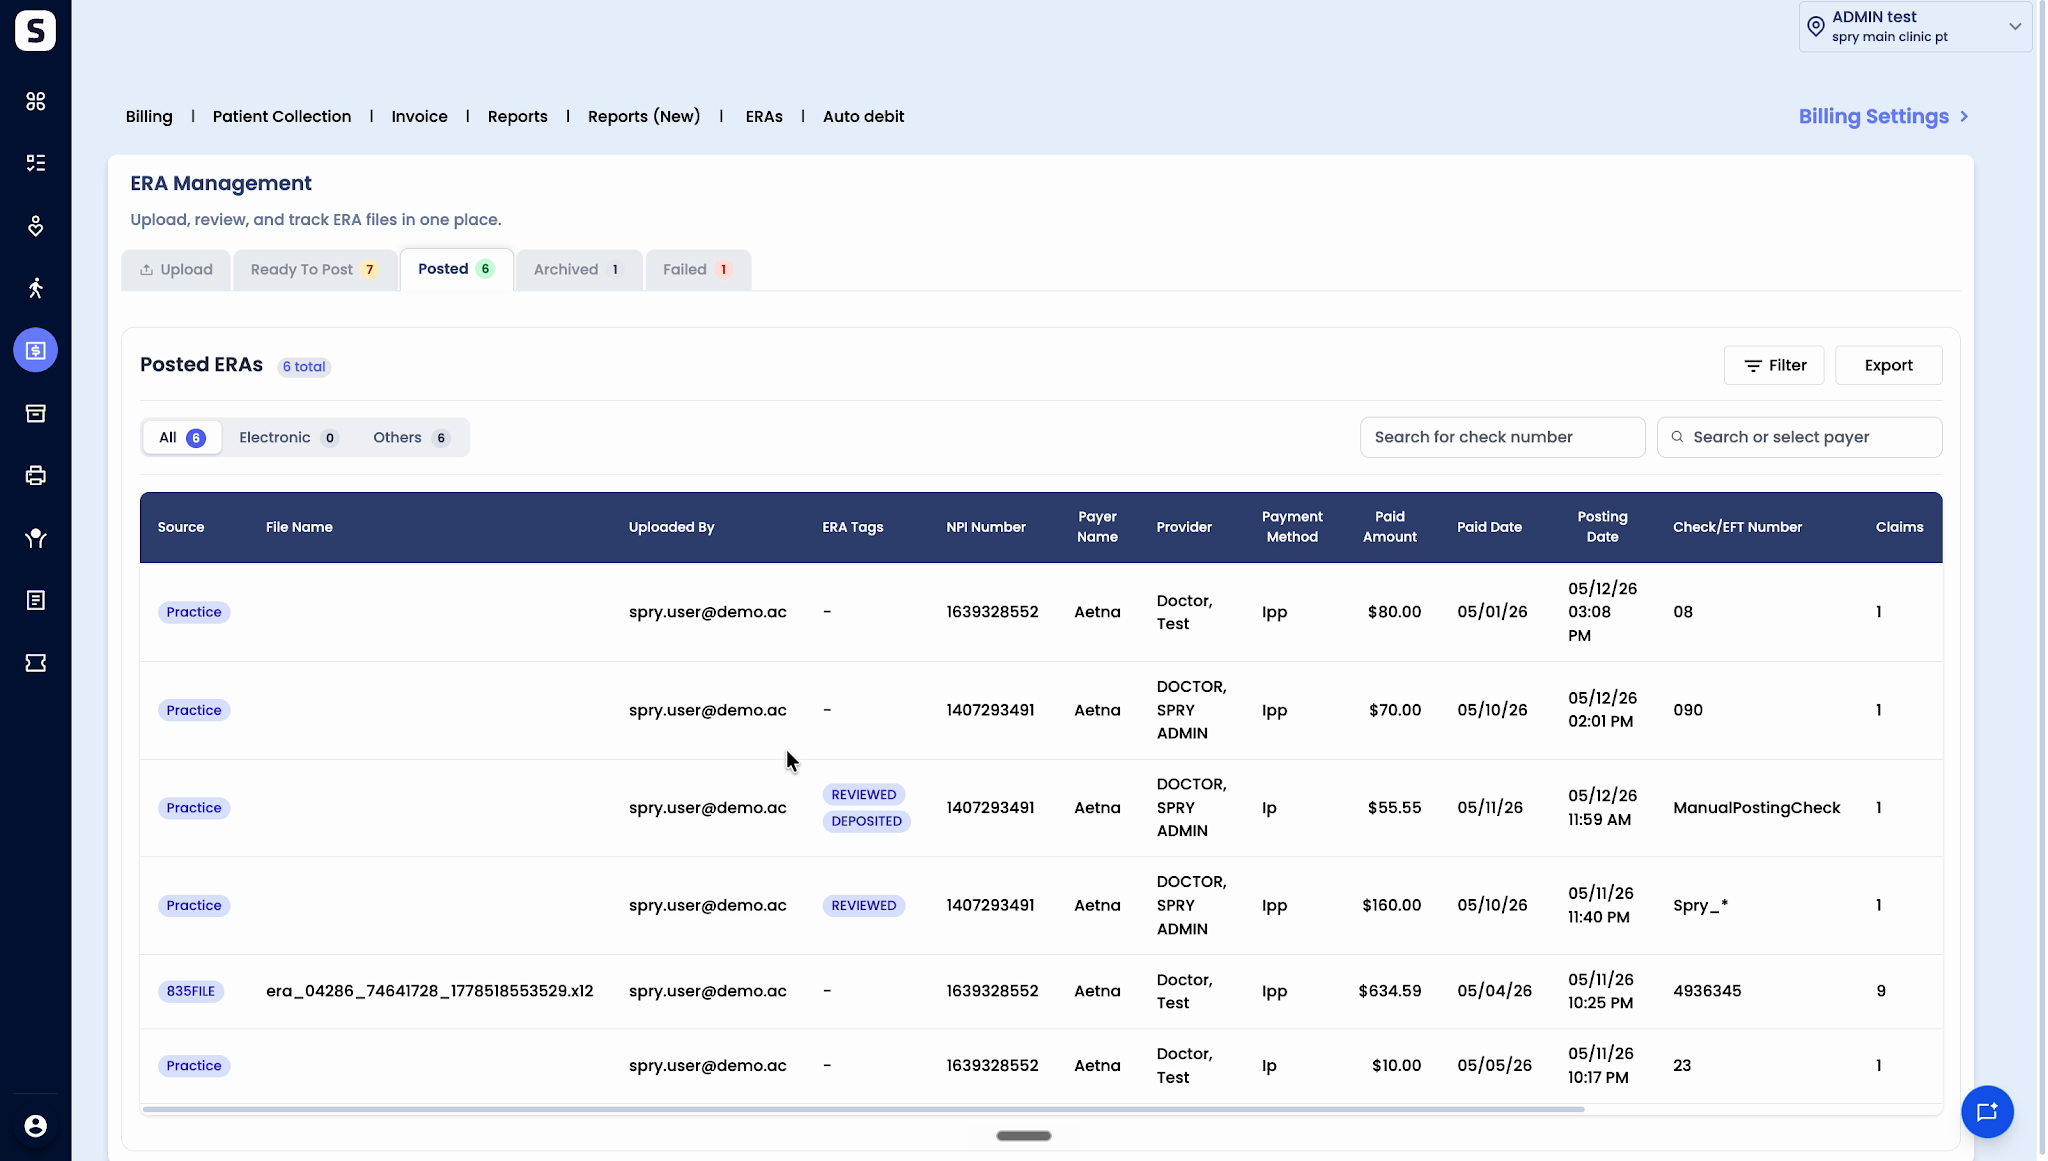
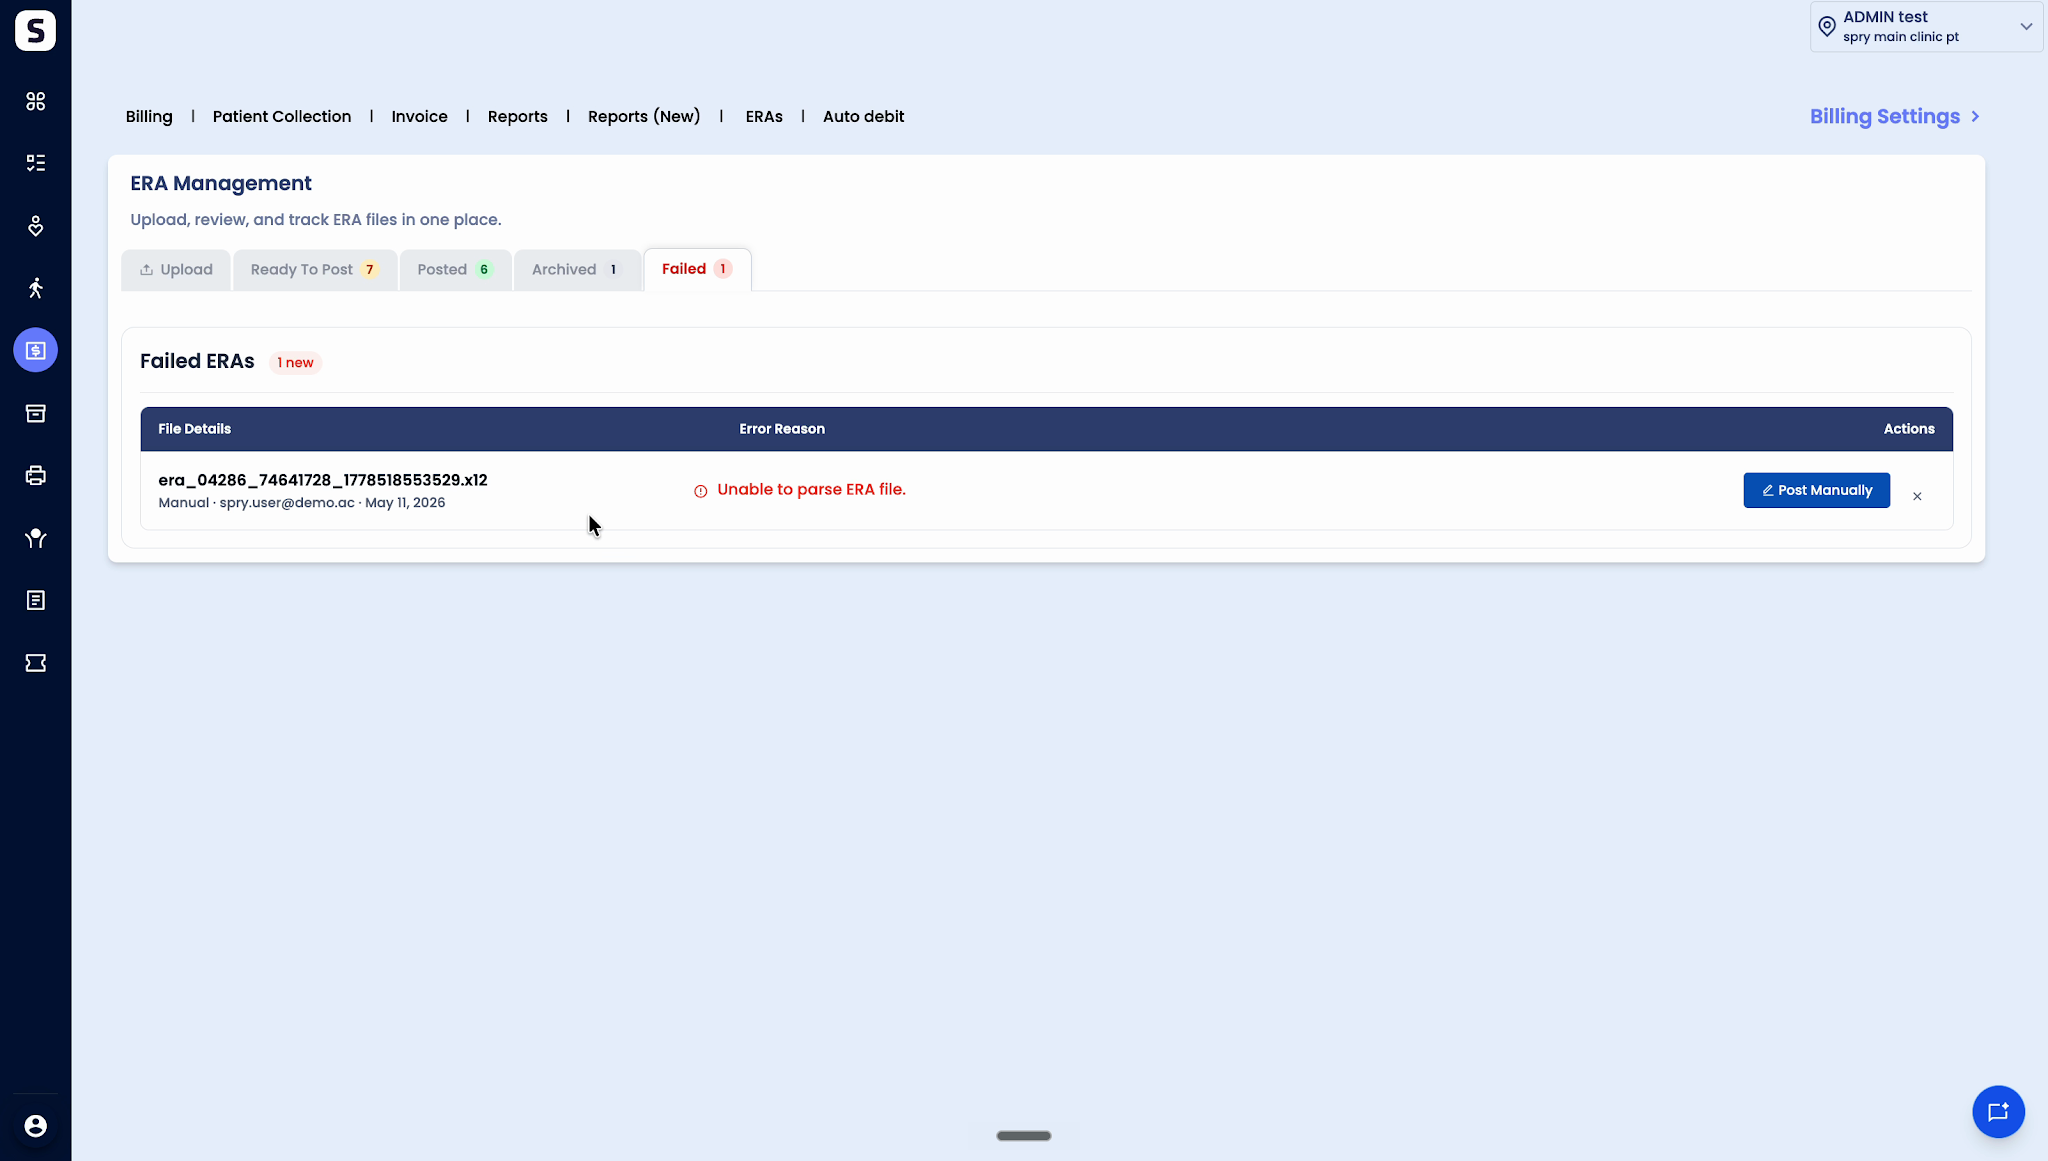
Step 9: Once posted, view or edit ERAs from the Posted screen. Failed postings appear under Failed.
Manual ERA Posting
Step 1: Go to the Upload screen and select Manual Posting.

Step 2: Fill in the manual posting form. Add payer name, paid date (automatically used as deposit date), check number, payment type, amount, provider, and payment method.

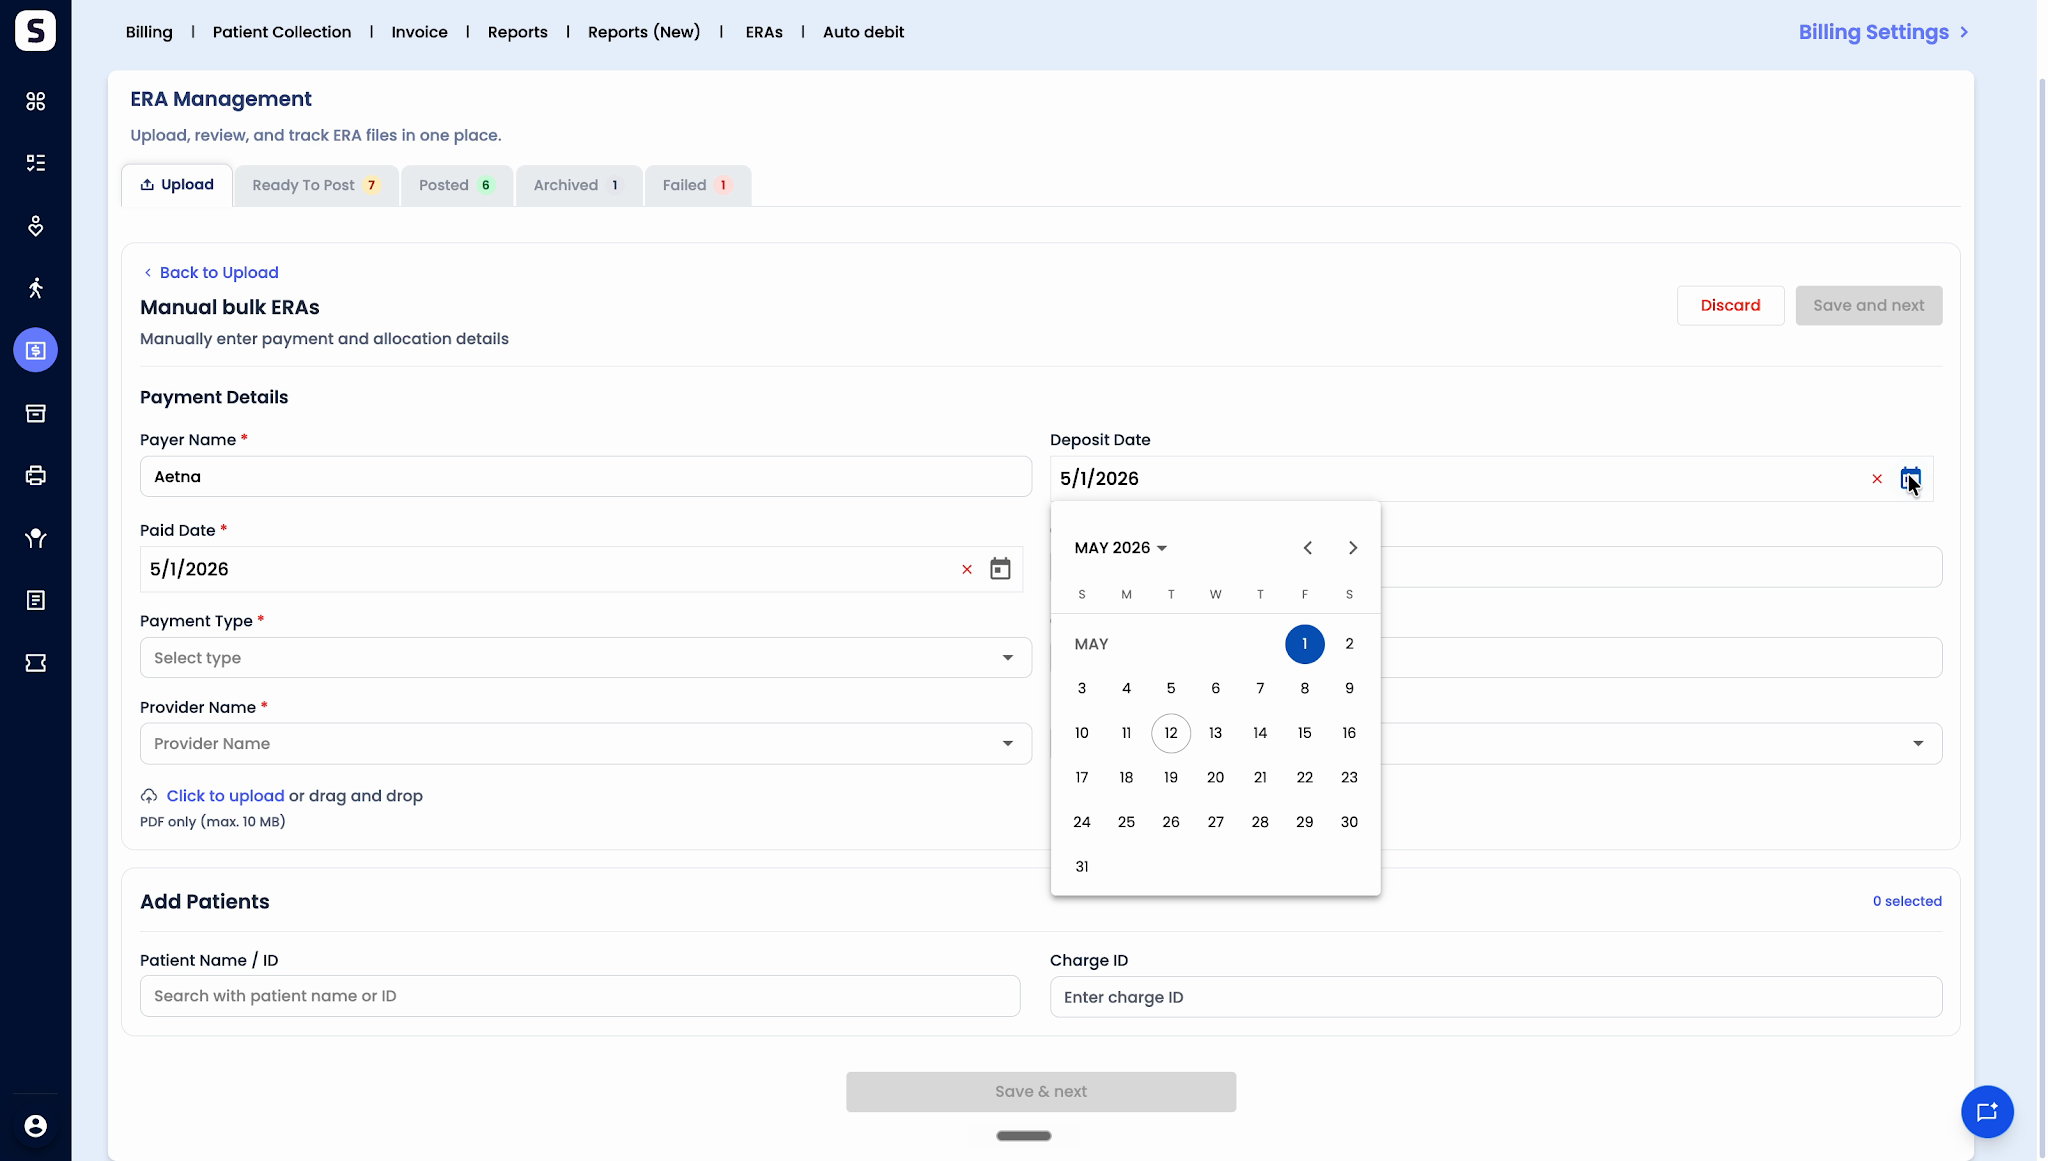
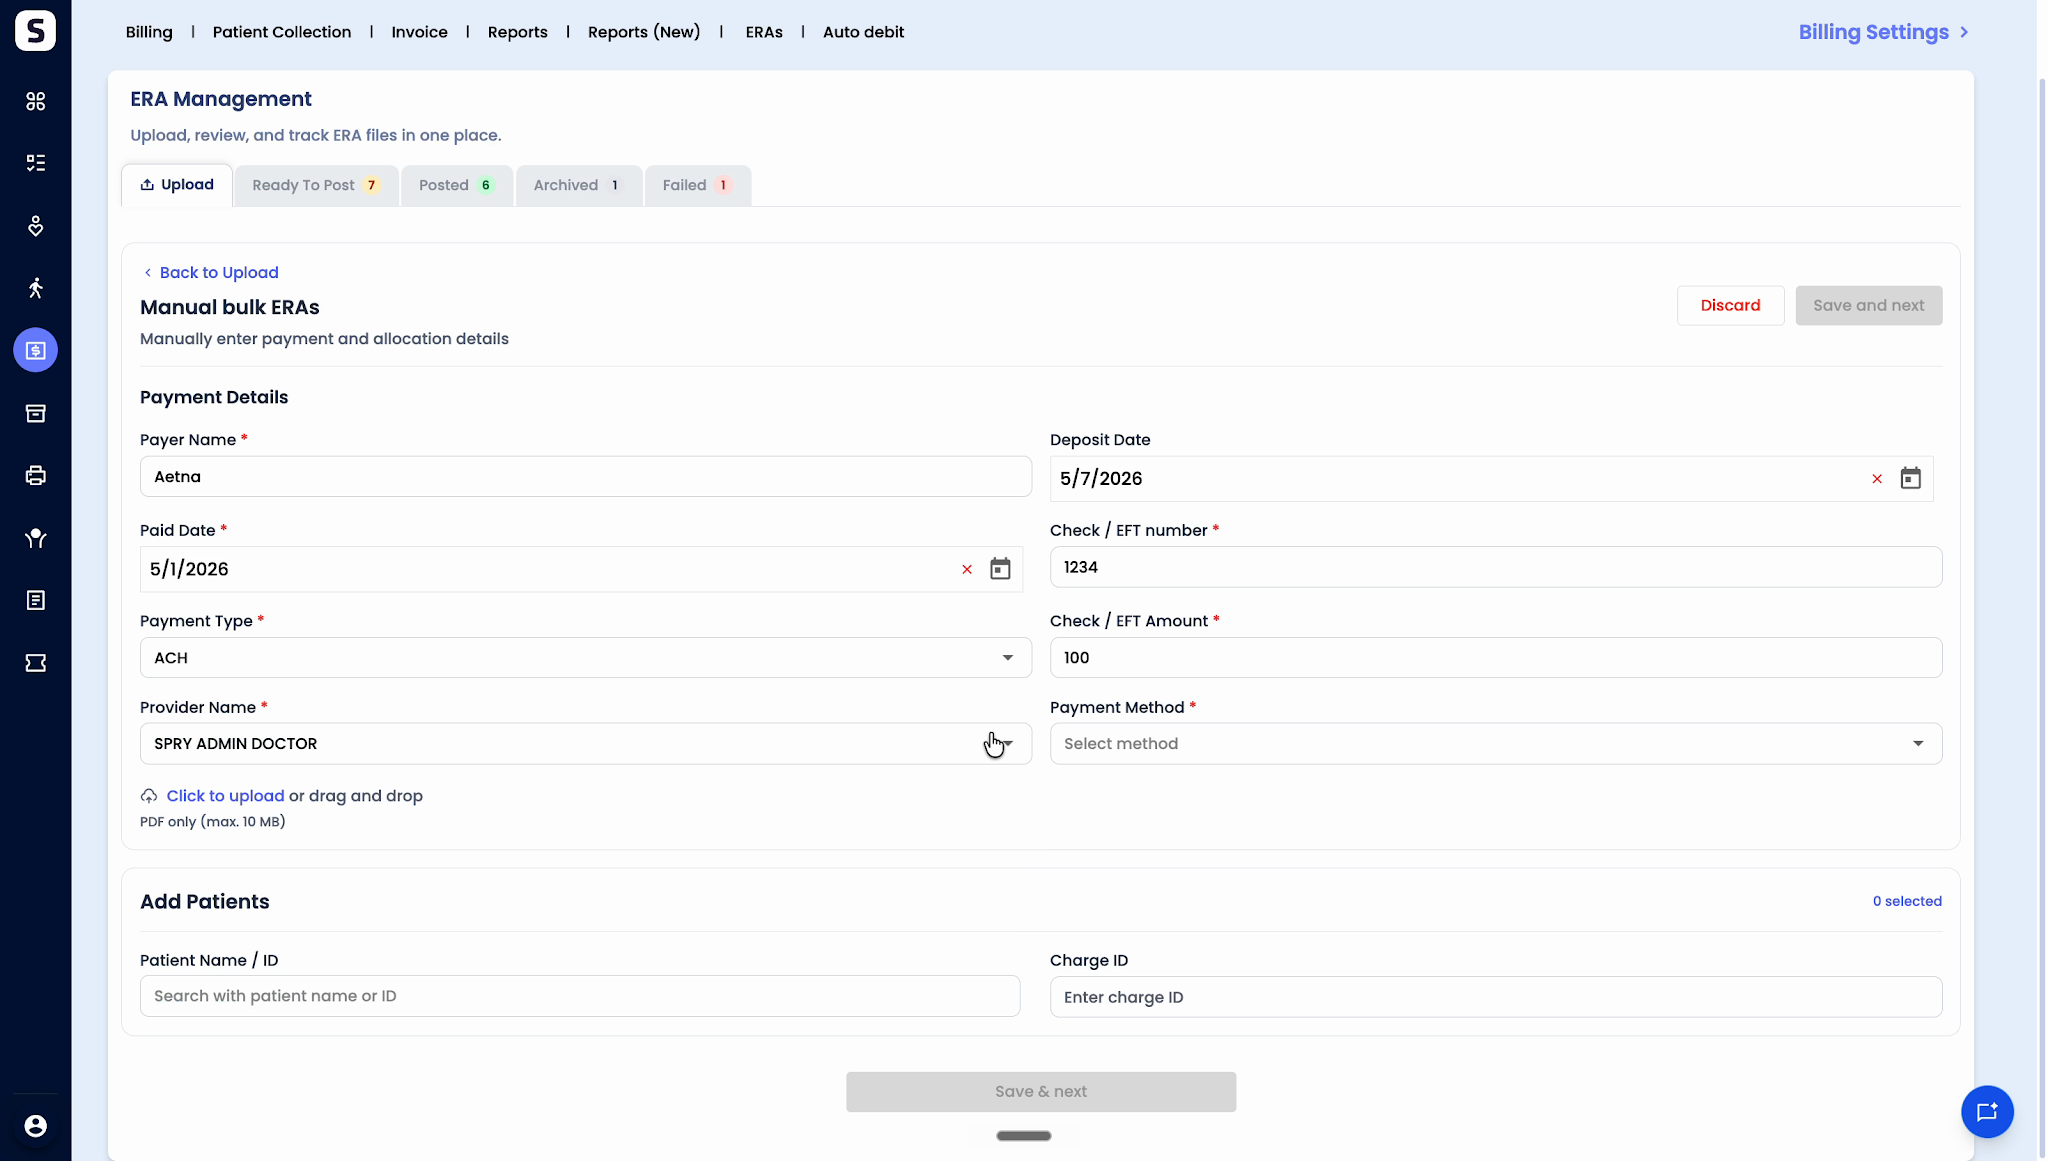
Step 3: Upload any supporting documents, search patient name, and select charge ID.
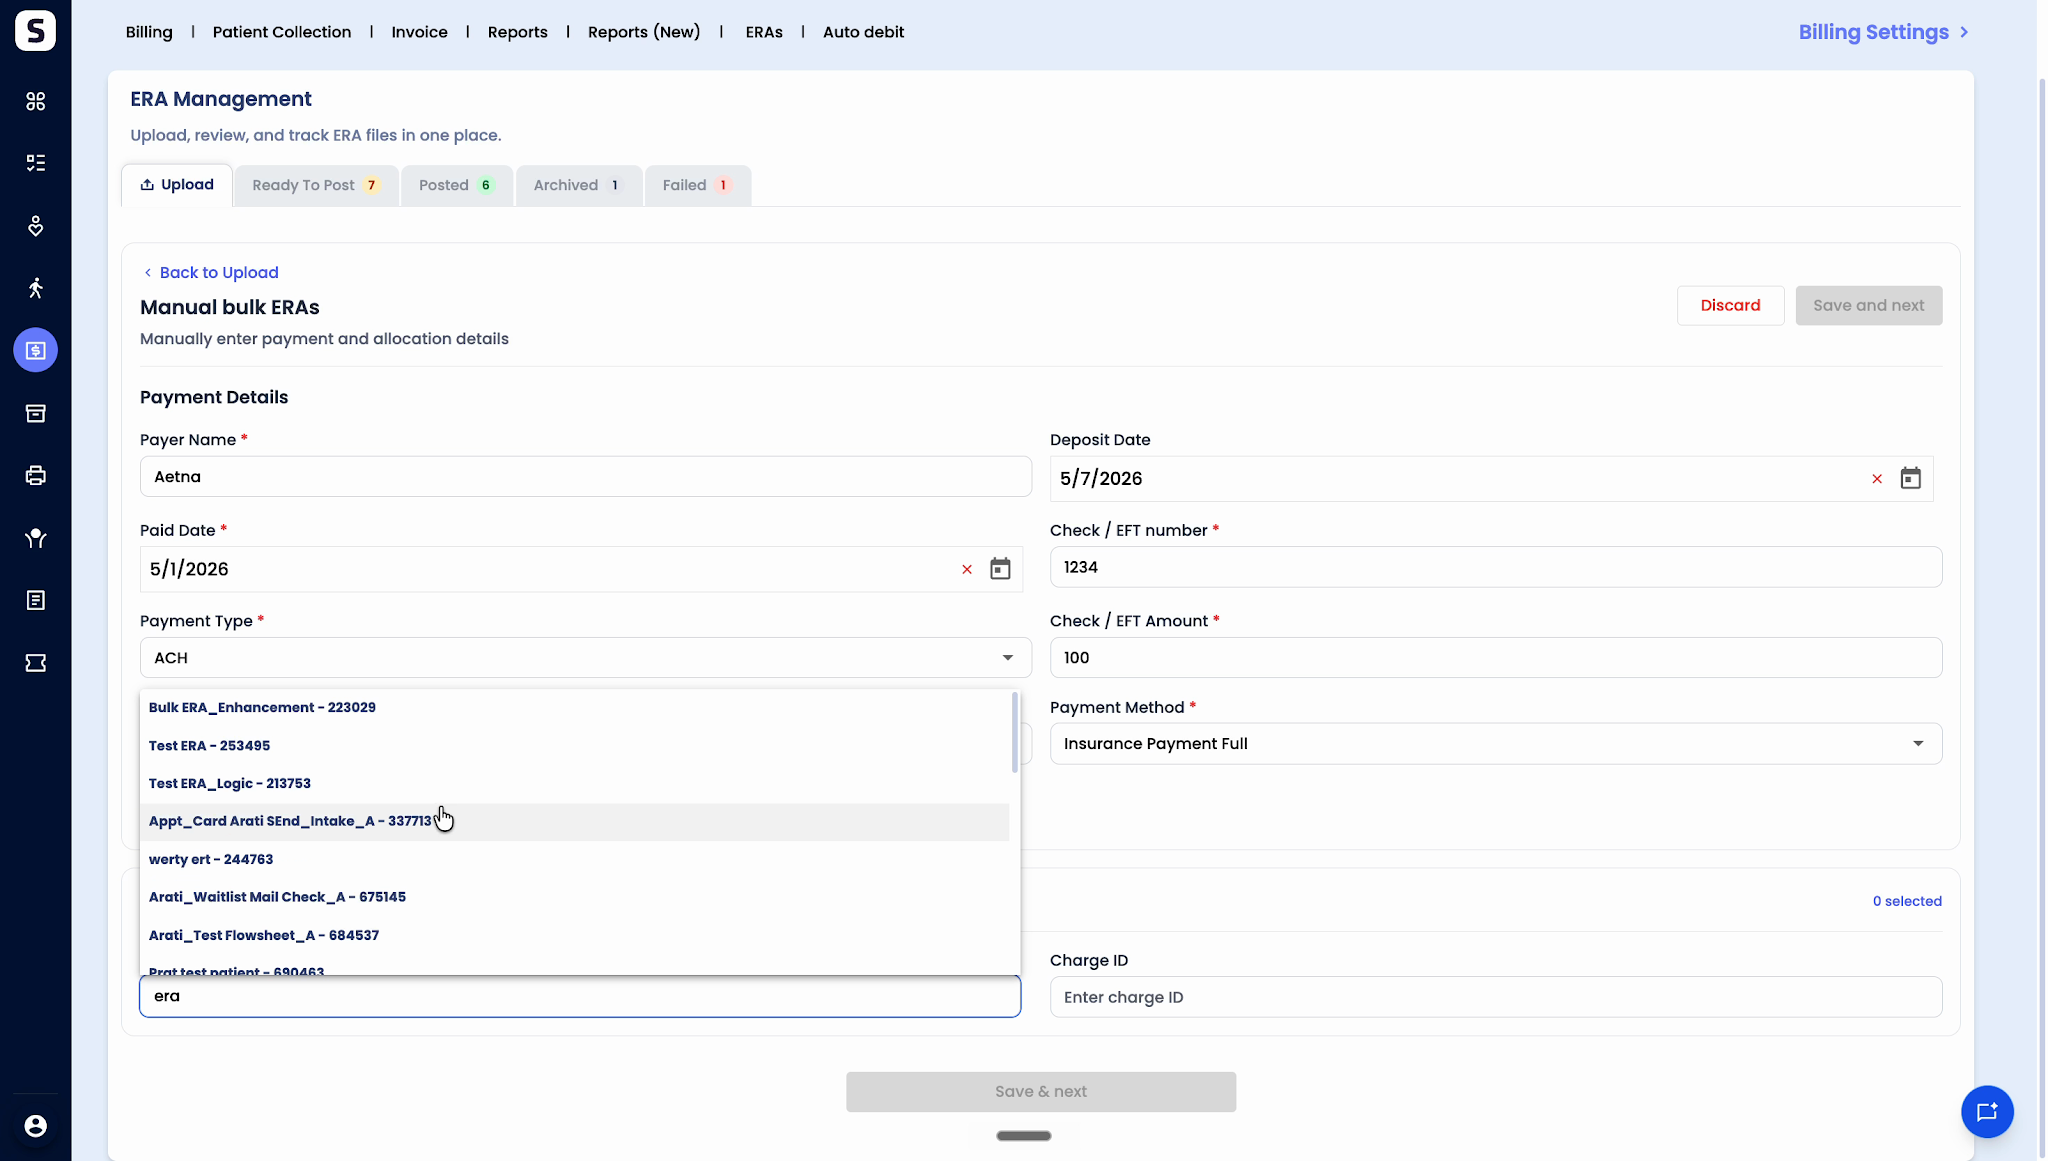
Step 4: On the next screen, edit or add claims, then post the ERA once all validations are complete.

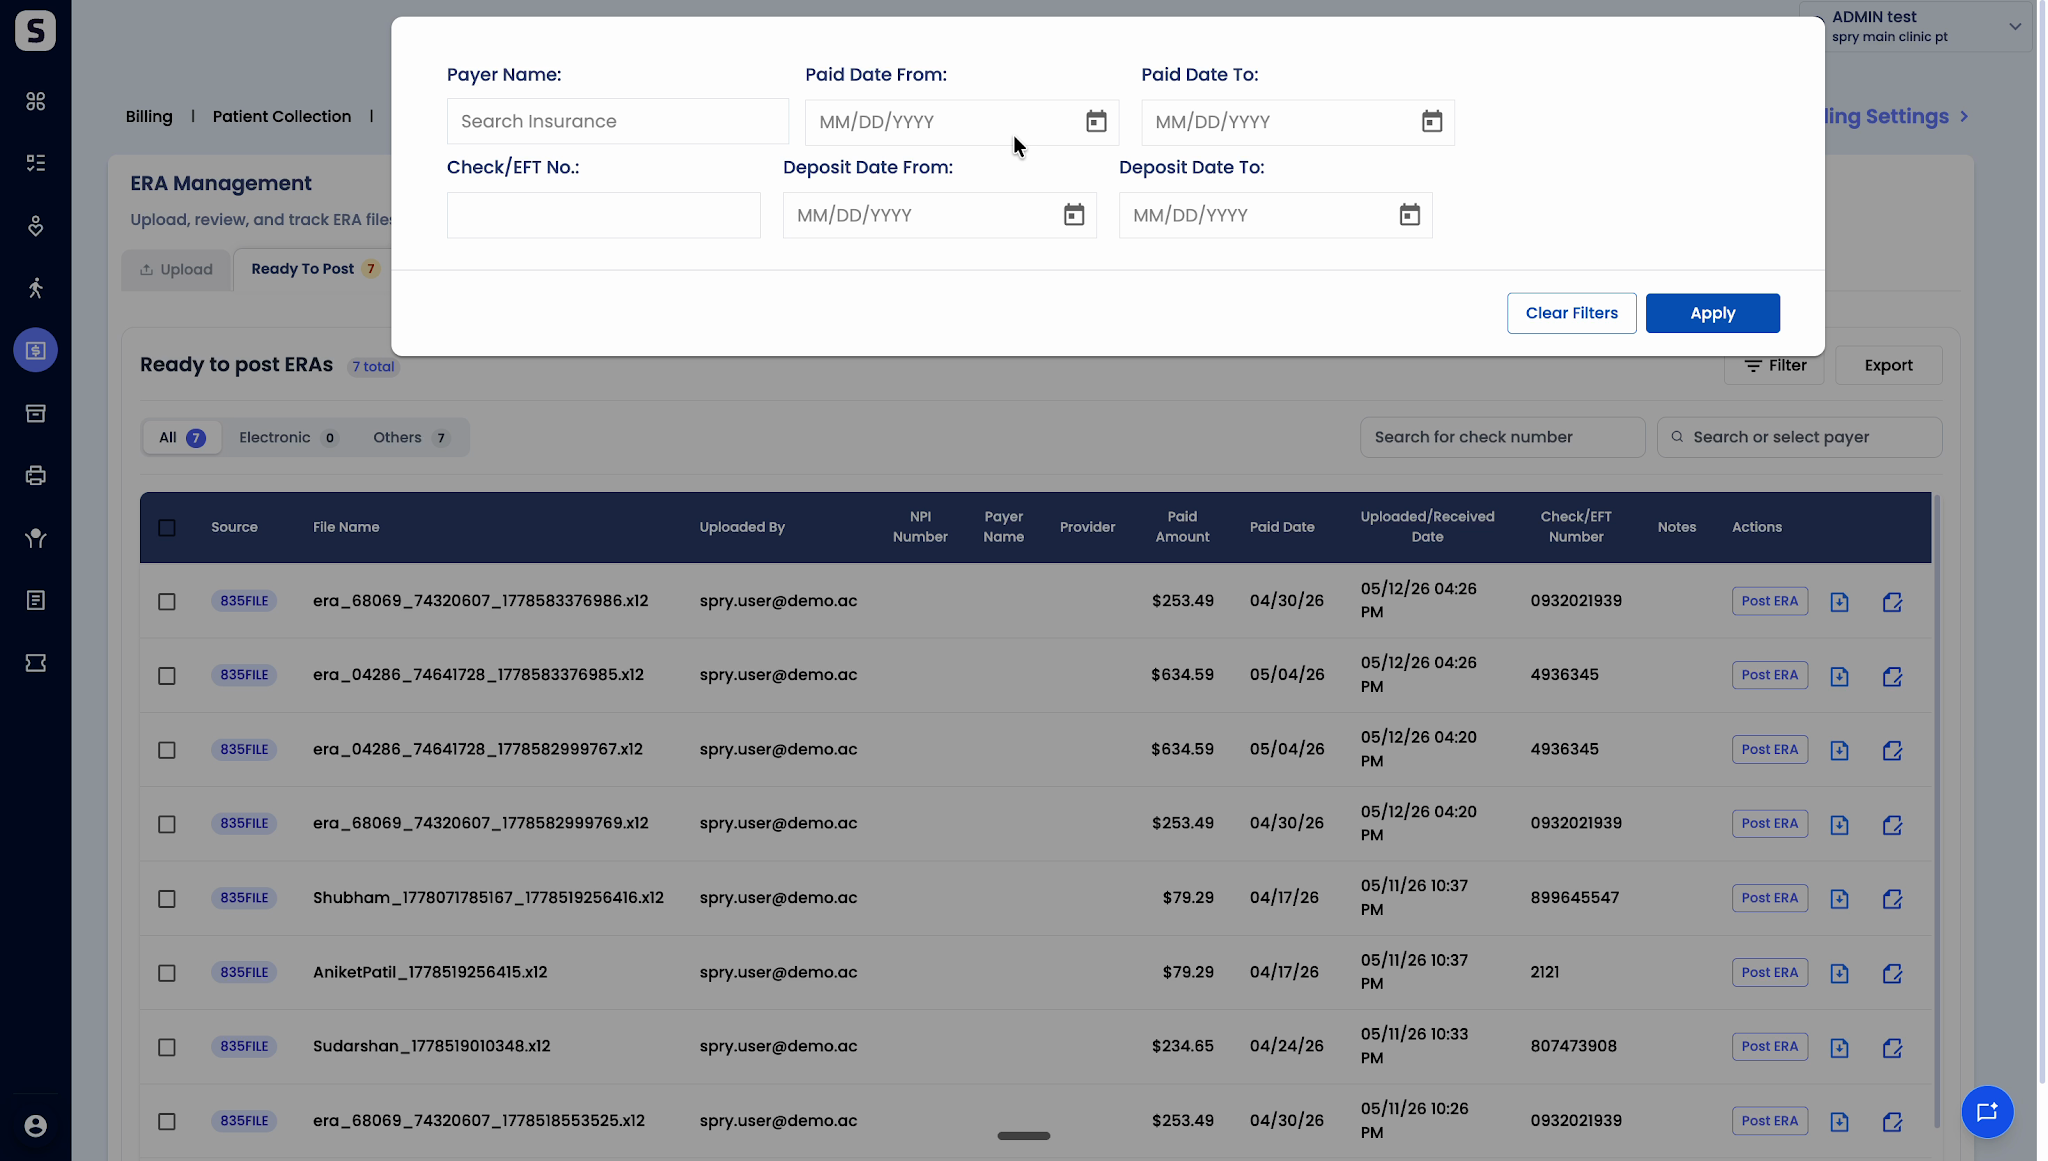
Using Quick Filters
Step 1: Use filters like Payer Name, Paid Date, Check/EFT Number, Deposit Date, or quick search by check number or payer to find the ERA you need.
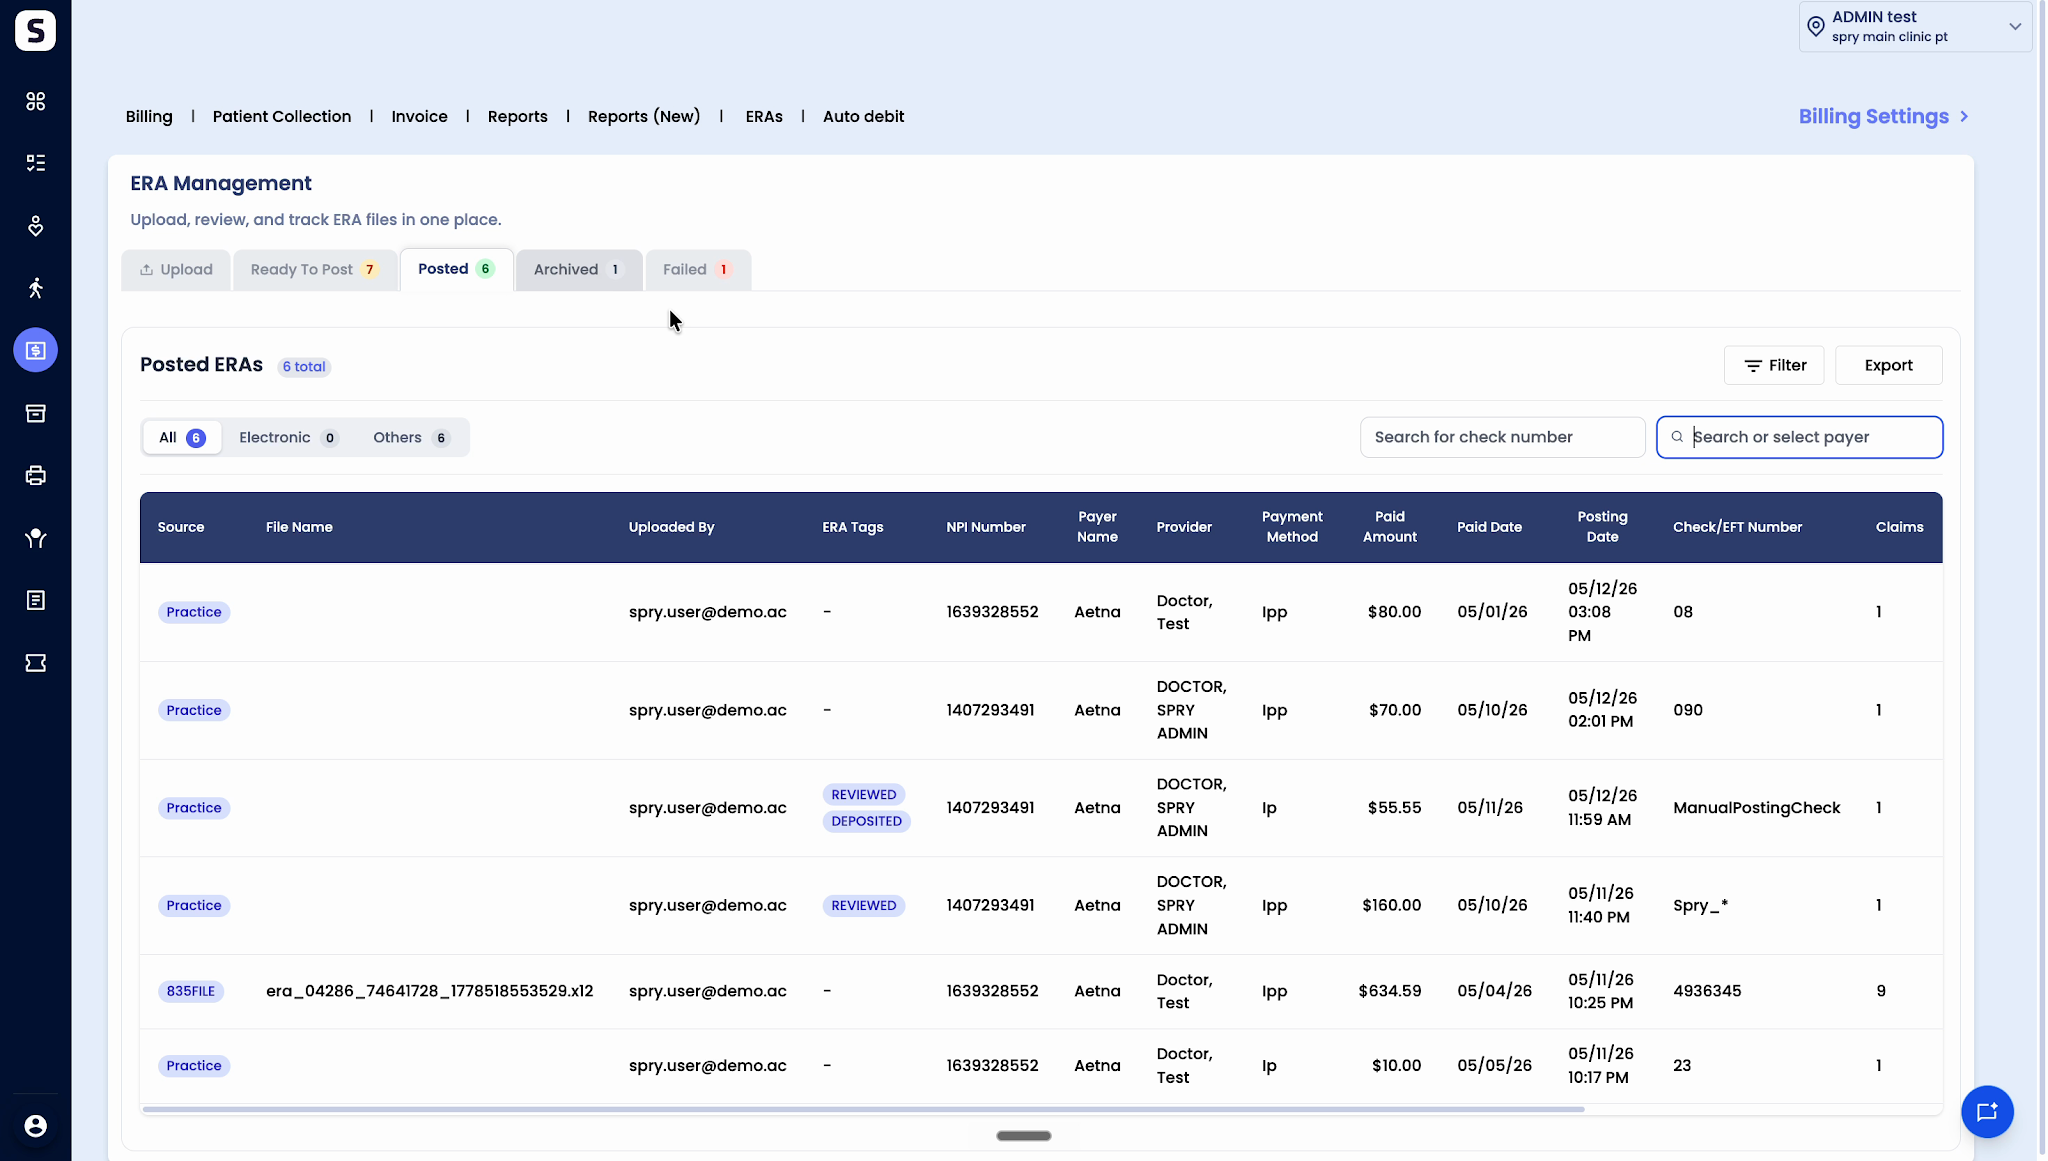
With this new ERA feature, all electronic remittances are organized in one place—you can upload, review, edit, post, and archive with ease. Use quick filters to find specific ERAs and keep your billing workflow moving smoothly.