
Patient Tagging System Introduction
Patient Tagging System Introduction
The new patient tagging system makes it easy to organize, identify, and manage patients by adding custom tags at both the patient and case levels. Tags help you track important details and streamline patient care.
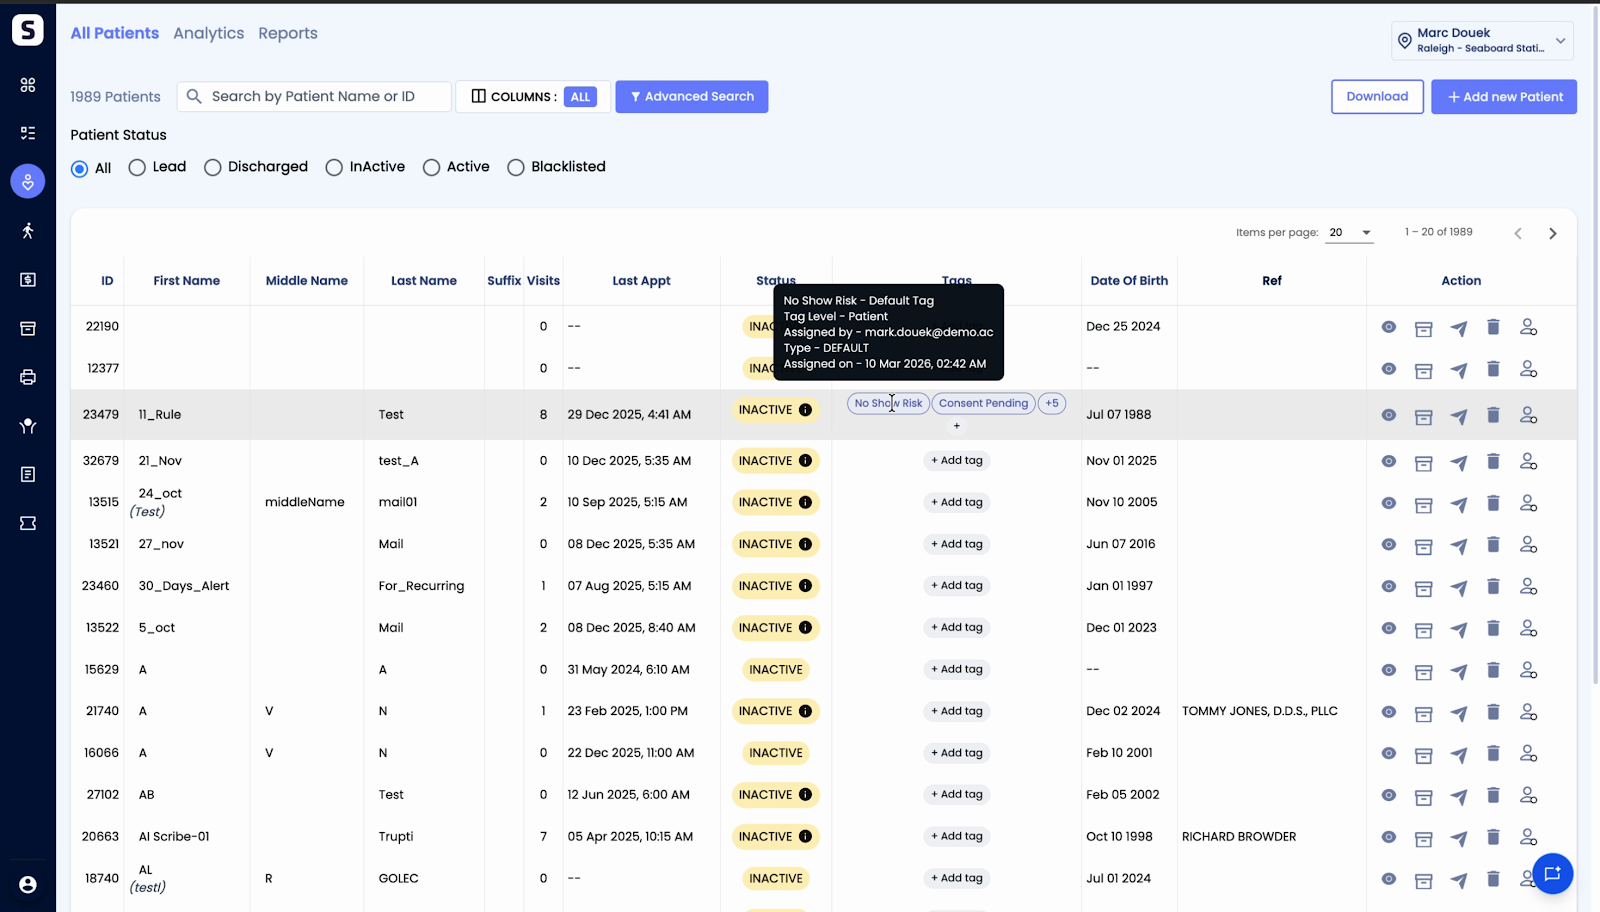
Step 1: Open the patient dashboard. Look for the Tags column next to each patient.
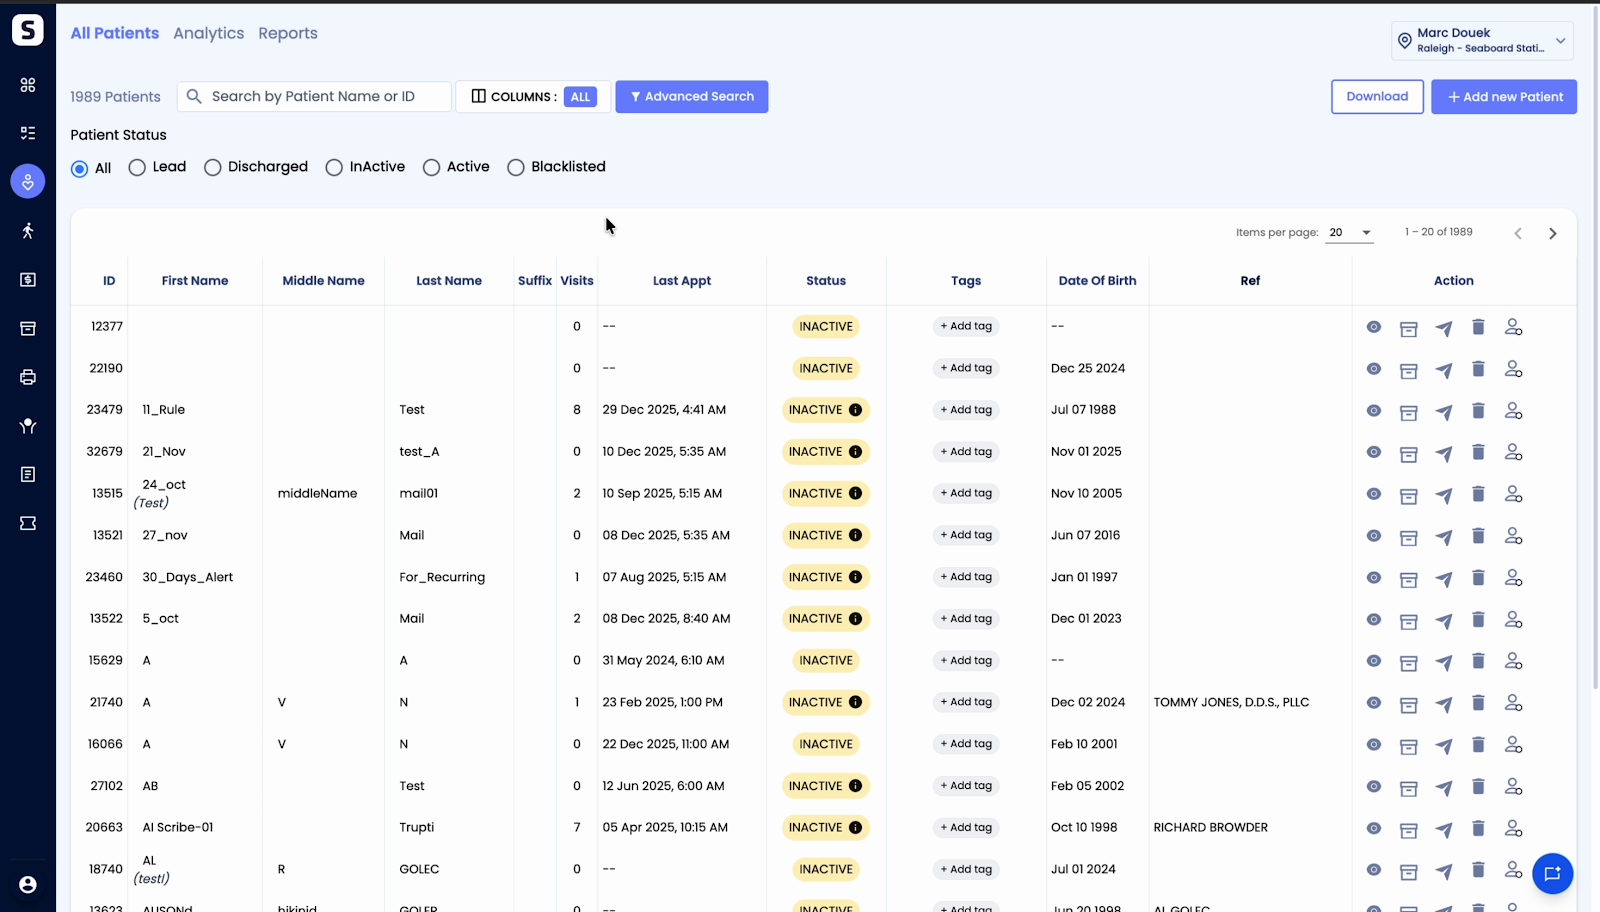
Step 2: Click the Add Tags option in the Tags column.
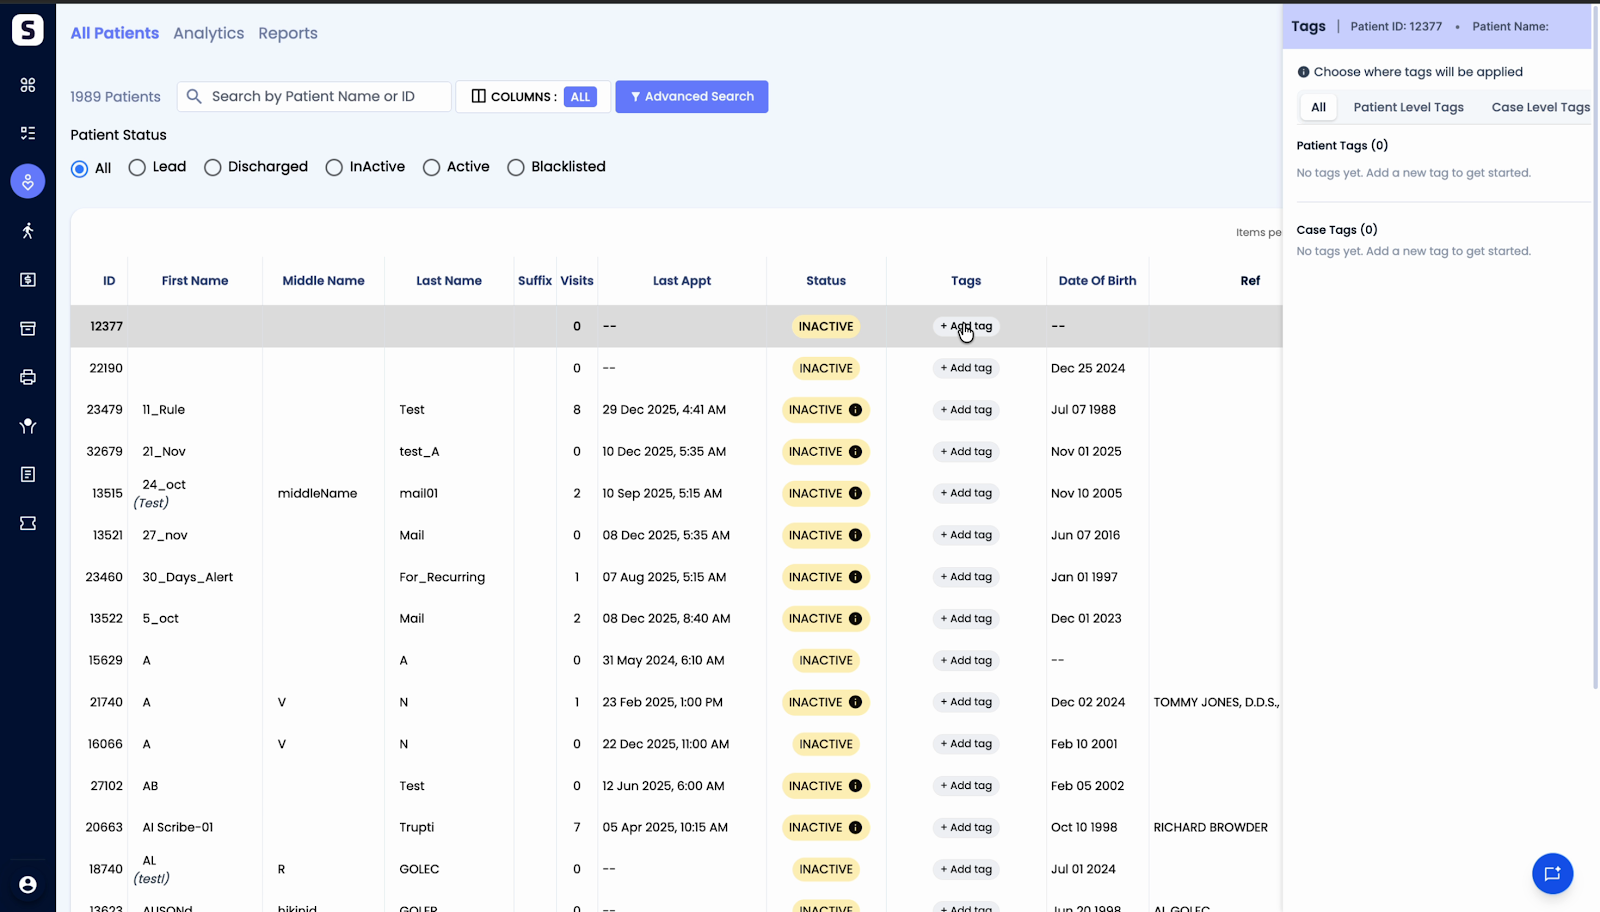
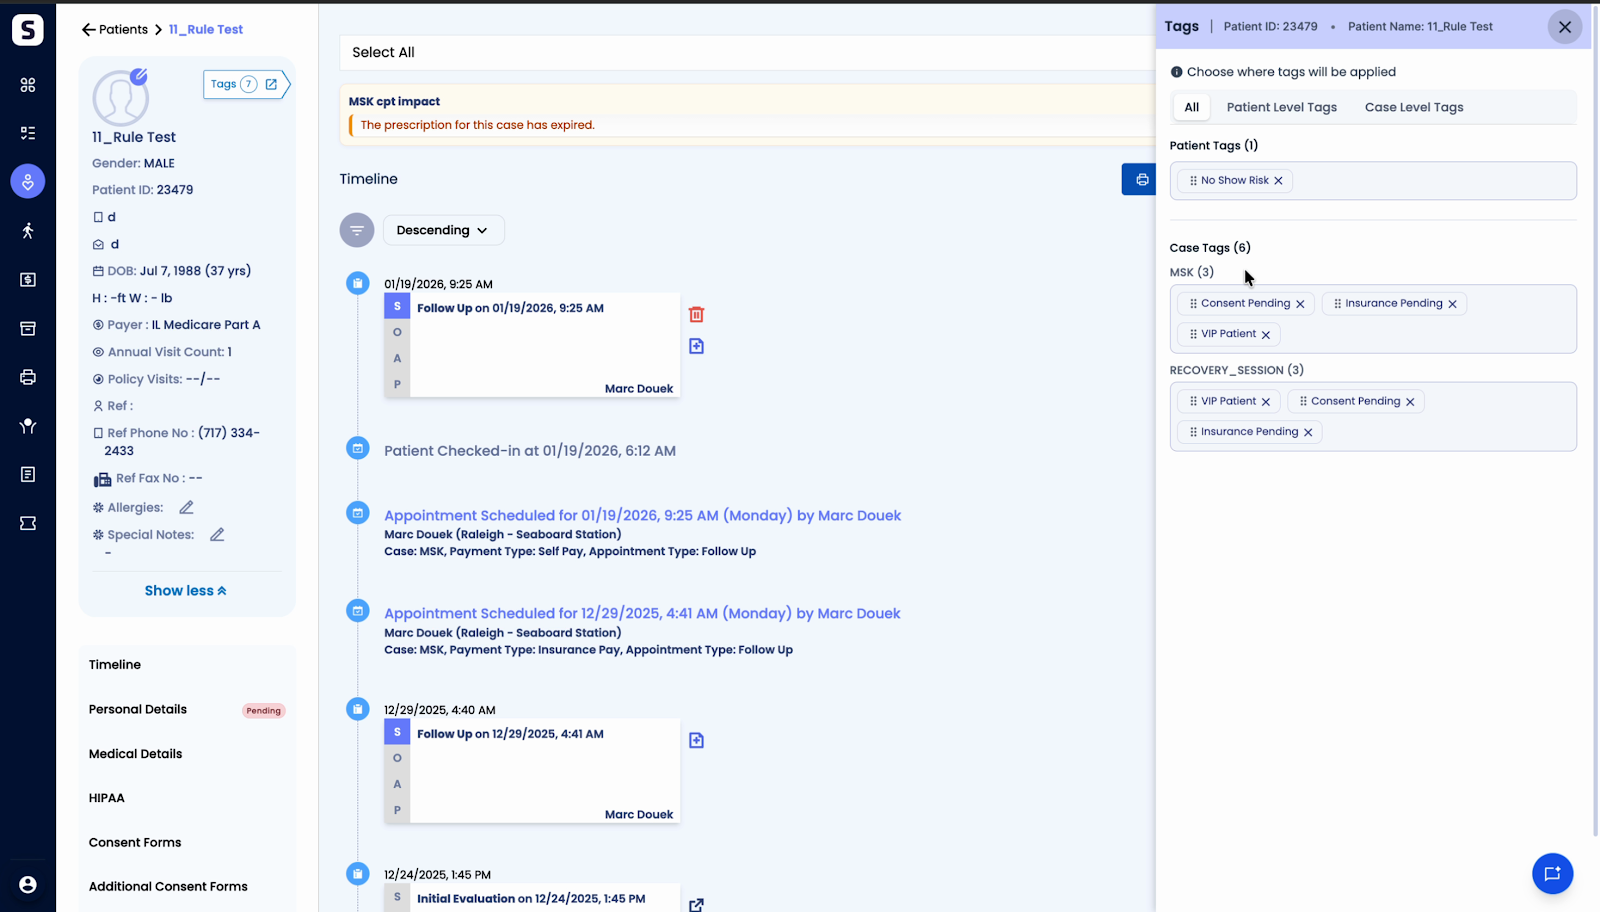
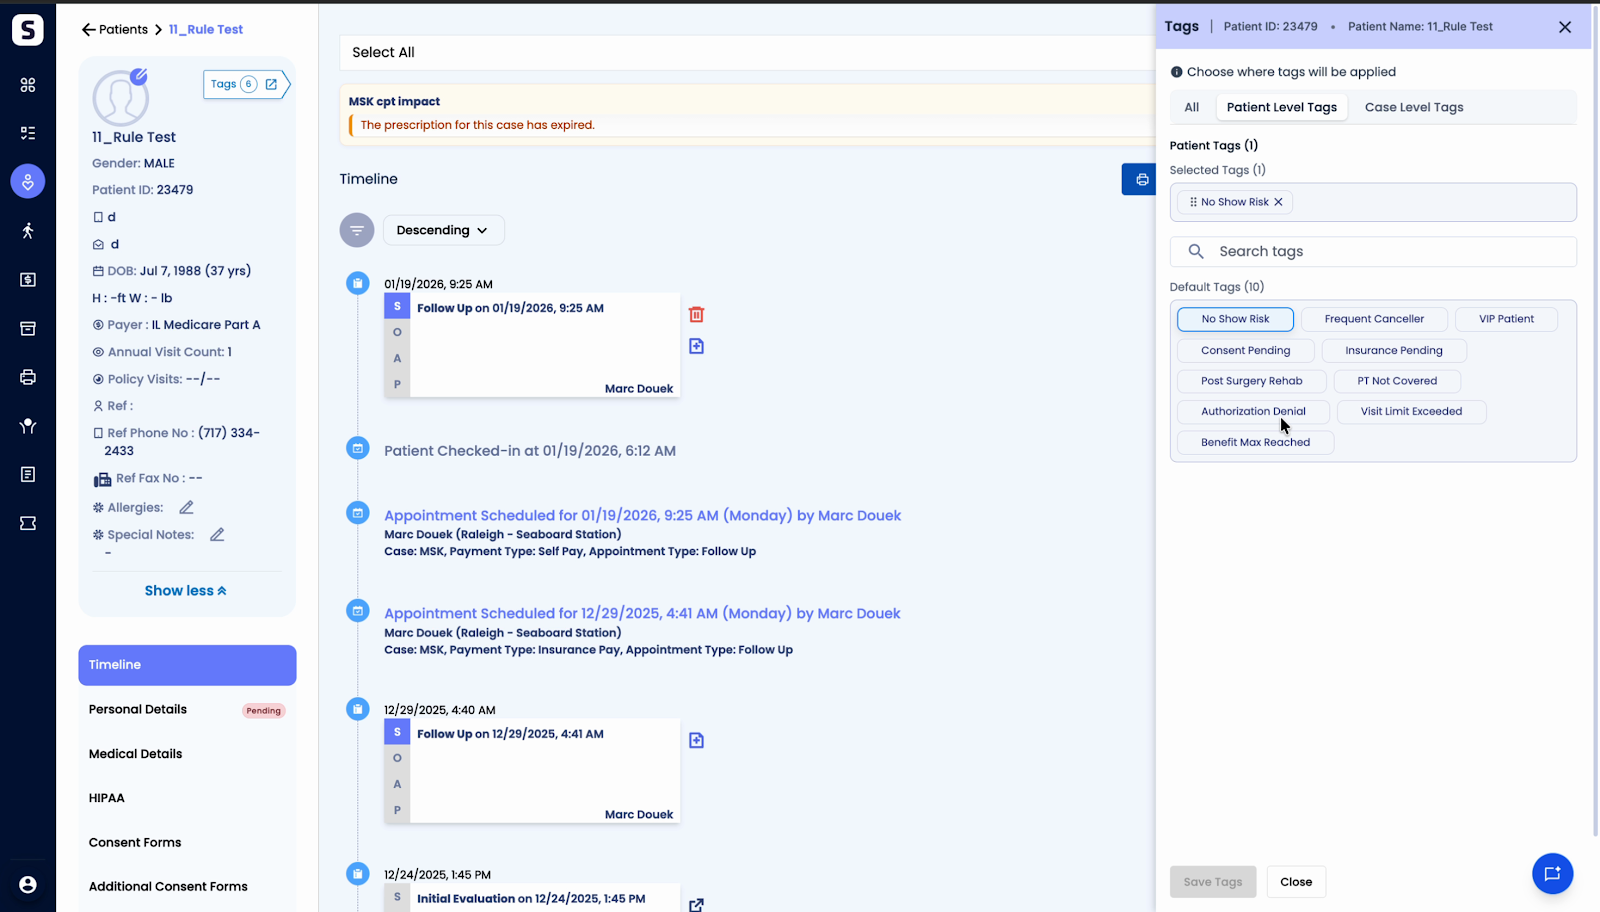
Step 3: In the side panel that appears, view the tags already applied to the selected patient. Tags are shown for both patient and case levels.
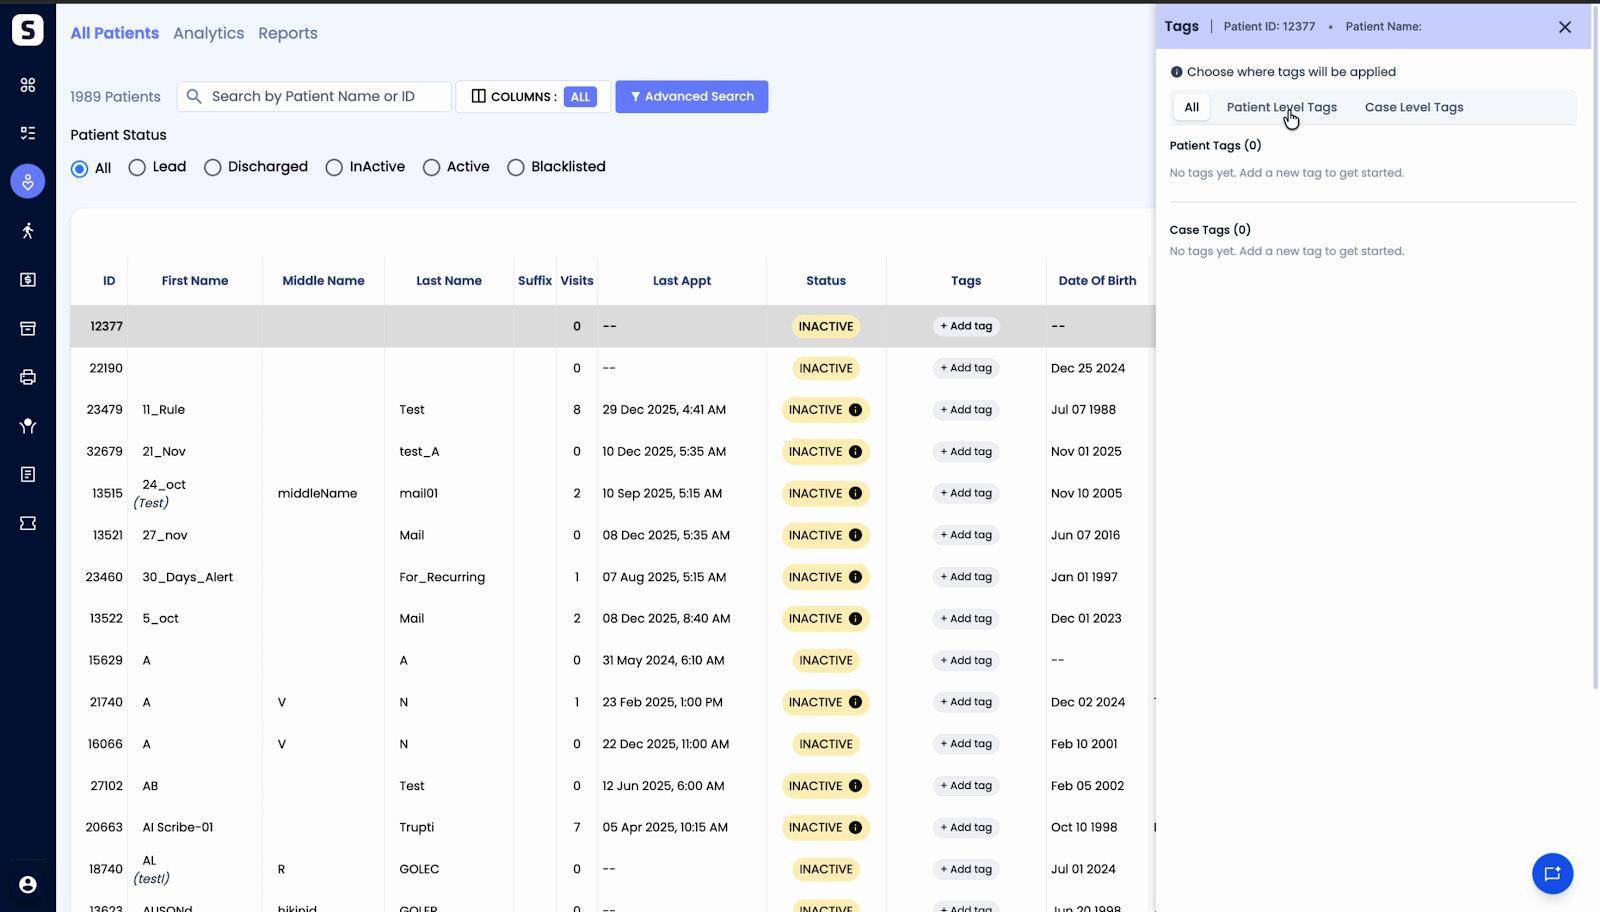
Step 4: Switch between Patient Level Tags and Case Level Tags tabs in the side panel to choose where you want to apply a new tag.
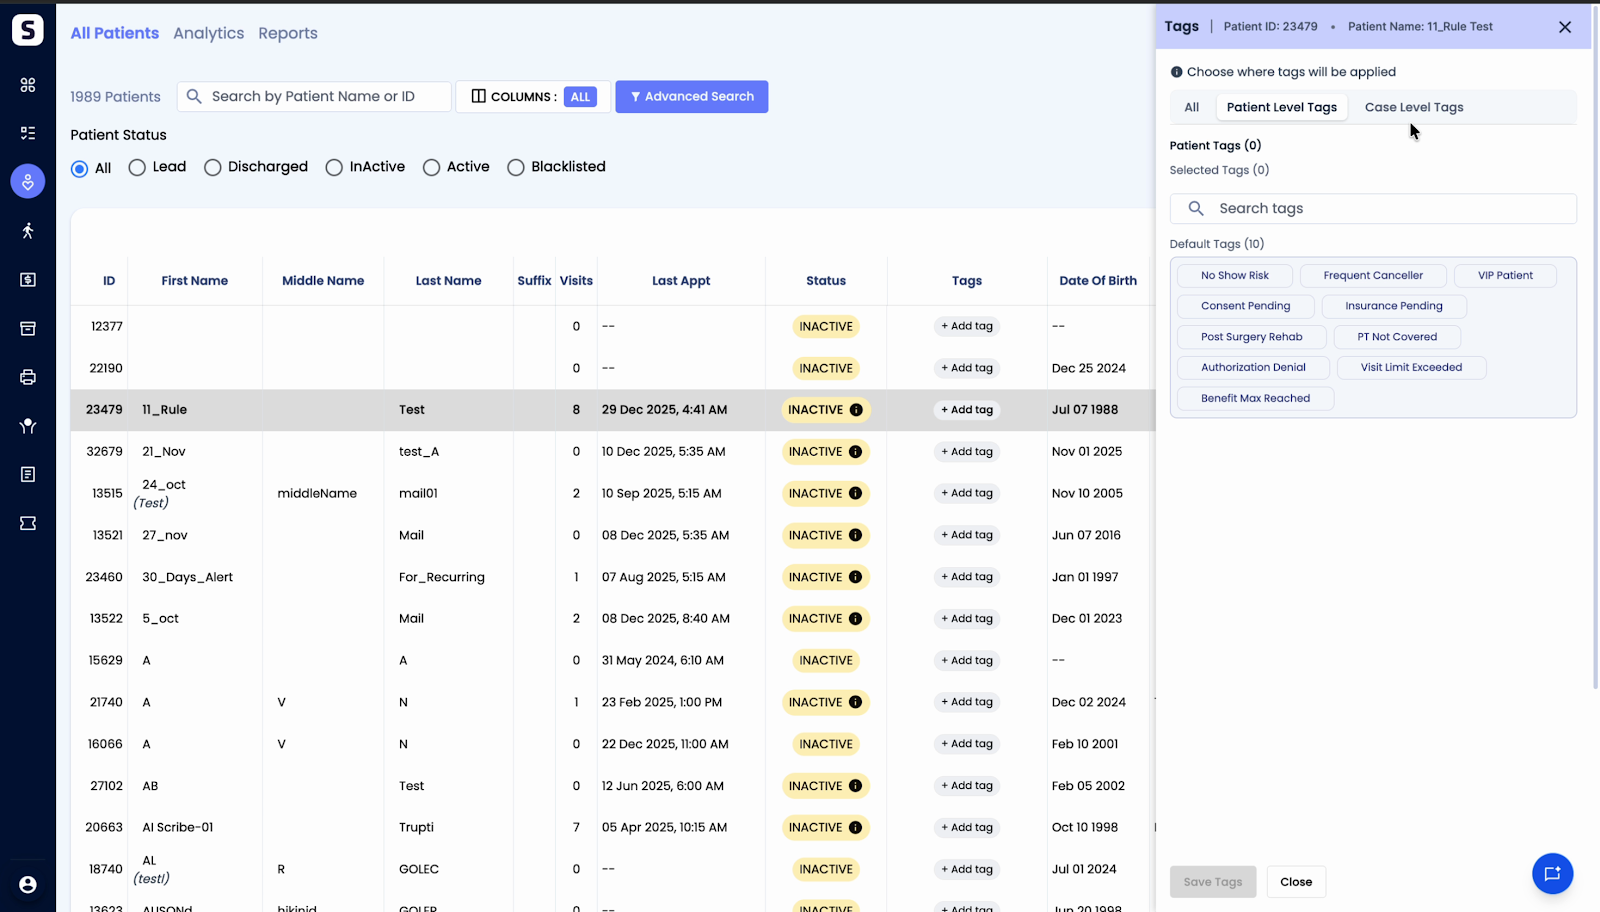
Step 5: To apply a tag at the patient level, use the search box to find the relevant tag and select it.
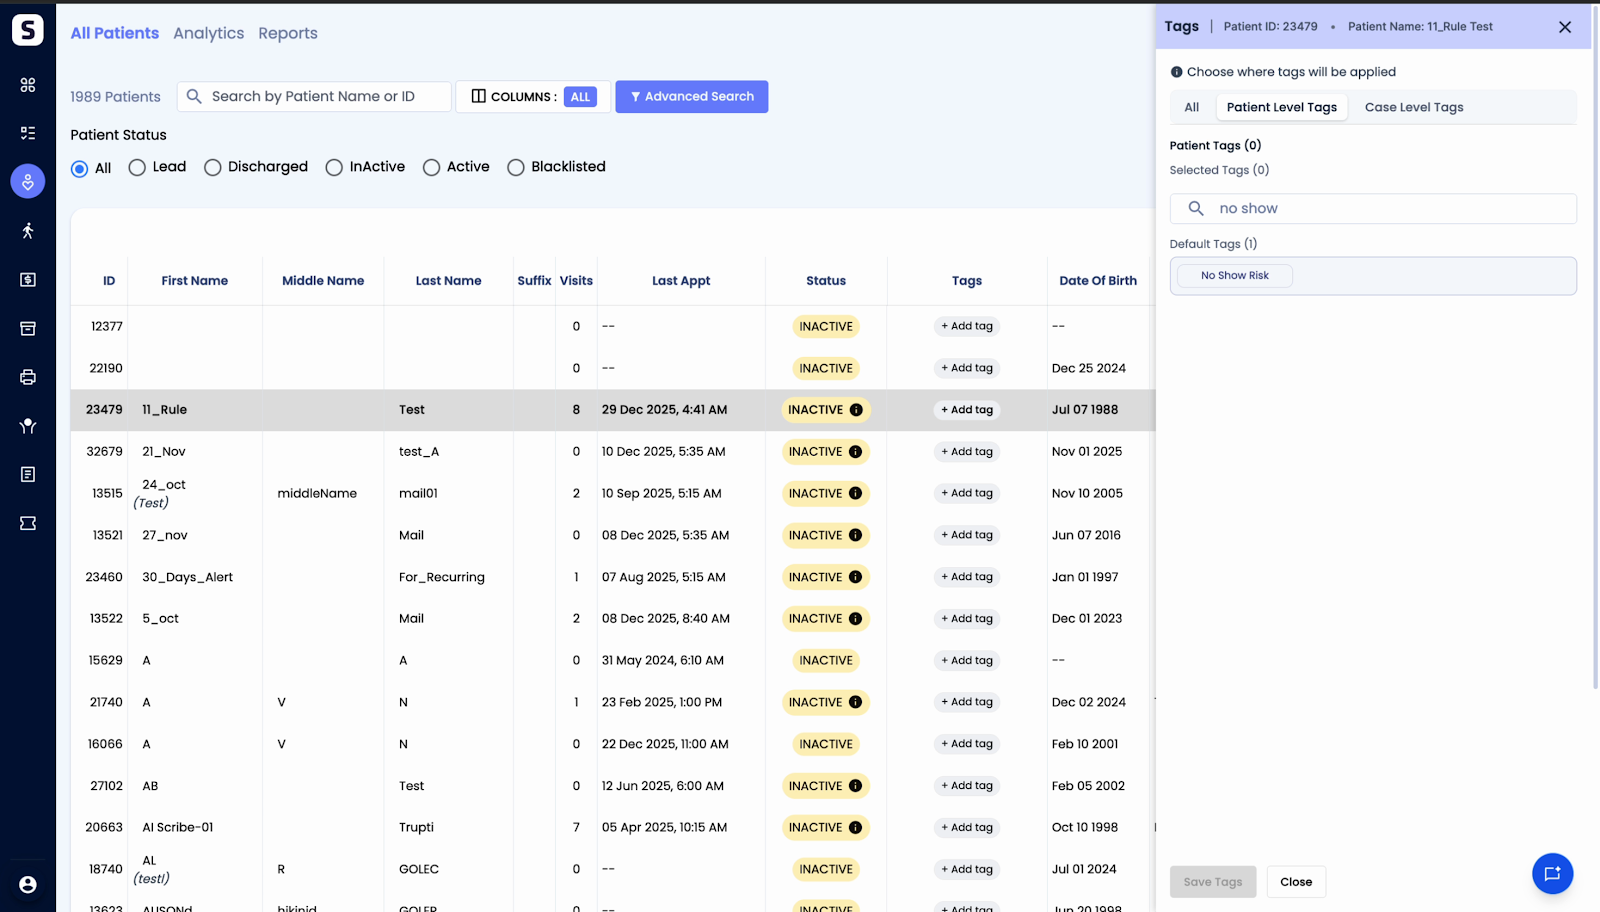
Step 6: To apply tags at the case level, click the Case Level Tags tab. Select the case(s) you want, then pick the appropriate tag(s). Tags can be applied to one or multiple cases at once.
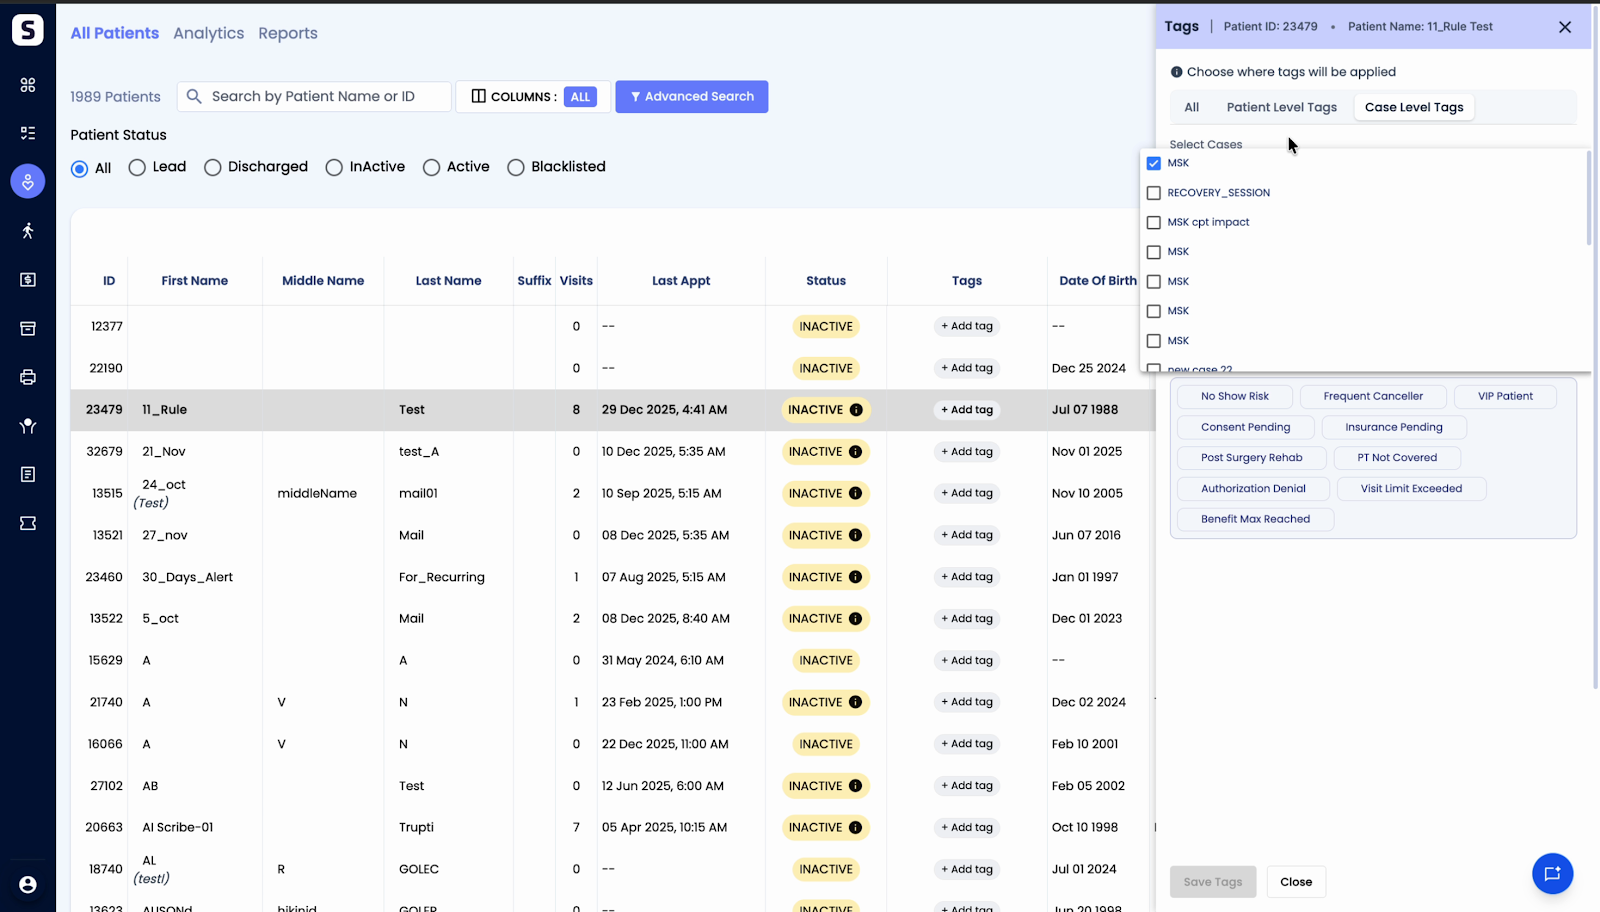
Step 7: Rearrange tags by dragging them into your preferred order.
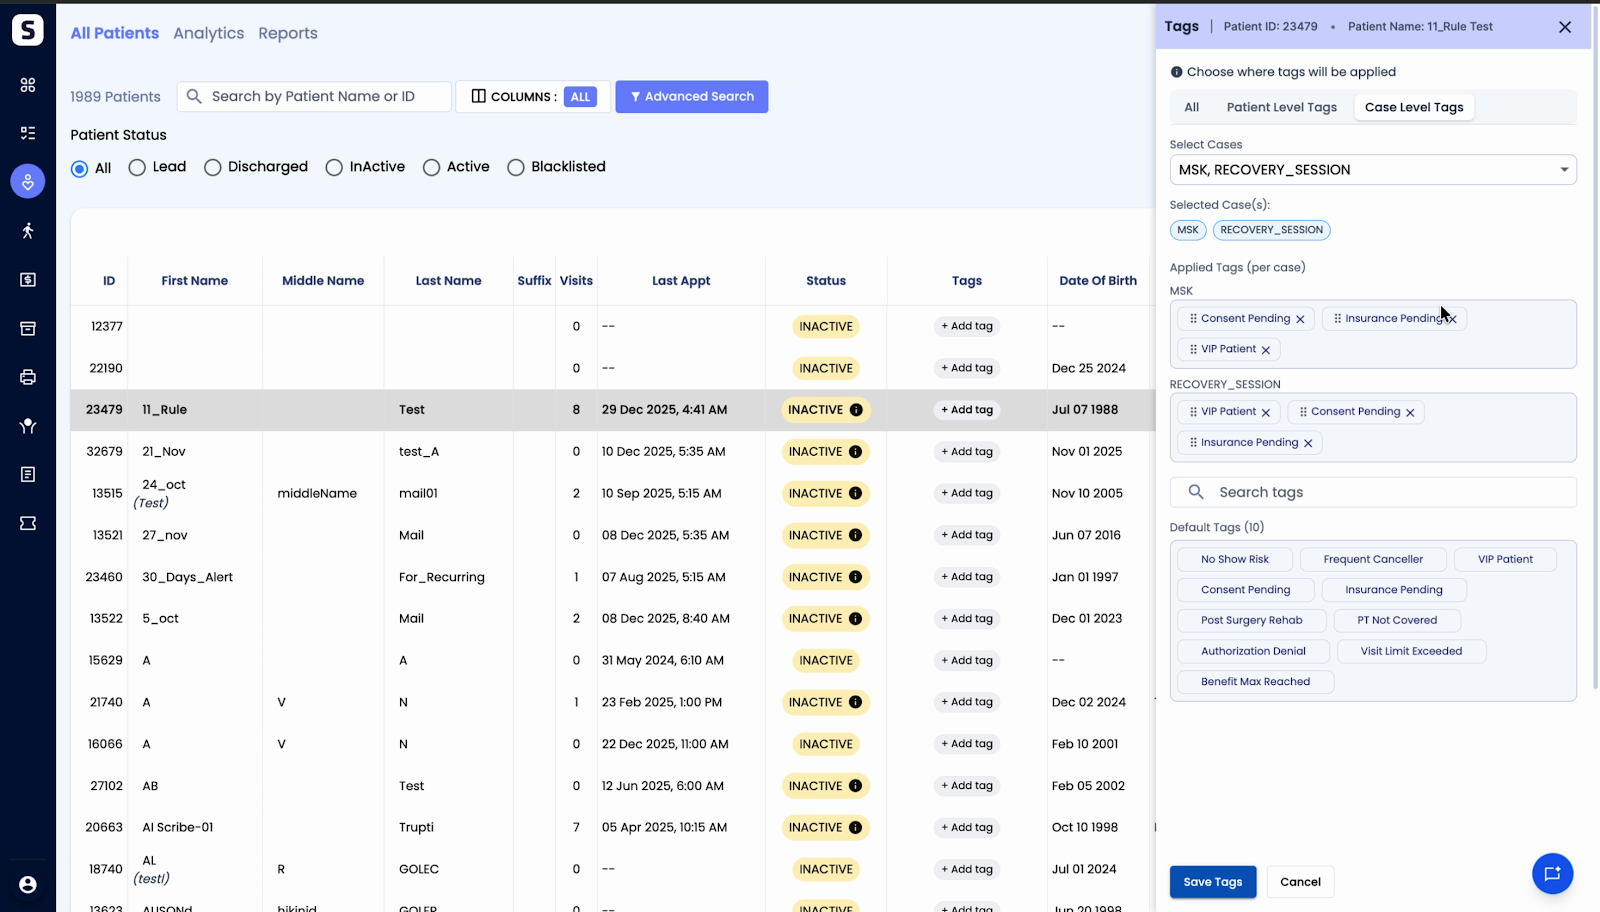
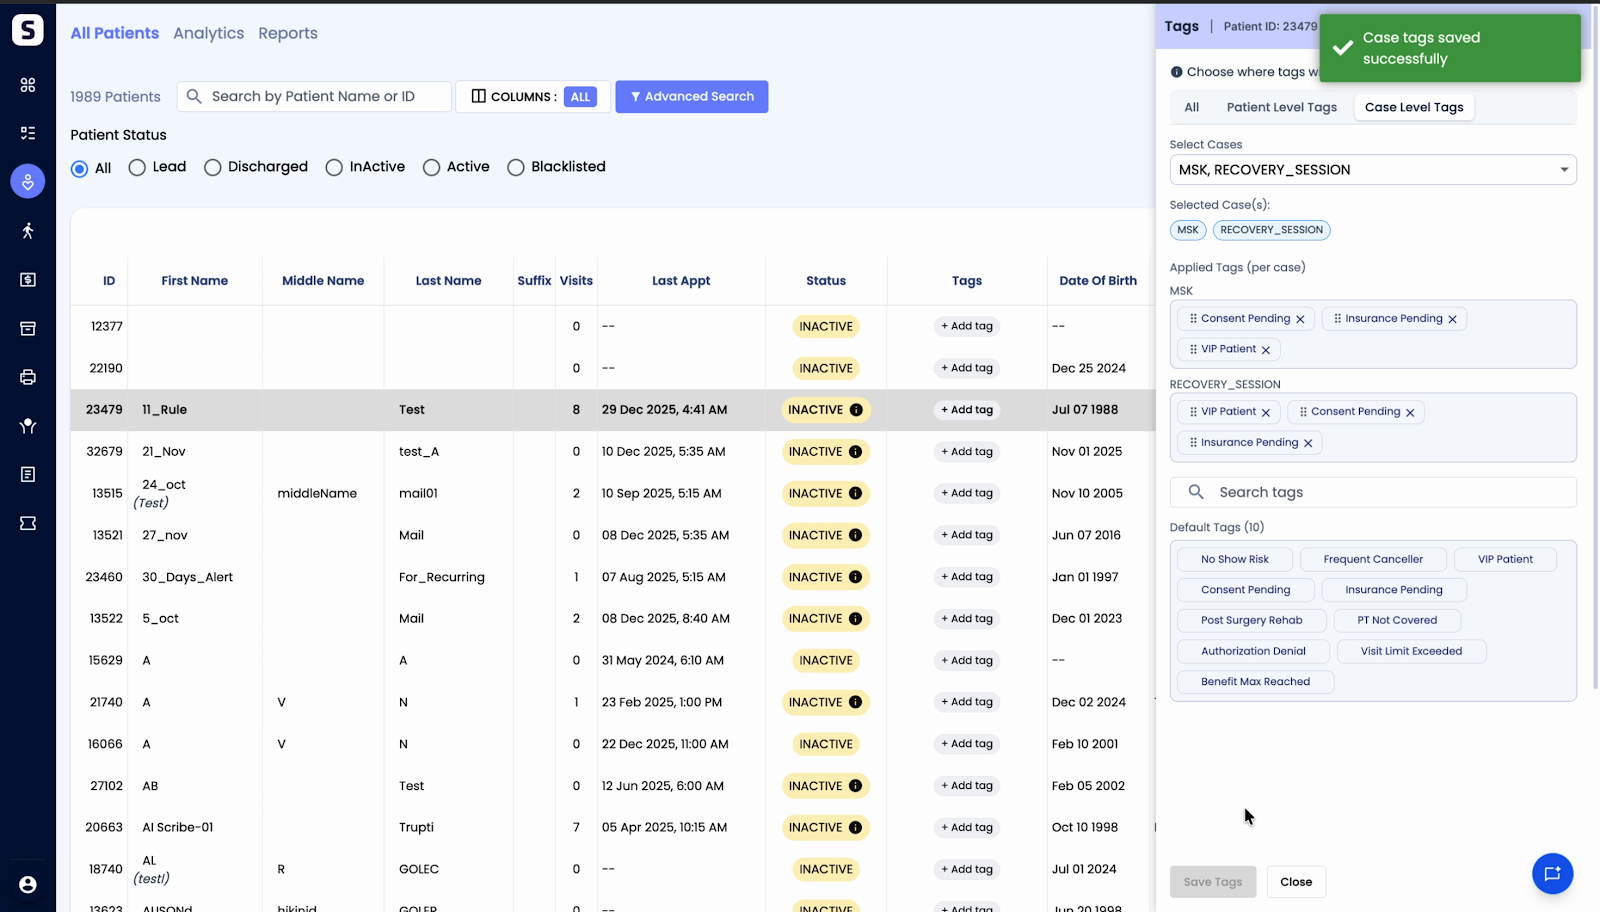
Step 8: Click Save Tags to confirm your changes. Tags will now appear on both the patient and selected cases.
Step 9: Hover over any tag to see its name, label, who assigned it, the tag type, and the timestamp.
Step 10: View or manage tags on a patient's profile under the Tags section. Here, you can add or remove tags at both the patient or specific case level.
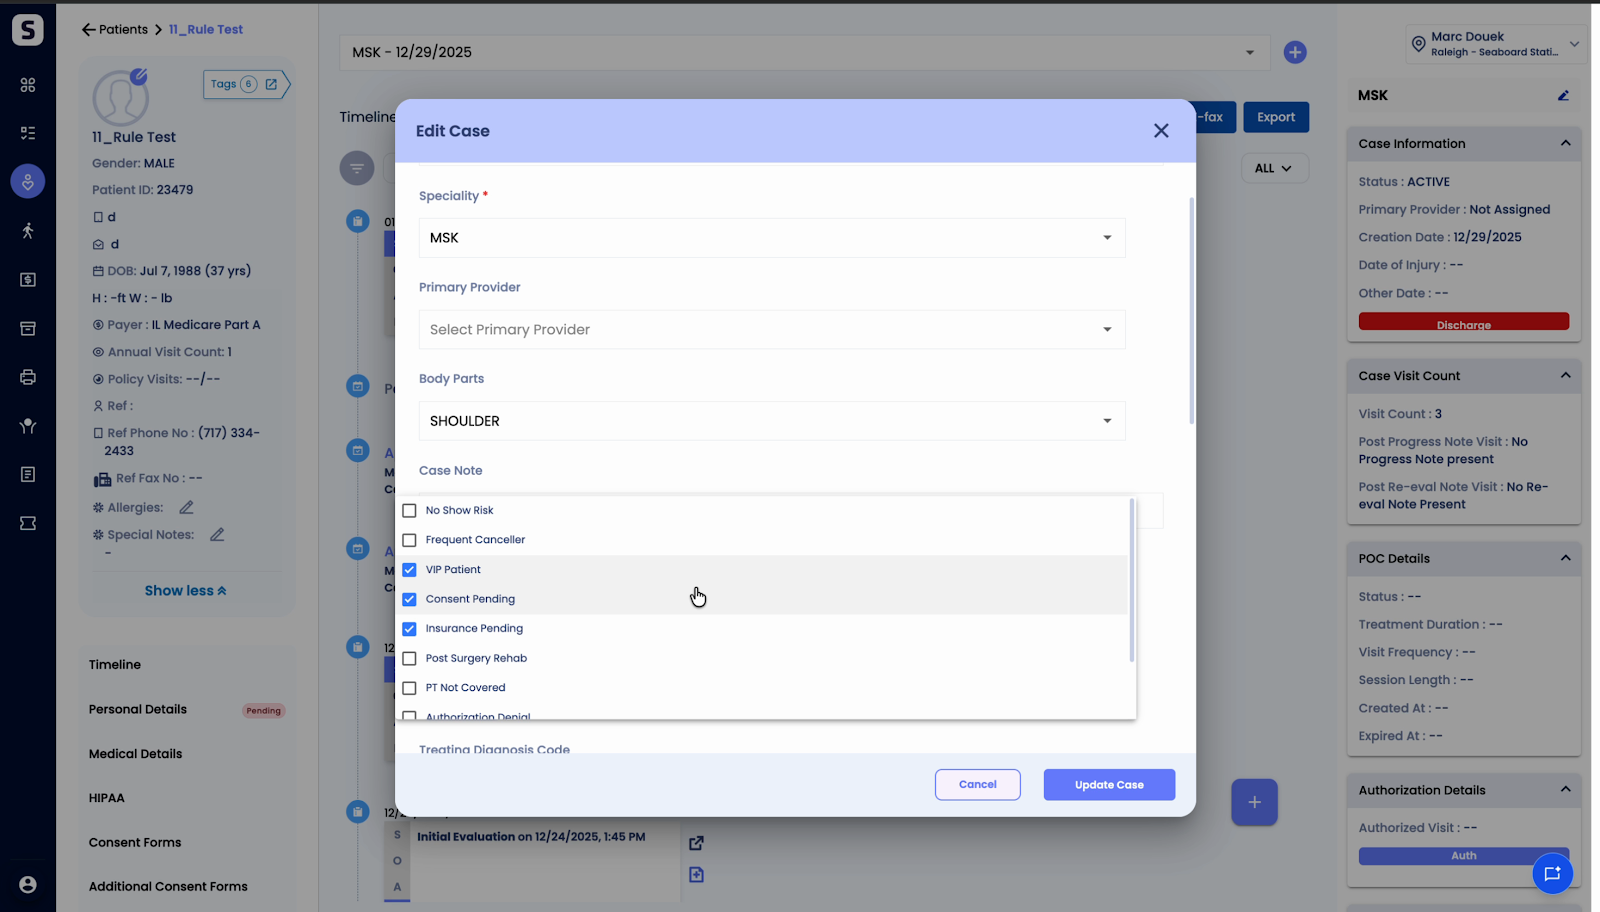
Step 11: From a specific patient case, select or deselect multiple tags to customize them for that case.
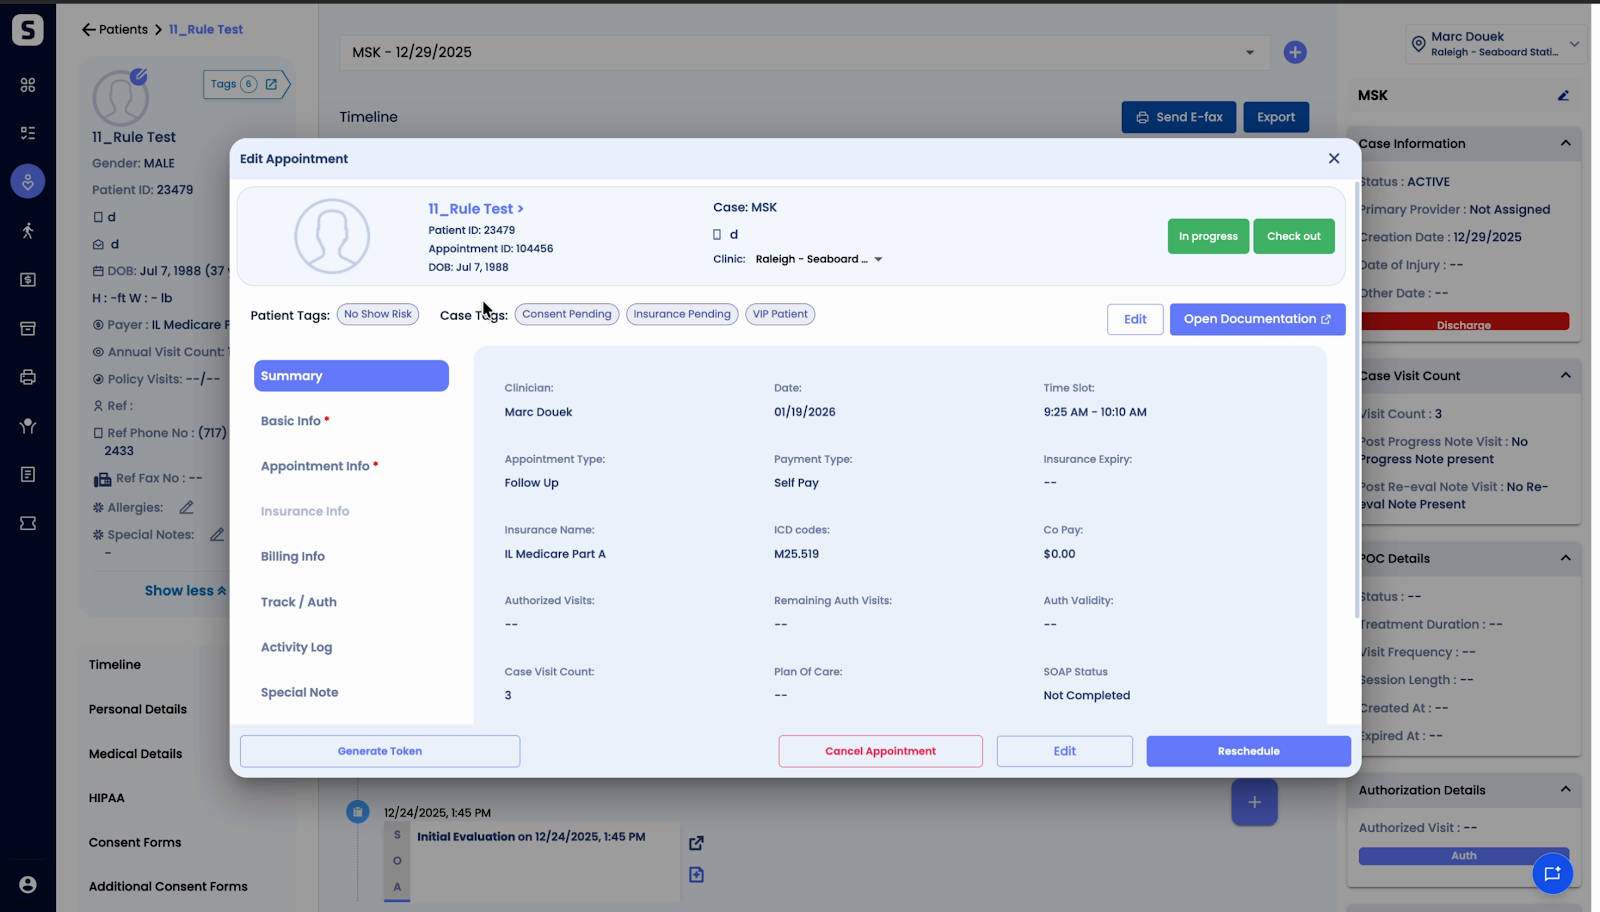
Step 12: Tags are also available and visible on appointment cards, distinguishing patient-level and case-level tags. Only tags related to the active case show up under the appointment where it’s booked.
Step 13: When an appointment is being booked, relevant tags appear for easy reference.
Automated Tagging for Denials
Certain tags are applied automatically if a patient's claim is denied for specific reasons:
- Physical therapy not covered
- Authorization denied
- Visit limit exceeded
- Benefit maximum reached
When a denial with these reasons is received, the system auto-applies the appropriate tag to the relevant patient case.
Using the patient tagging system keeps your data organized and lets you respond quickly to each patient's unique circumstances. Tag patients and cases to improve tracking, communication, and workflow throughout the care process.