AI Scheduling Agent
How to Use the AI Patient Scheduler for Effortless Appointment Booking
The new AI patient scheduler makes booking appointments fast, easy, and reliable. With intelligent suggestions and custom instructions, you’ll streamline your workflow and reduce booking errors. Here’s how to make the most of this powerful feature.
Step 1: Click the AI Scheduler icon to open the chatbot.

Step 2: Choose an action like Book Appointment from the available options, or type your request directly in the chat.
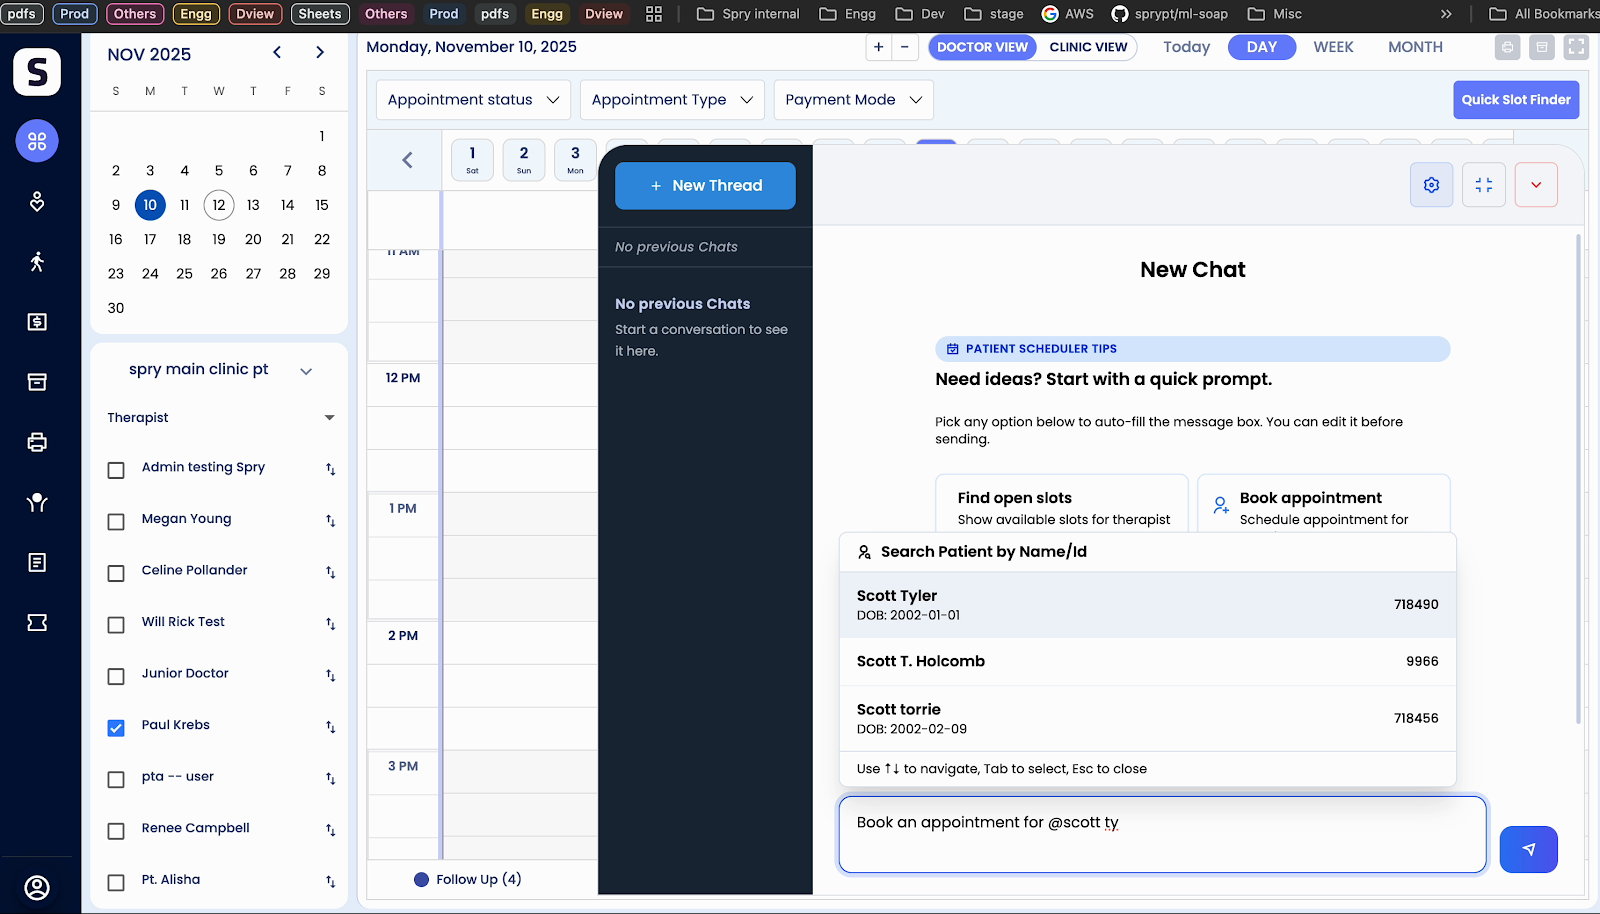
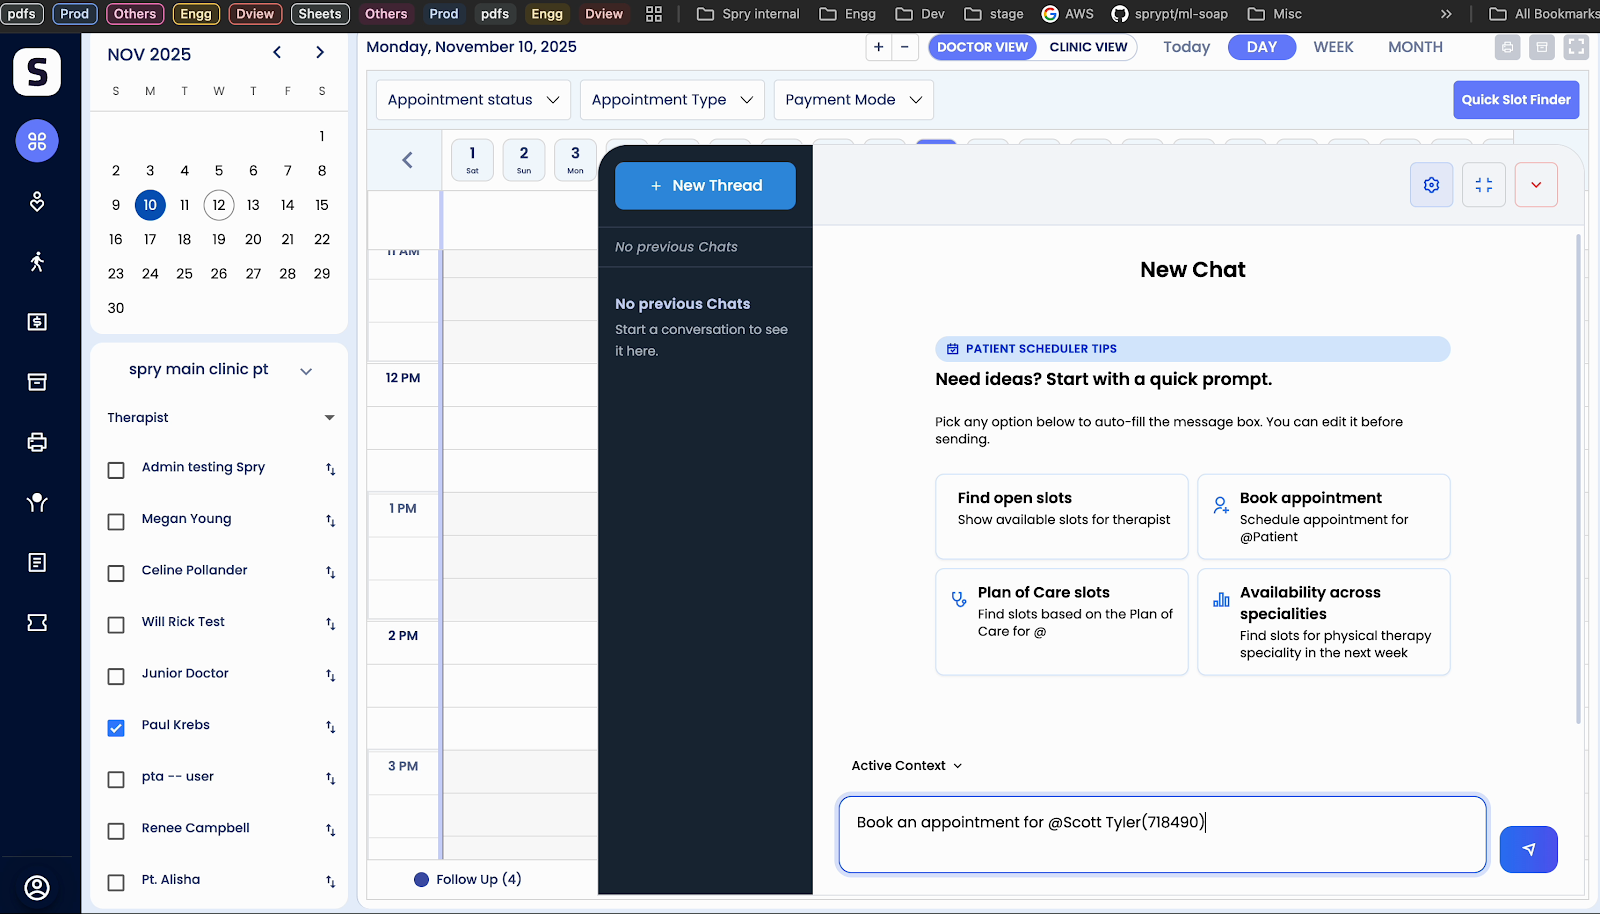
Step 3: Type `@` to search for your patient by name (for example, “Scott Styler”). Select the patient and confirm.
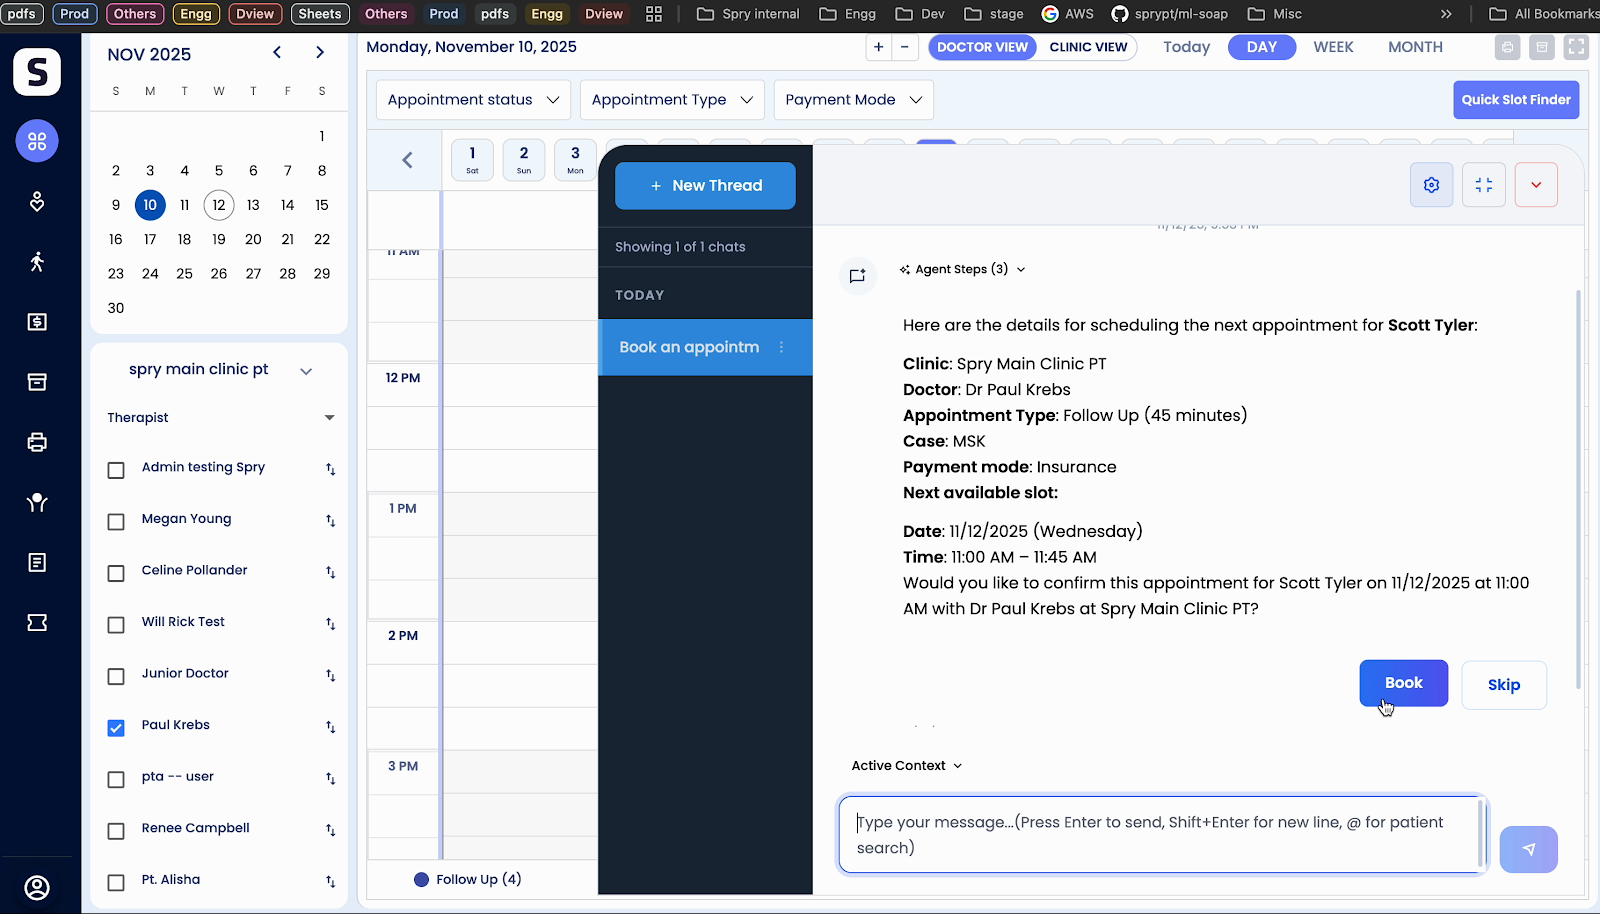
Step 4: Press Enter. The AI agent will pull up default details—provider, appointment type, payment mode, and suggest the best available slot.
Step 5: Review the suggested slot. To pick a different slot, simply type your preference in the chat or select another time.

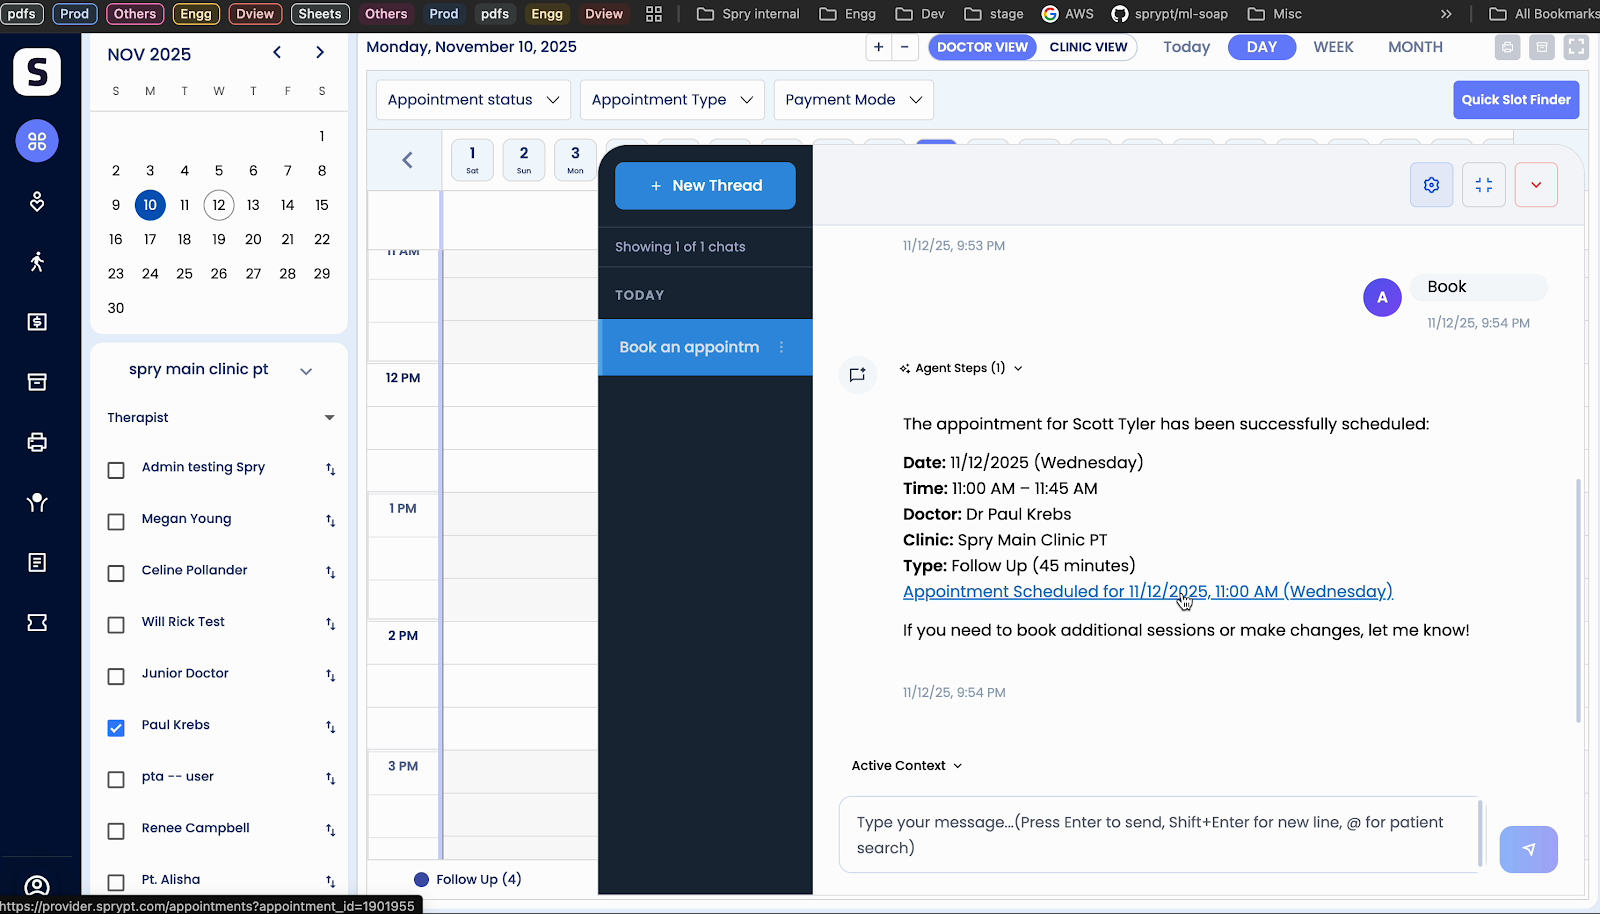
Step 6: Click Book to confirm the appointment. The booking is now complete.
Step 7: Click the confirmation link to view booking details.
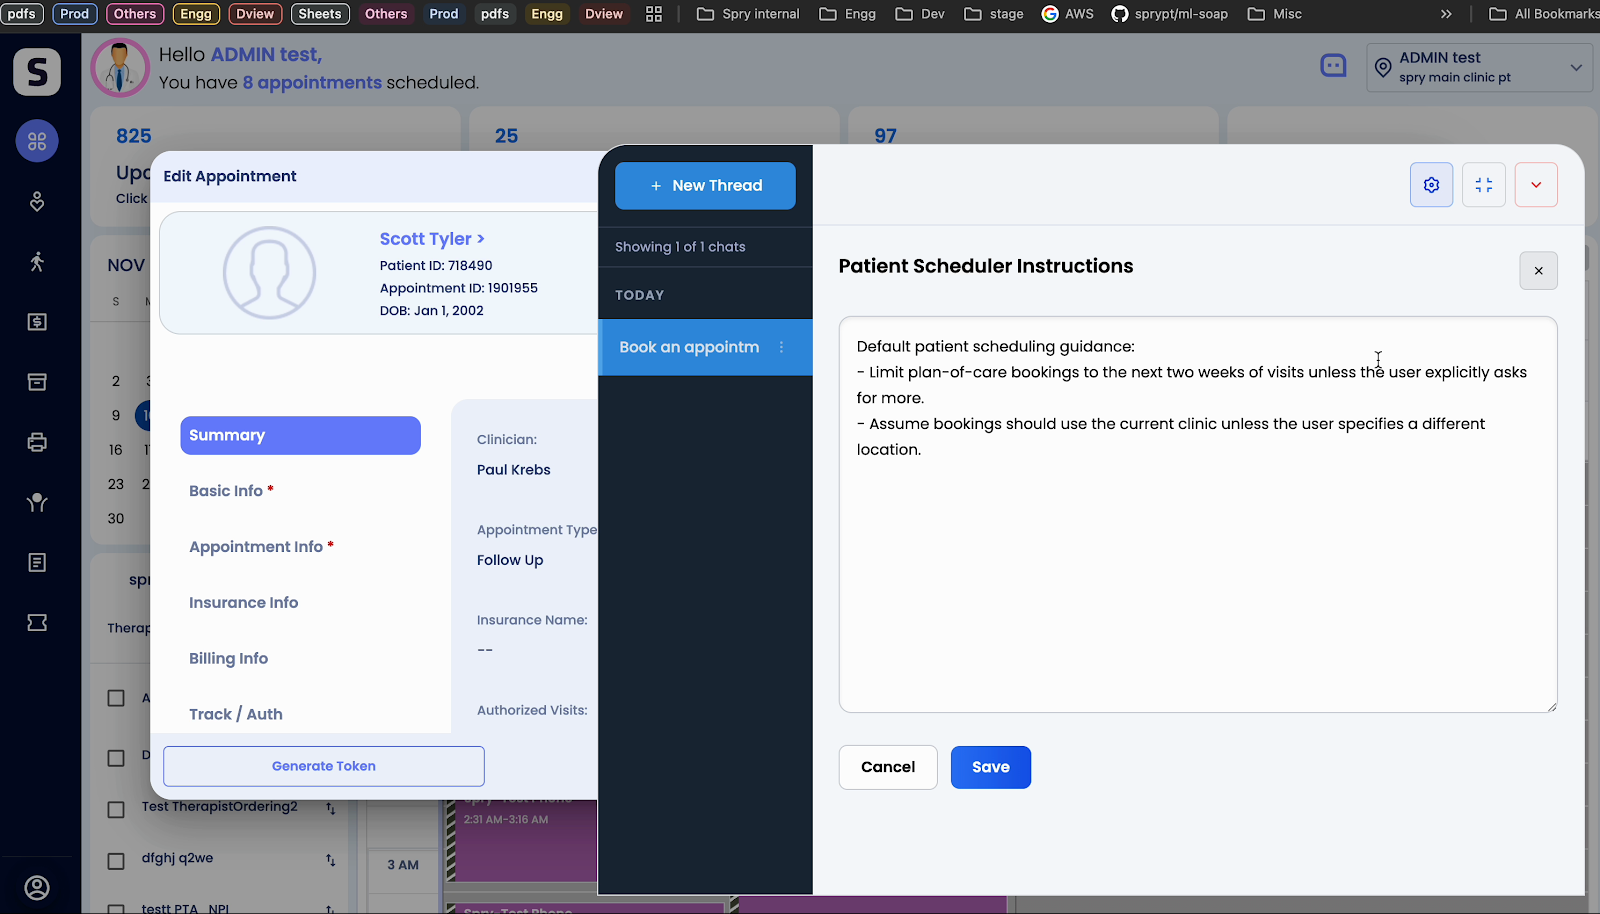
Adding Custom Booking Instructions
Tailor the AI scheduler to fit your needs by setting custom instructions for future bookings—perfect for ongoing care plans or clinic preferences.
Step 1: Enter your standing instructions in the Custom Instructions section. For example, limit plan-of-care bookings to the next two weeks, or always use the current clinic unless stated otherwise.
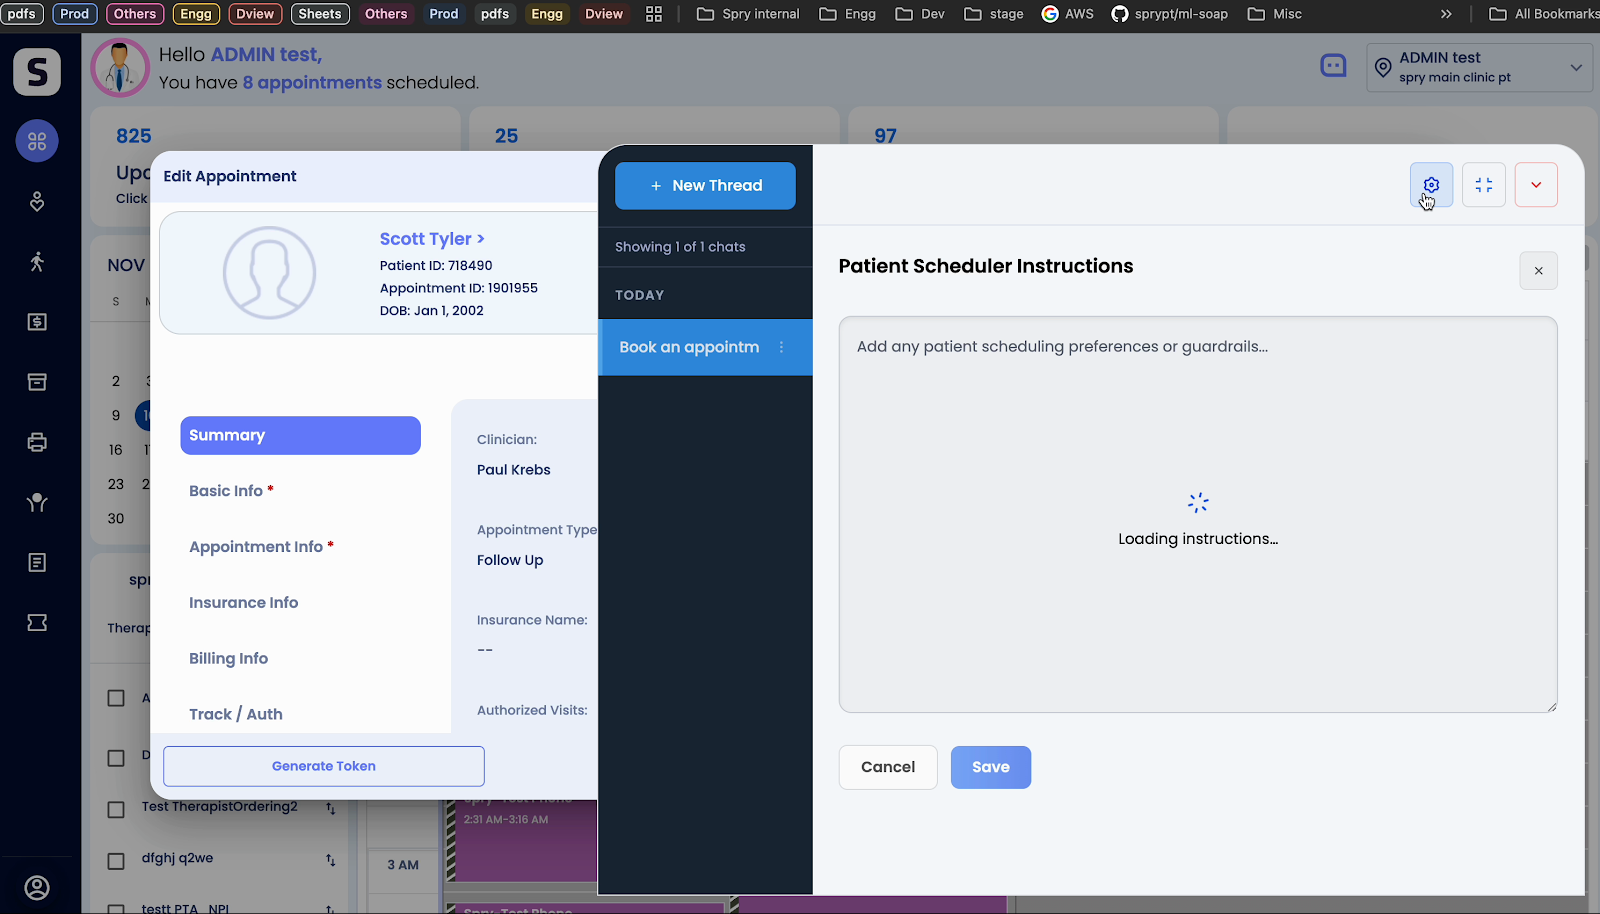
Step 2: Save these instructions. The AI will automatically follow them for all future bookings.
With the AI patient scheduler, appointment management becomes smarter, faster, and more accurate. Add your custom preferences and let the AI handle the details, so you can focus on patient care.